Exporting data
 Updated
by Andreas Knaupp
Updated
by Andreas Knaupp
The export function in the backend allows you to export individually compiled data records in Excel or CSV format. The following description uses the example of exporting orders, but the system works the same way throughout the entire backend.
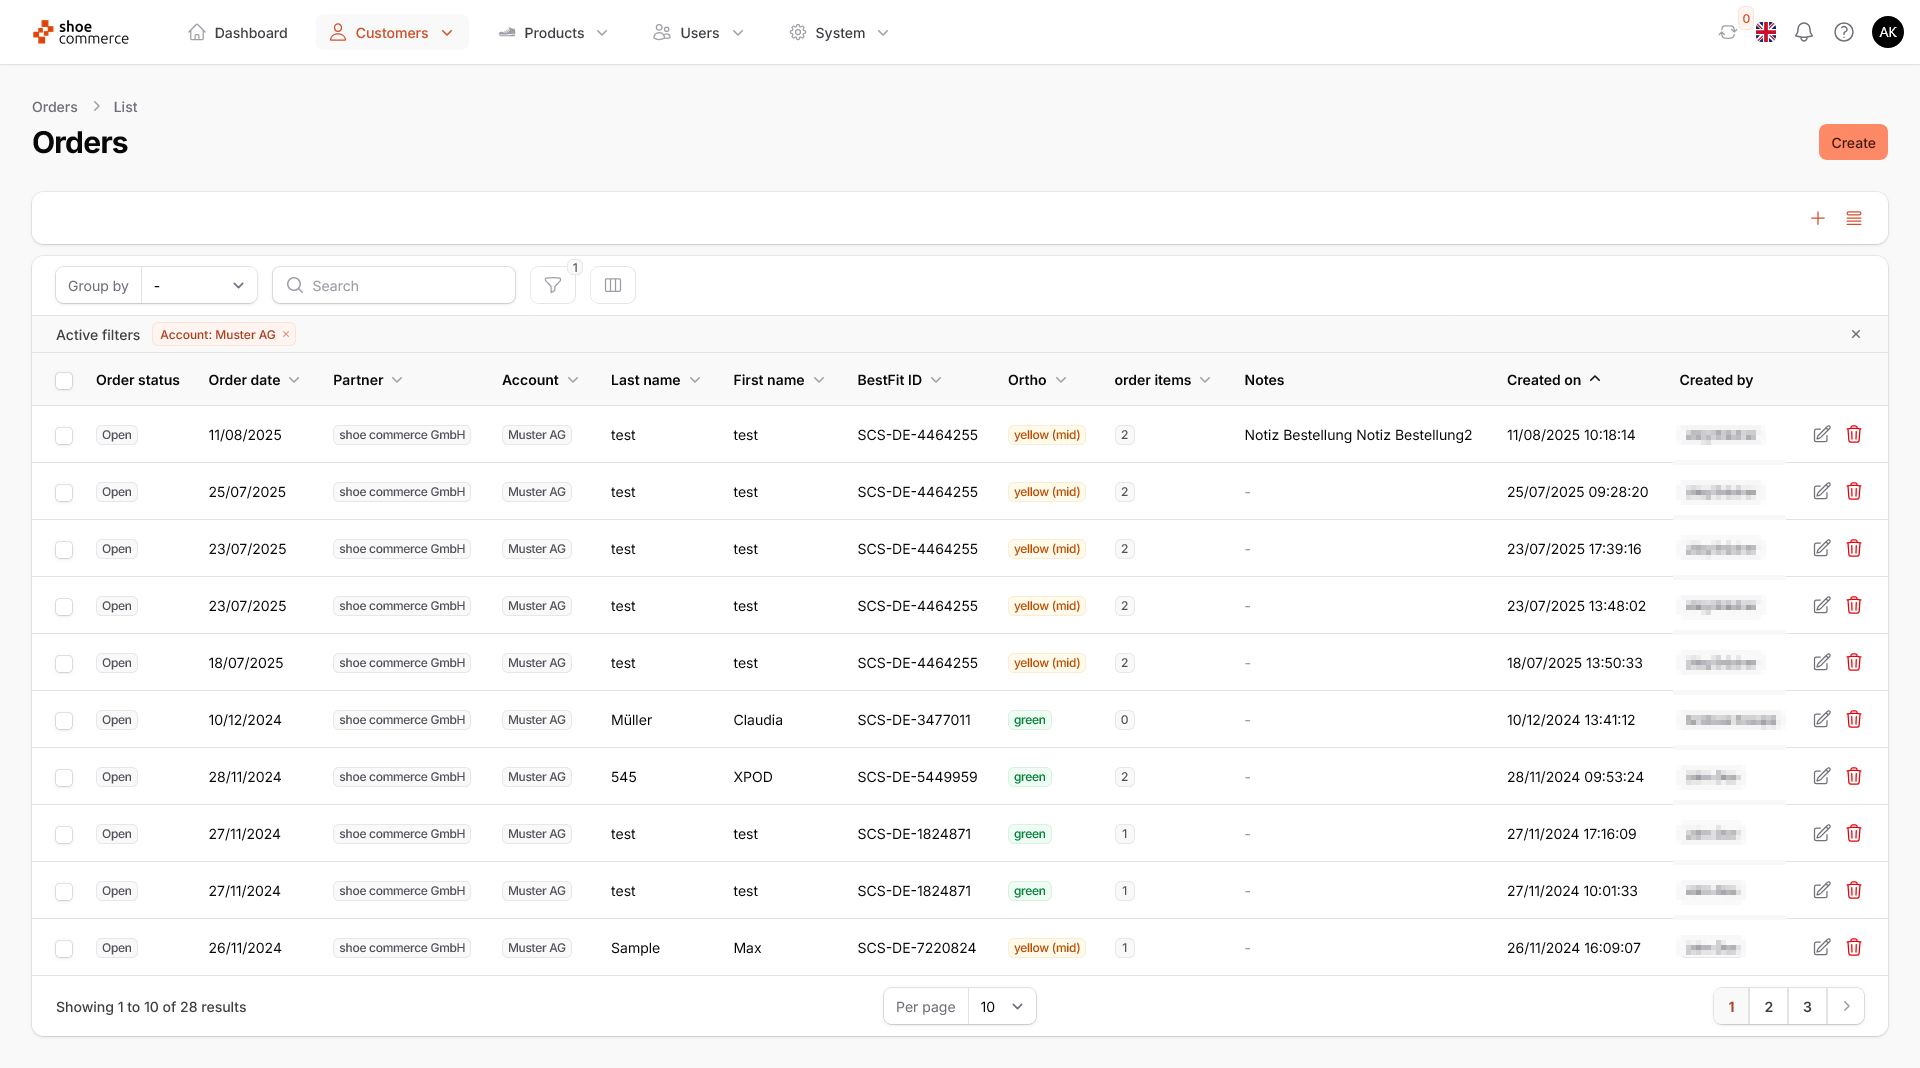
To start the export for one or more data records, you can use the corresponding function in the Bulk actions menu. However, this menu item is not yet active without a selection of data records. Therefore, proceed as described below.
- To use the export function via Bulk actions, at least one data record must first be selected. You have the following options for data selection:
- Single or multiple selection by clicking the checkboxes of the required data records
- Selection of all visible data records (all data records listed in the “Per page” dropdown menu)
- Select all available data records (entire selection)
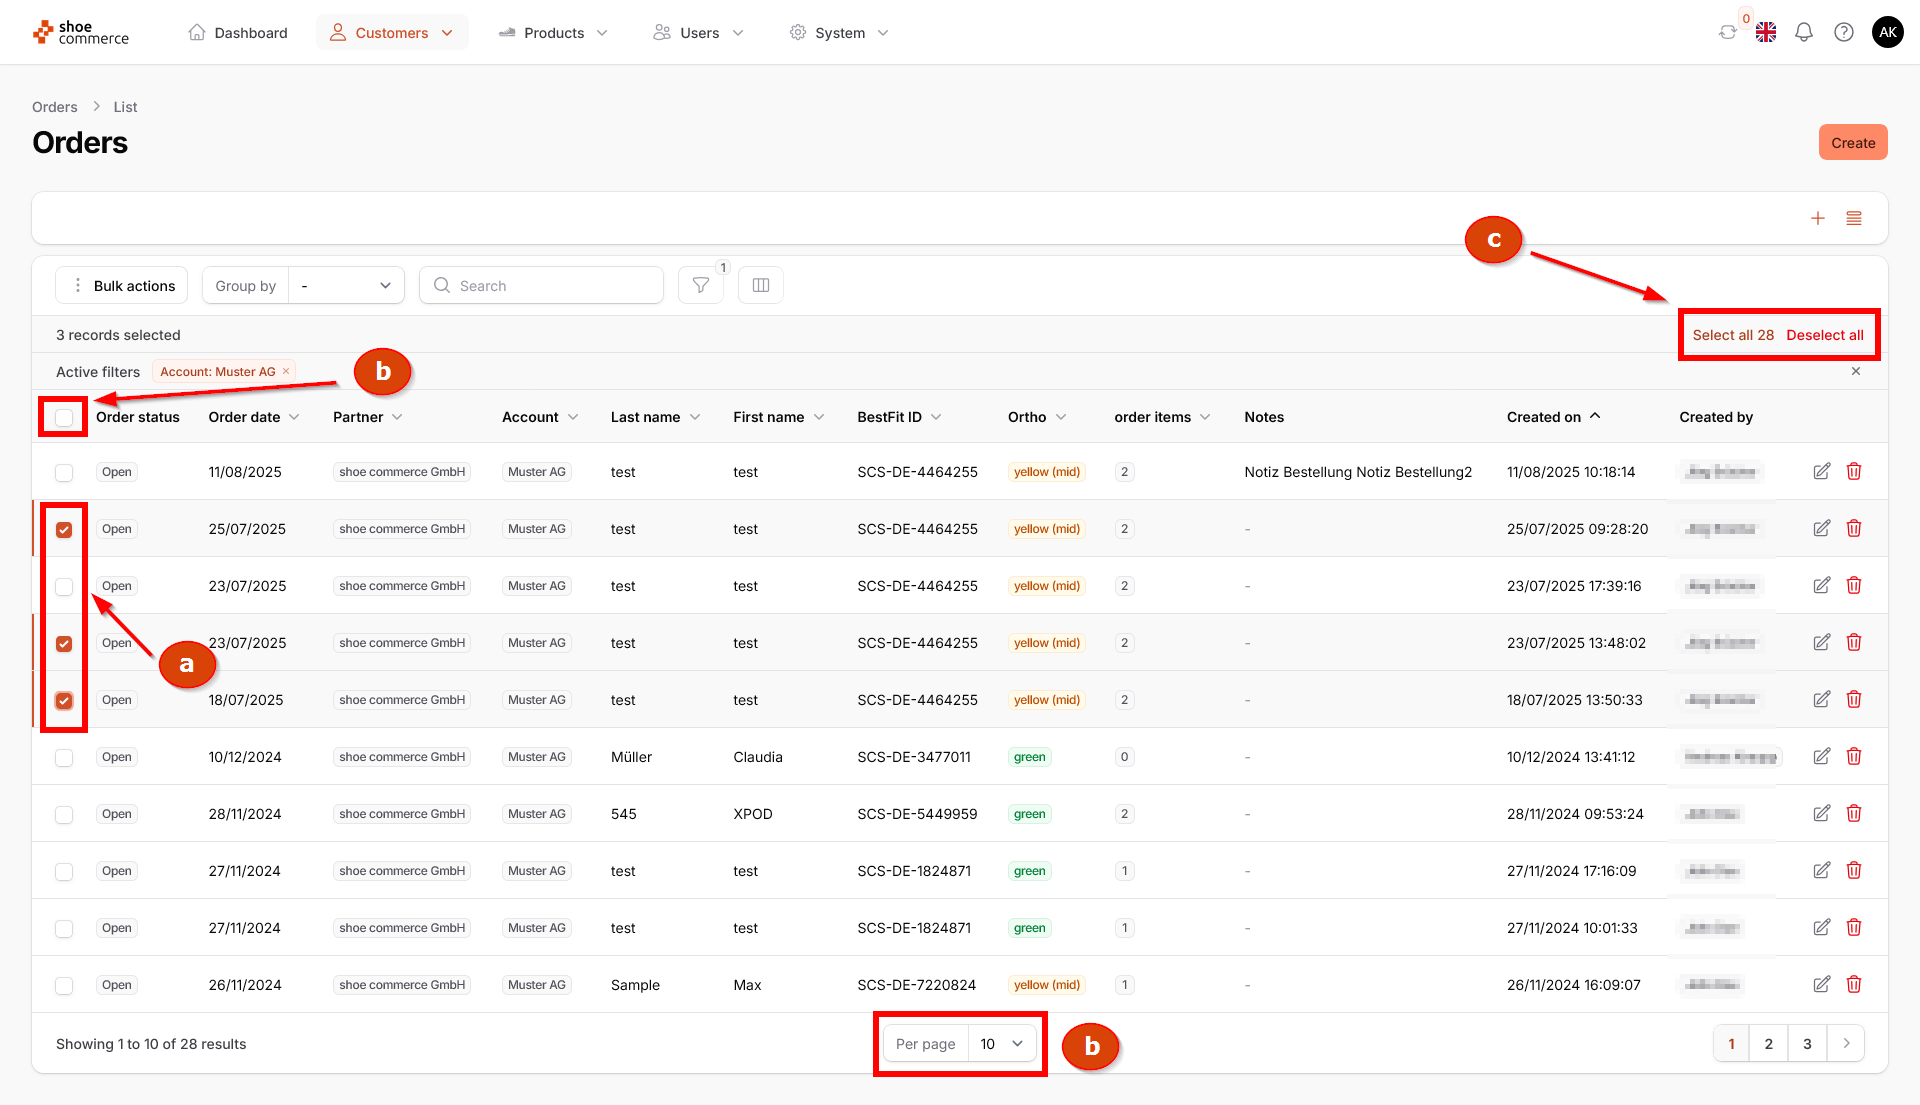
Only those data records for which the checkboxes are selected will be included in the export later.
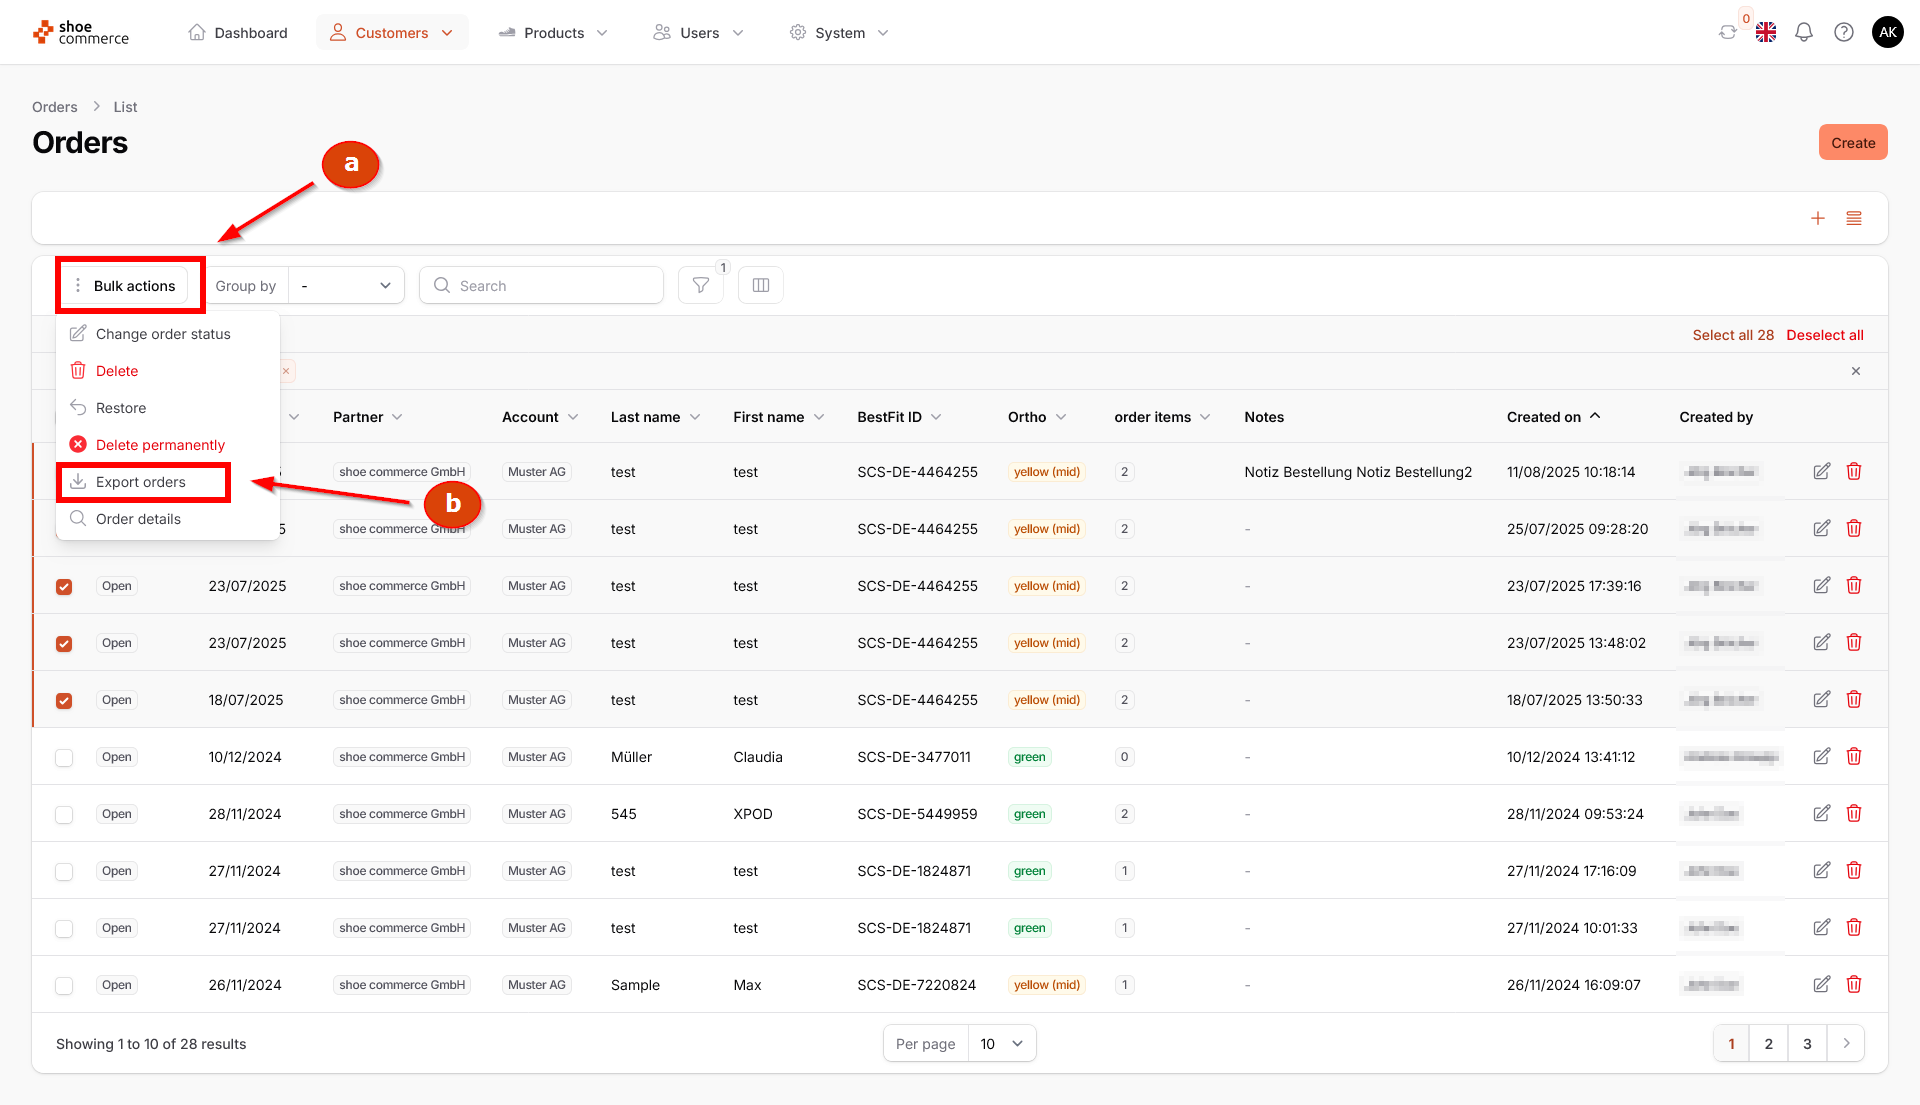
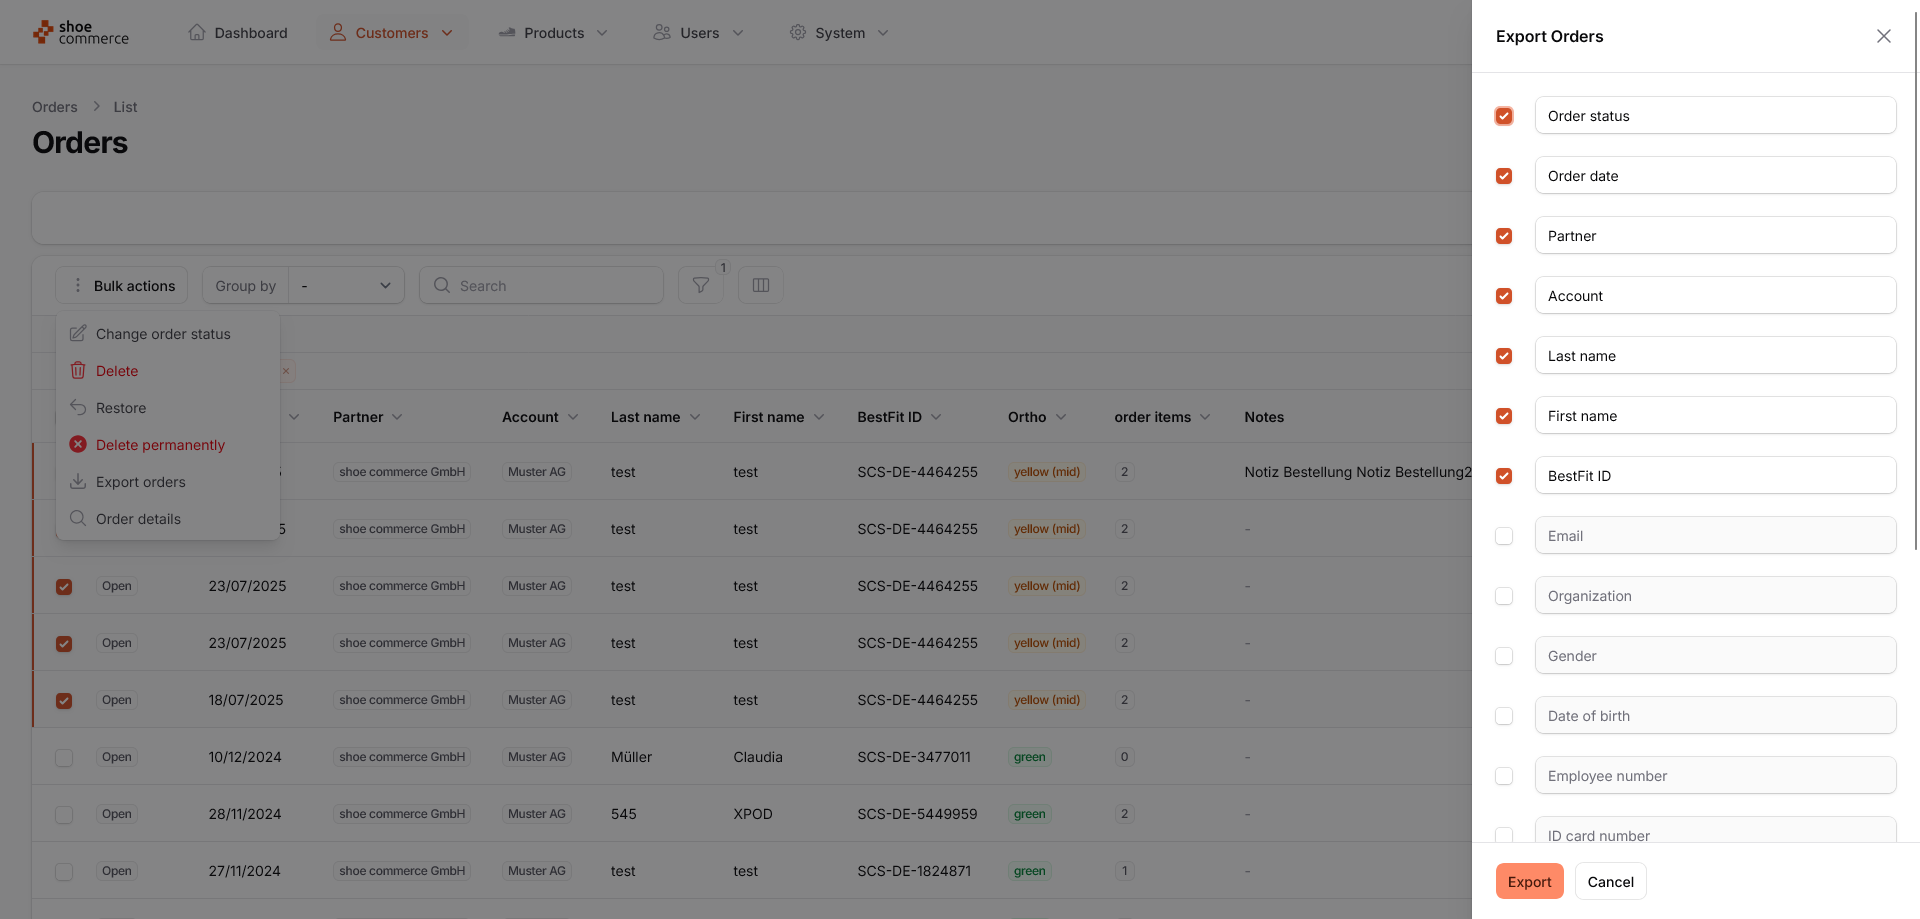
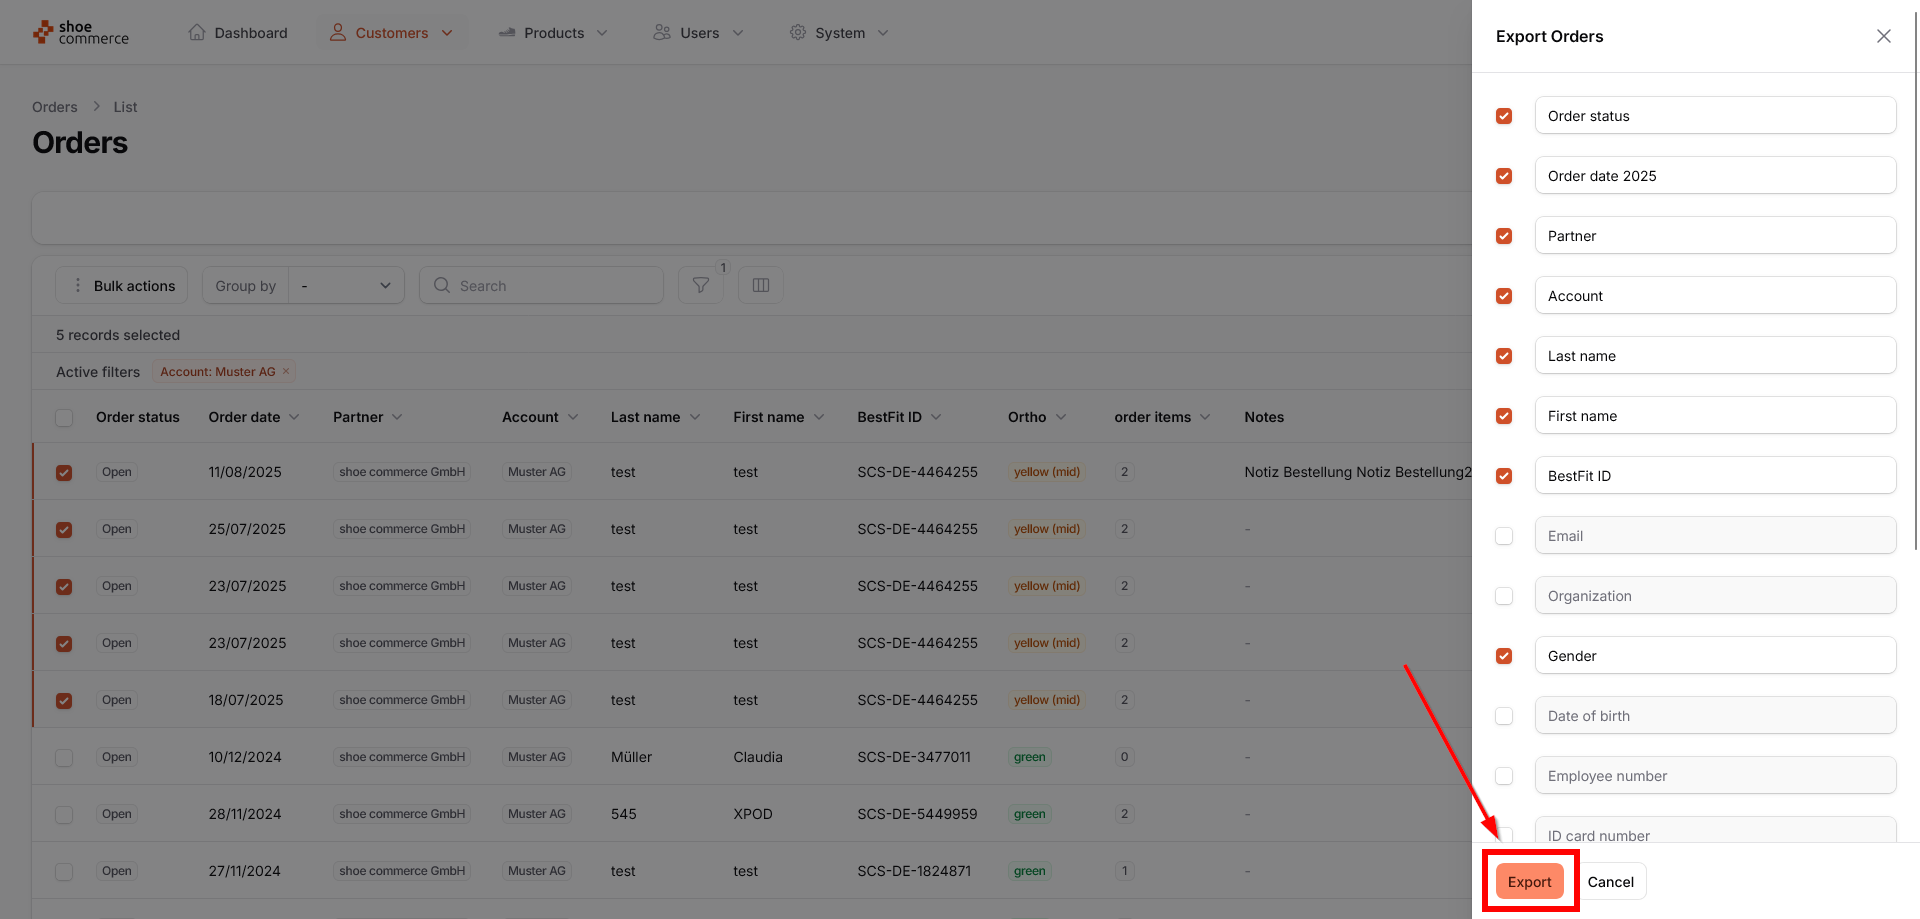
- After selecting the desired data records, first click on the “Bulk actions” button to access the functions available there. Then select “Export orders” from the drop-down menu that opens.
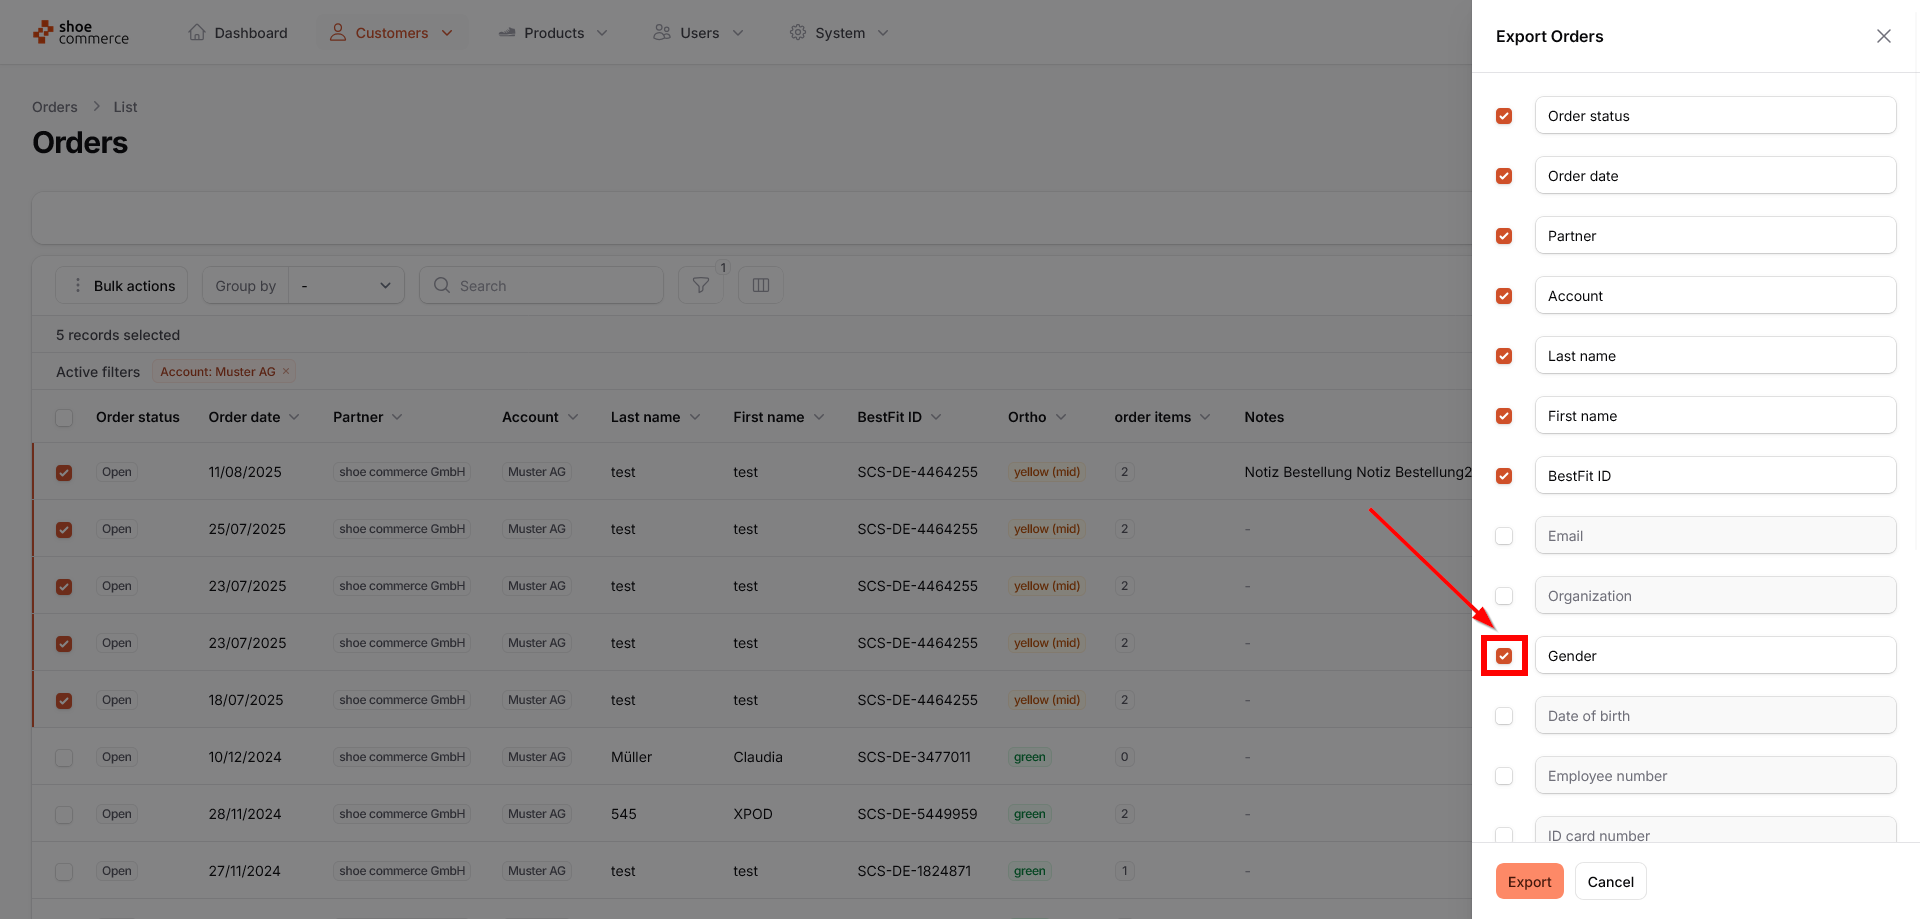
- This opens a new menu field “Export Orders” on the right-hand side, whereby all columns marked with checkboxes are included in the export. All columns that you have already displayed in the backend are preselected. However, you also have the option of removing or adding individual columns here. In our example, we would like to include the “Gender” column in the Excel export.
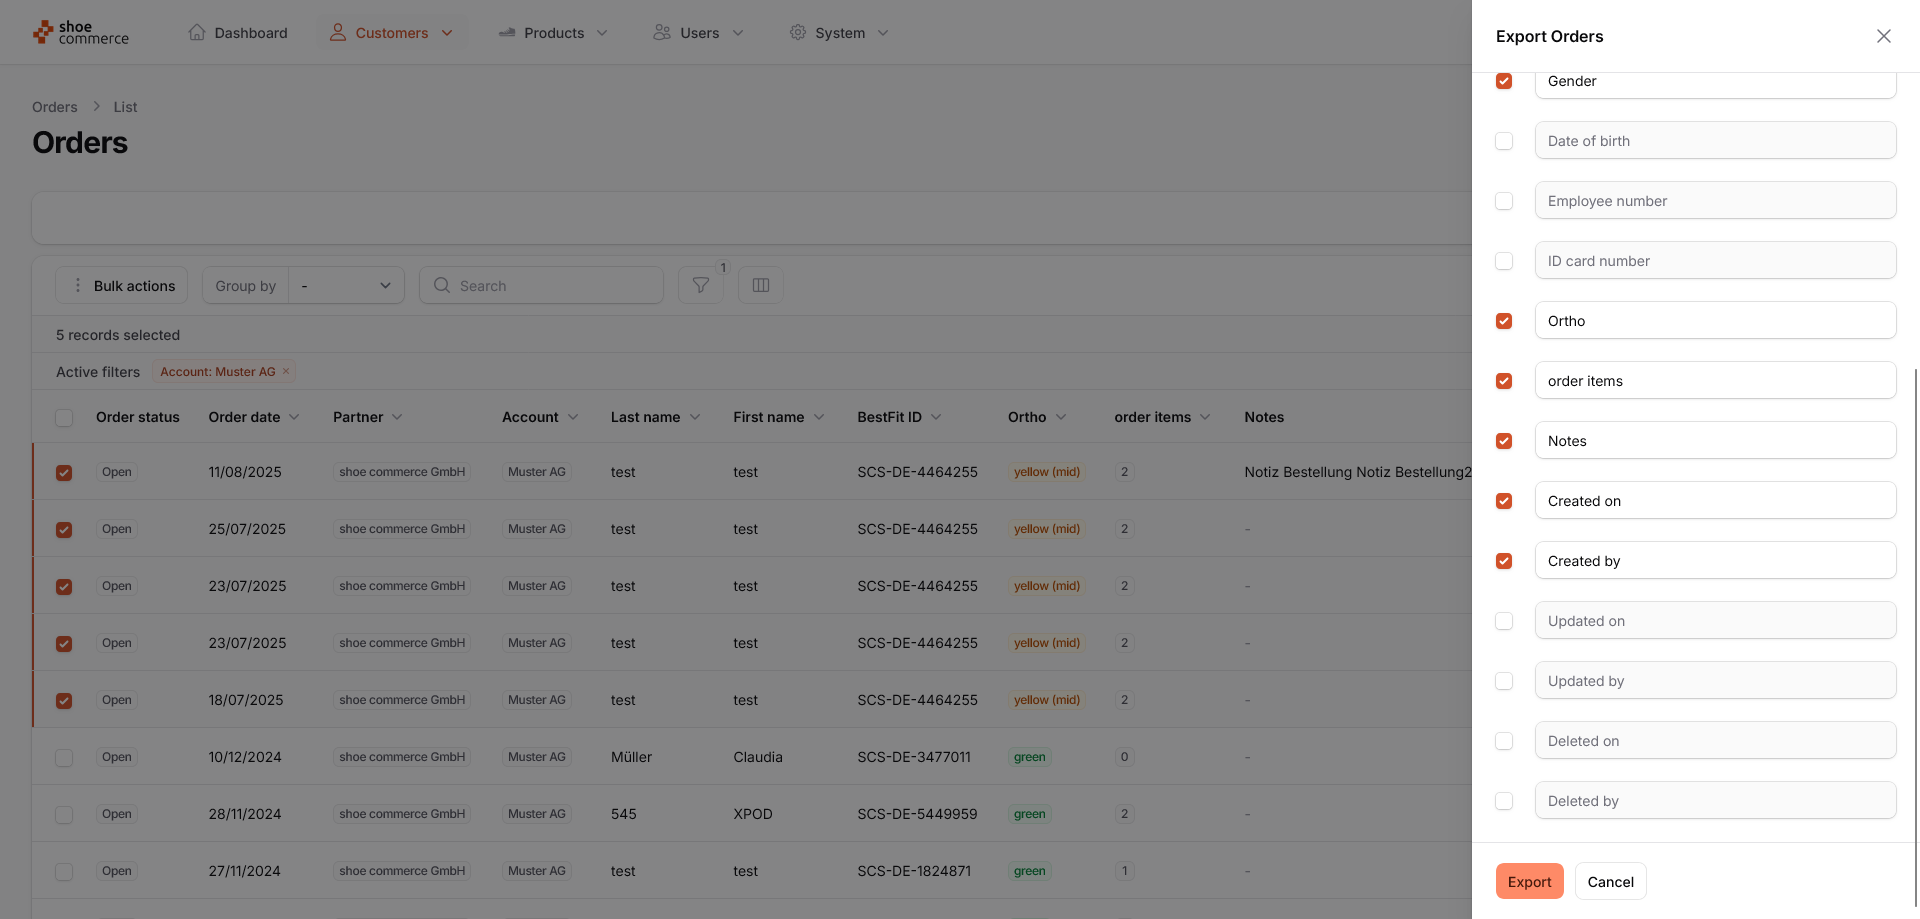
Scrolling down will display the columns that are also available.
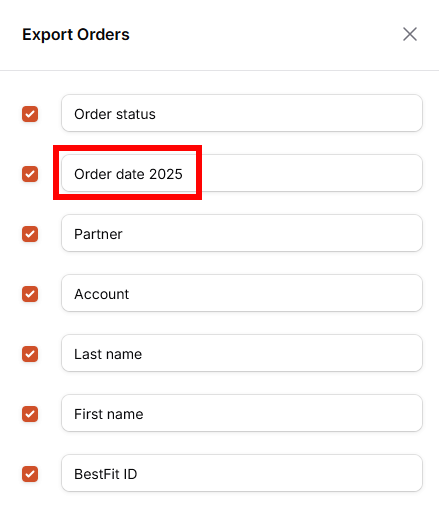
You also have the option of customizing the table column headers. In this example, we have renamed the “Order date” column to “Order date 2025.”
- Once you have selected all columns, you can start the export by clicking the corresponding button.
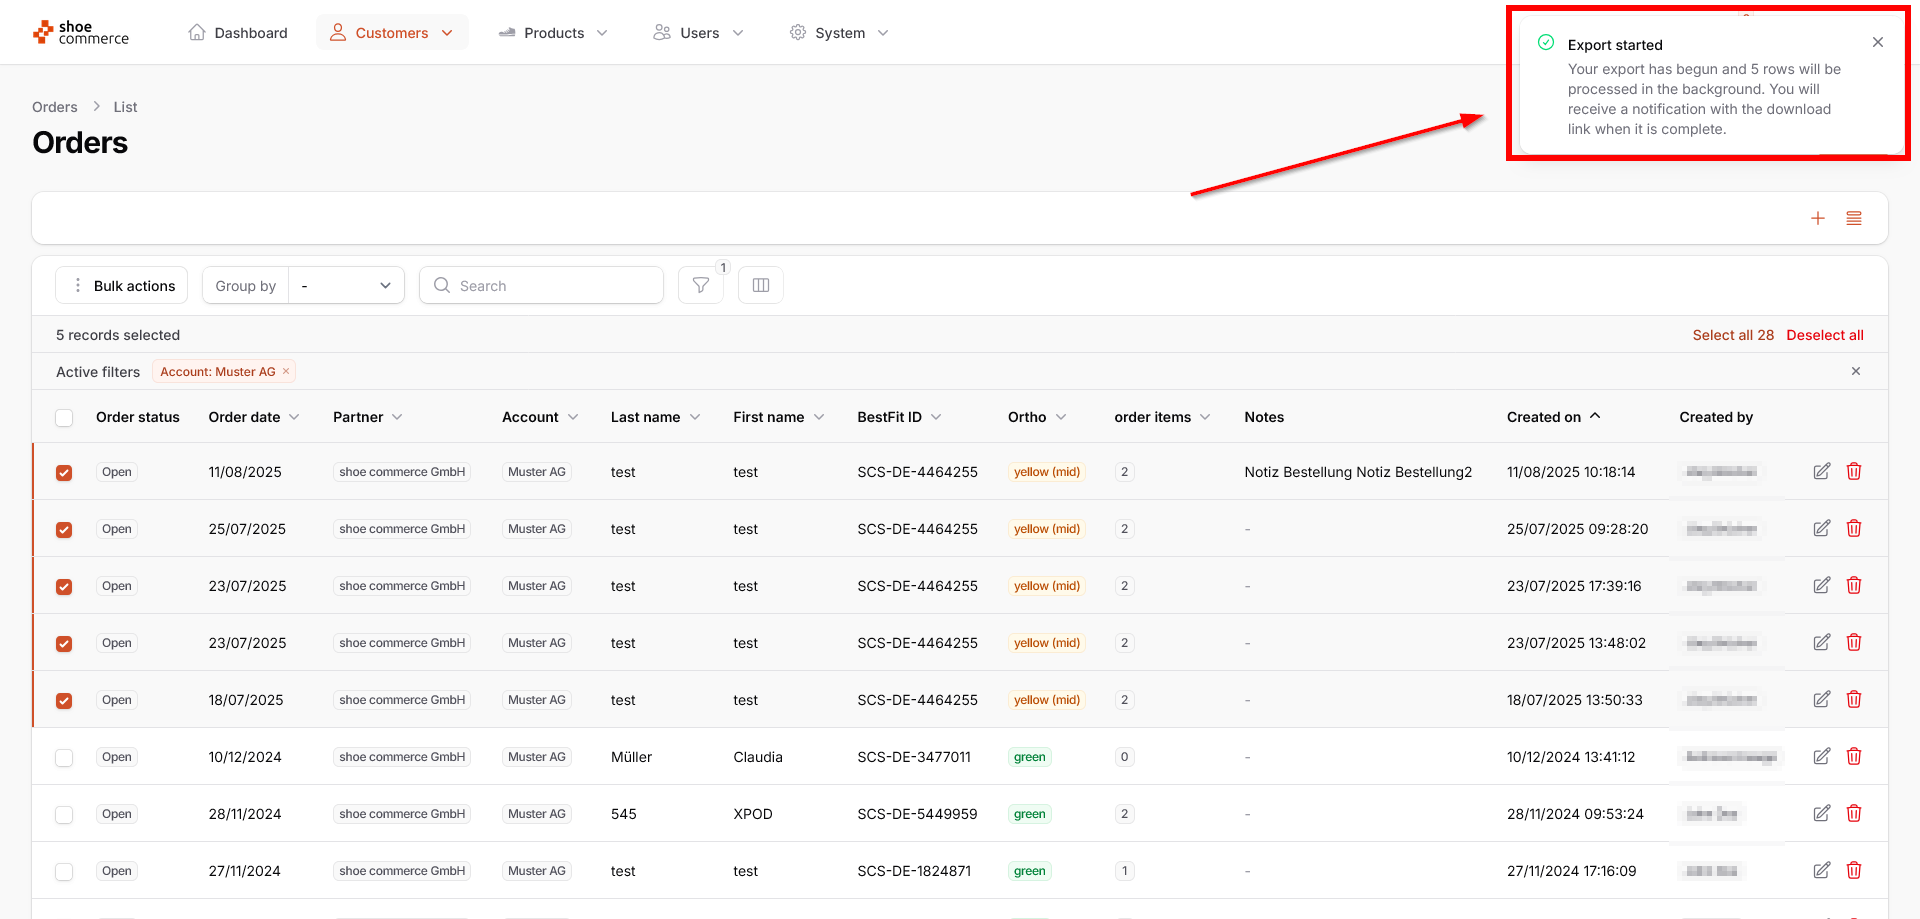
- You will now see a message in the top right-hand corner indicating that the export of the relevant data has started. You can continue working in the system as normal until the export is complete, as it is processed in the background.
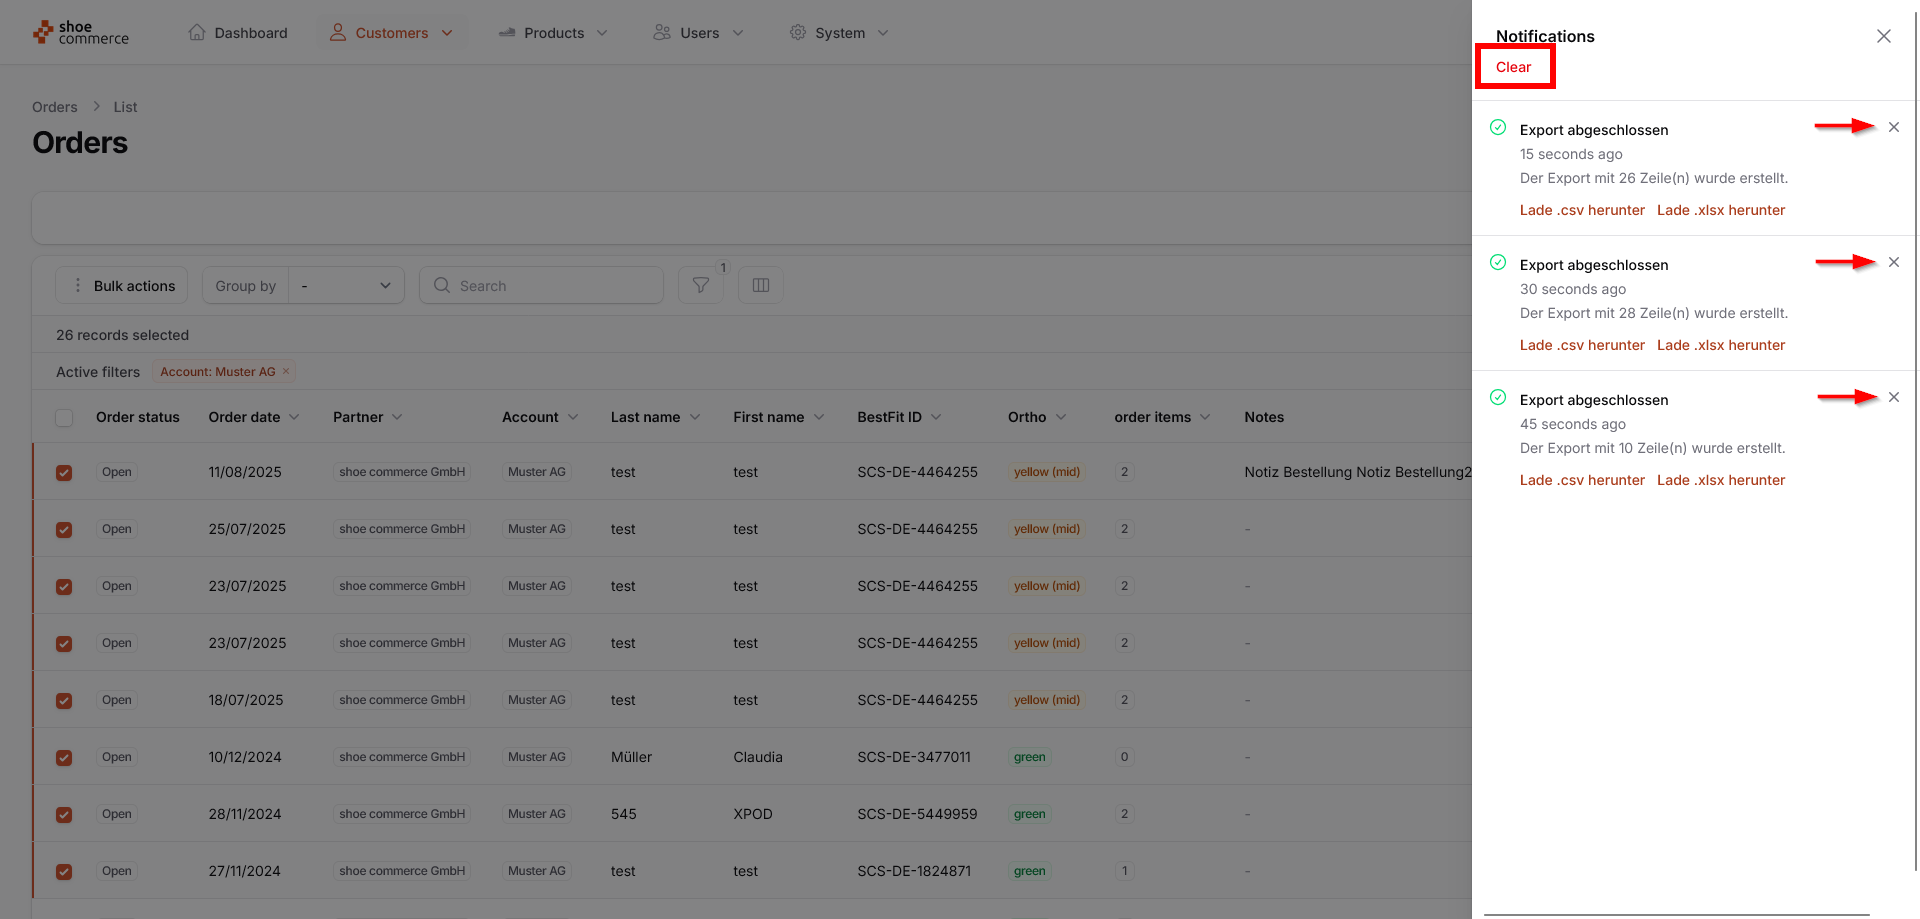
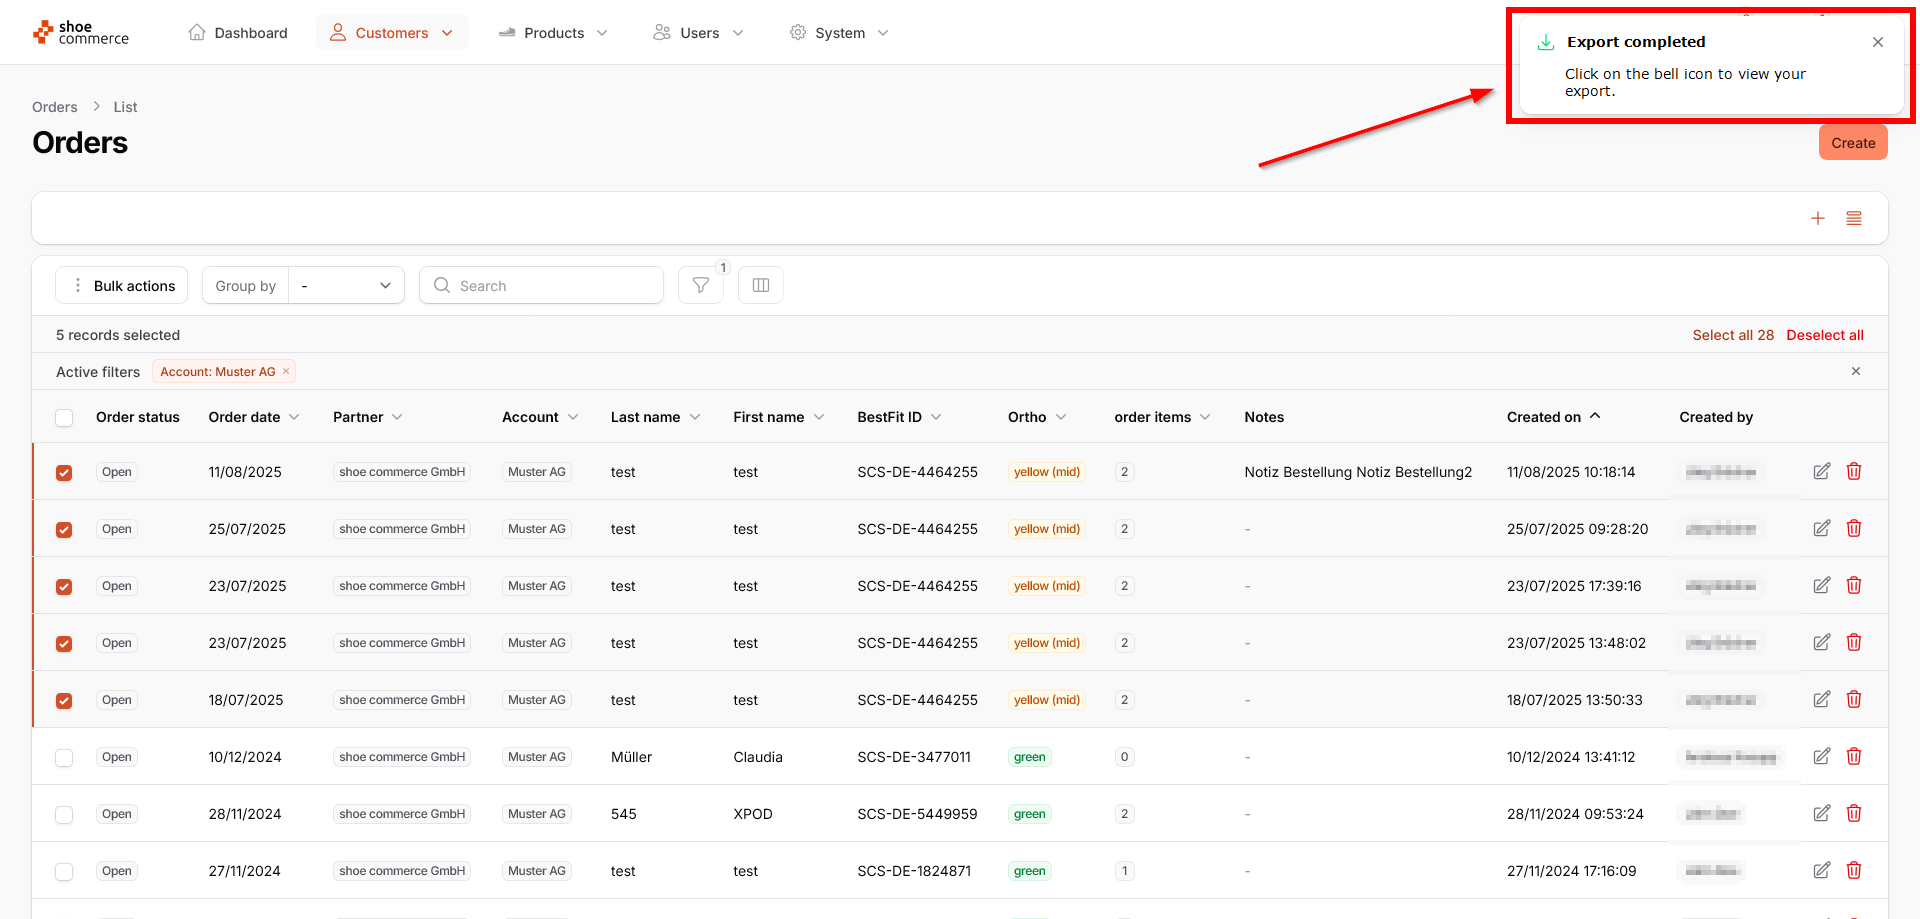
- Once the export is complete, you will receive another notification that it has been finished. You can also see this by the notification icon now displaying a ‘1’. Depending on how many exports you have started in the backend, the number here will always be updated once they are complete.

- After clicking on the notification icon, the corresponding menu will open on the right-hand side, showing you all exports that have been carried out. These can be downloaded in either the regular Excel format (.xlsx) or, if required, in .csv file format. Simply click on the desired format and the file will start downloading automatically.
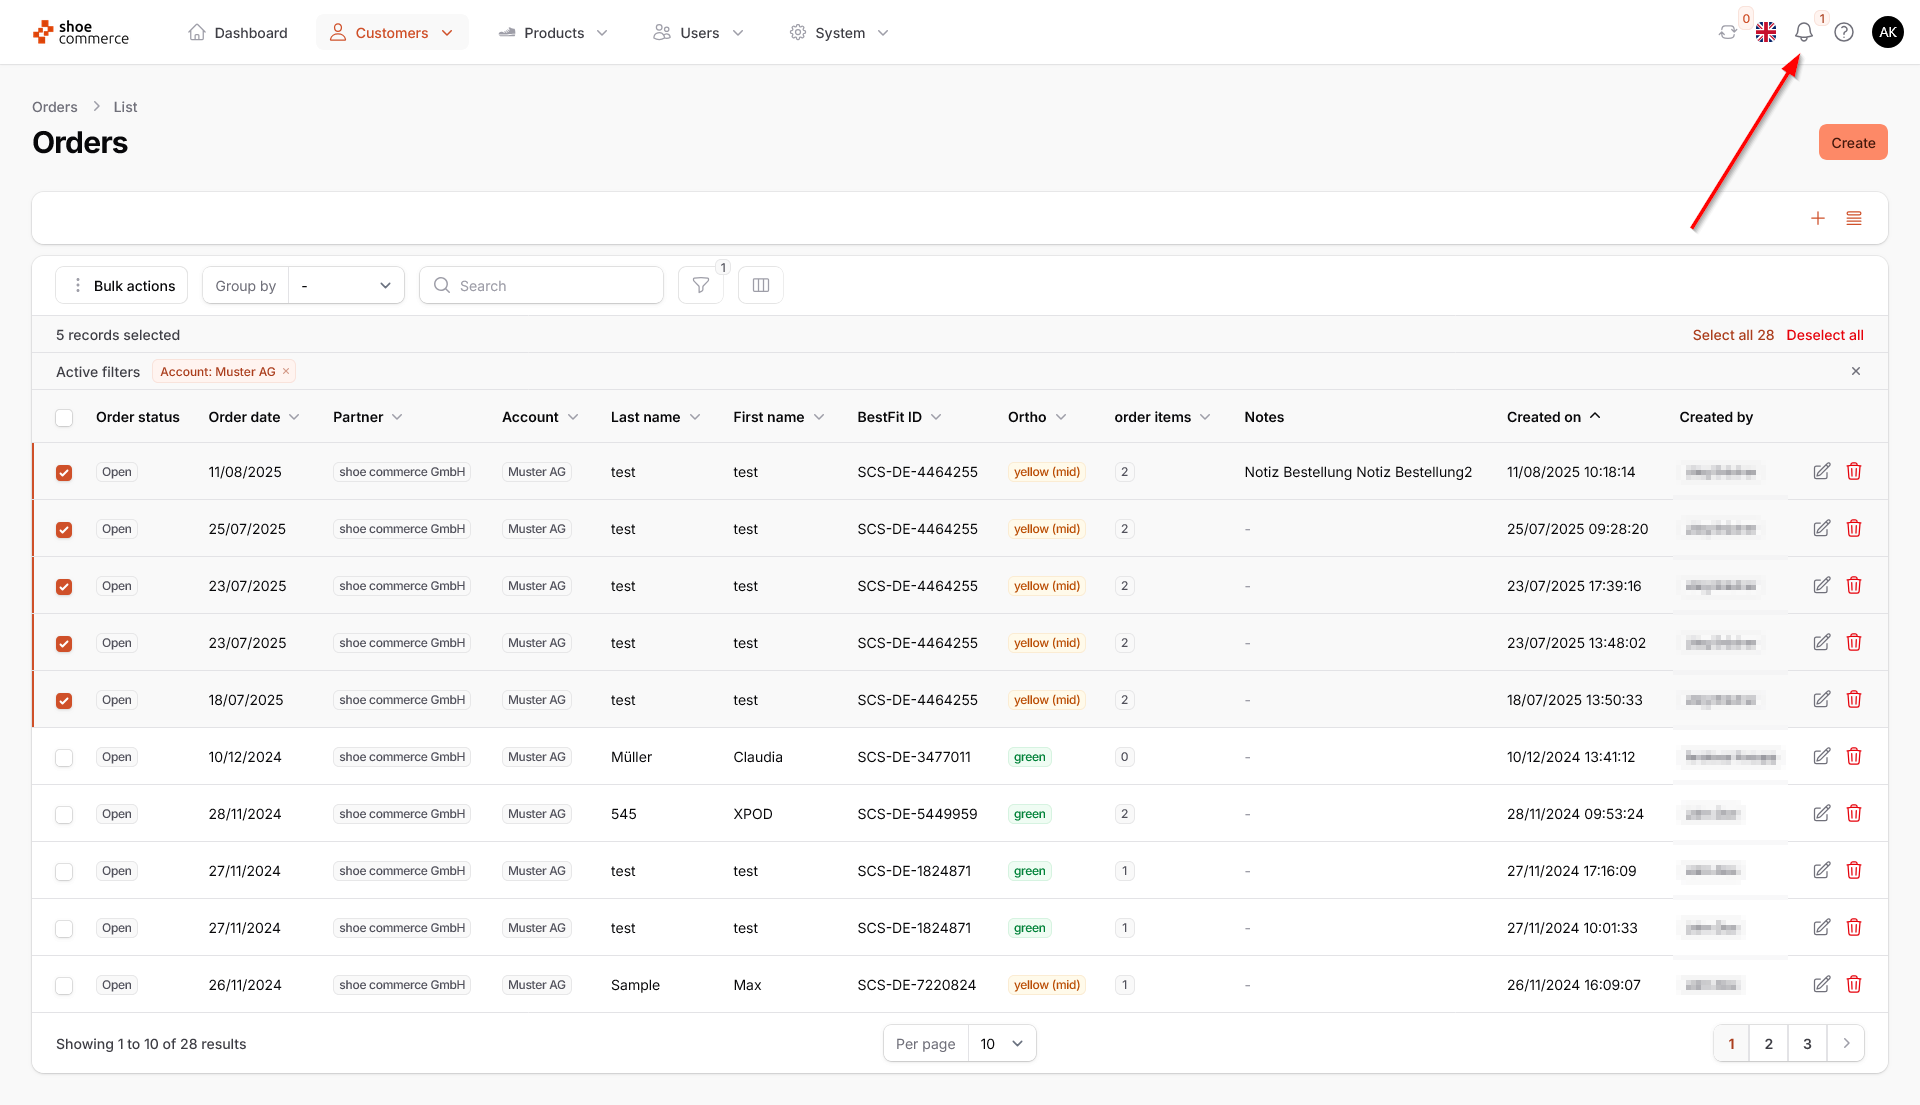

- The Excel export is now complete, and our change to the column heading has also been taken into account.

- Excel exports are available to you for an unlimited period of time. For example, you can click on the notification icon again at a later point in time (even after logging out of the backend) and restart the download. If, for example, you want to delete all notifications (and thus also the exports) for reasons of clarity, simply click on ‘Clear’. If you only want to delete individual notifications (or exports), click on the respective ‘x’ to the right of the export.