Create and save customized views
 Updated
by Andreas Knaupp
Updated
by Andreas Knaupp
The function to create and save customized views is explained here using the “Measurements” menu as an example, but works identically on all levels of the backend. Existing filter criteria will remain in place.
This unit explains how you can permanently save and display the customized views created in the article show and hide columns.
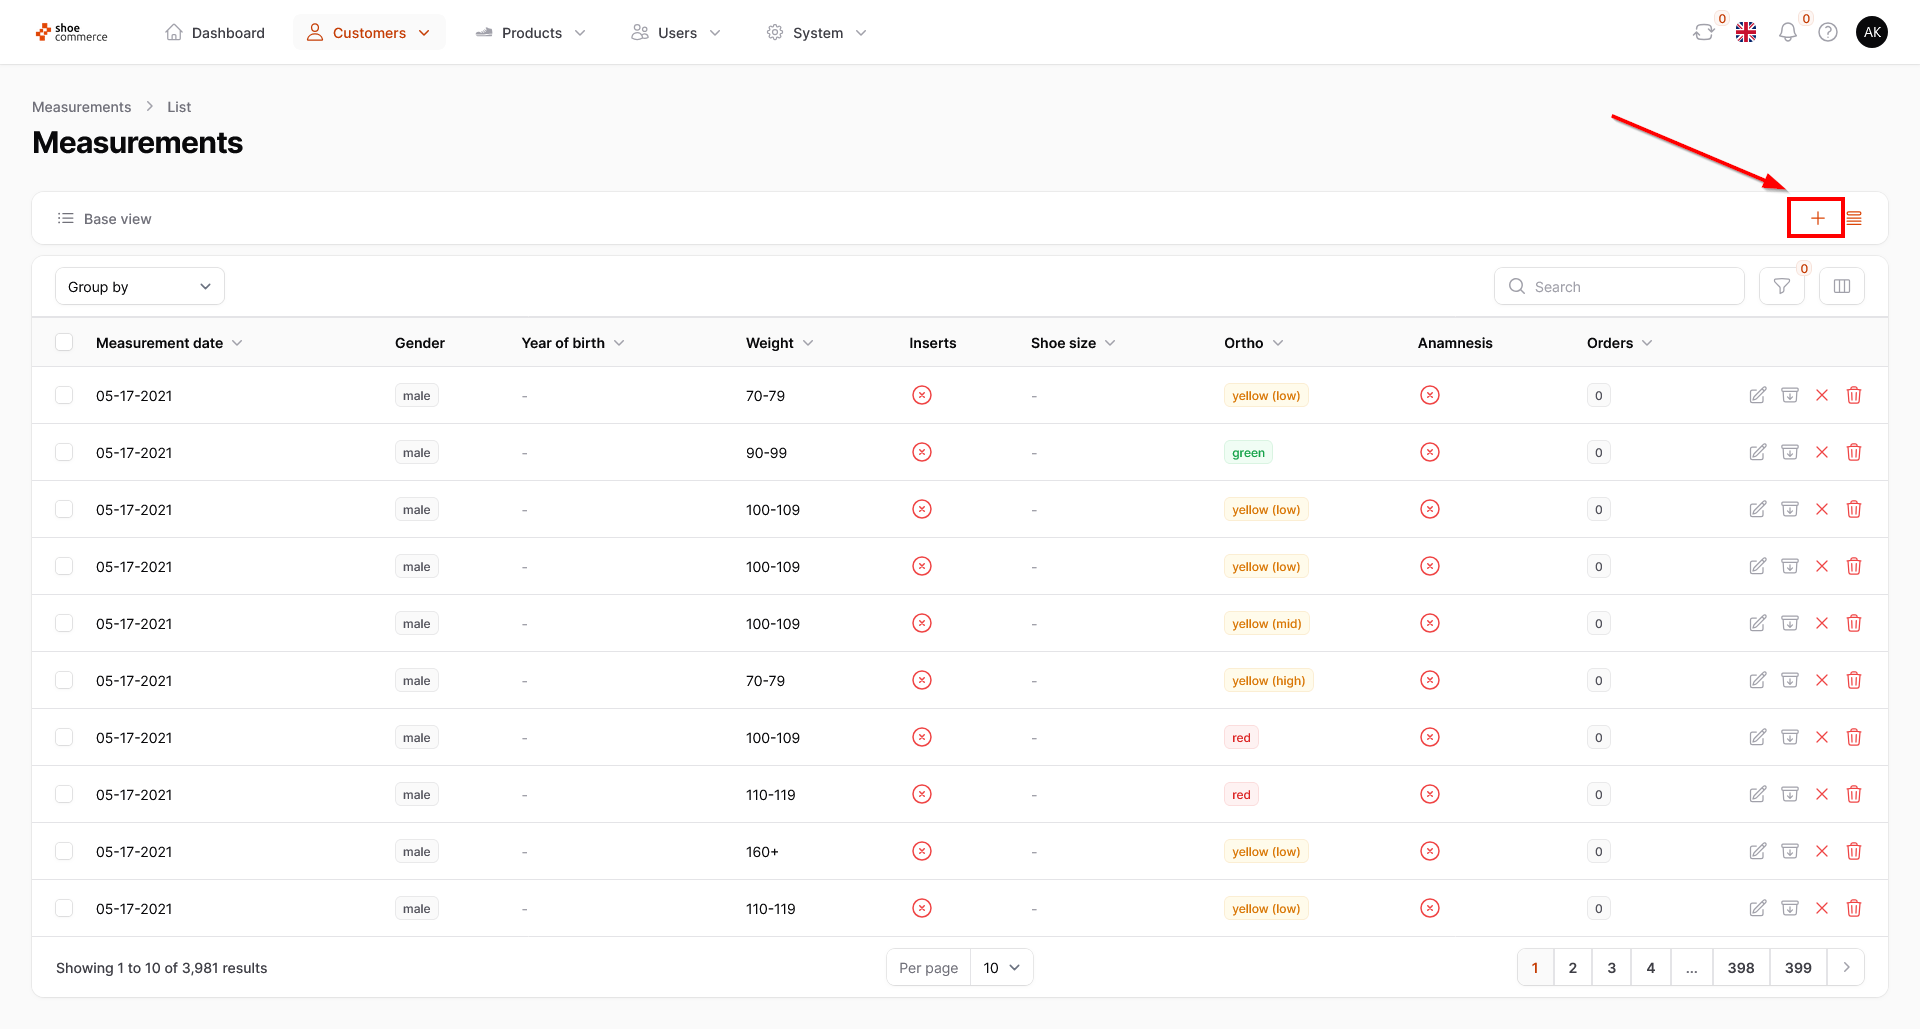
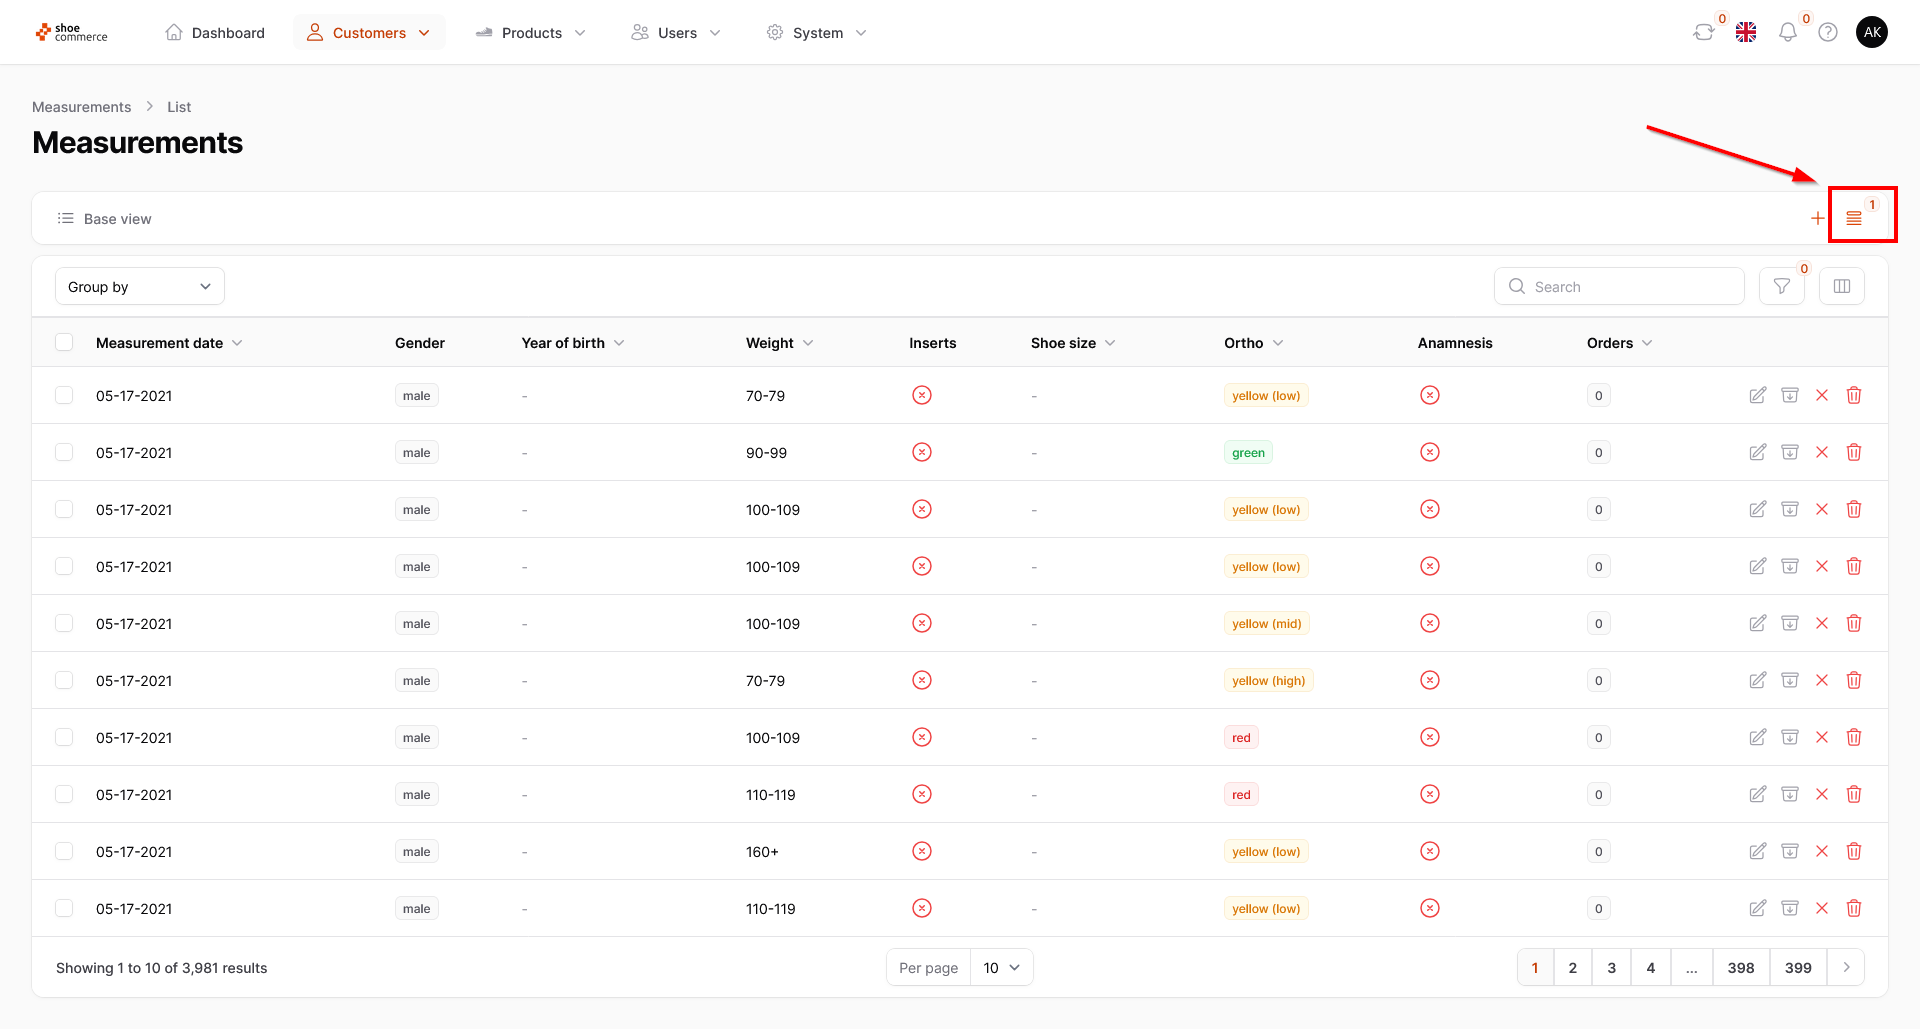
- After you have configured all settings regarding shown/hidden columns and their order, please click on the plus symbol in the top right corner of the backend to save your view for later use.
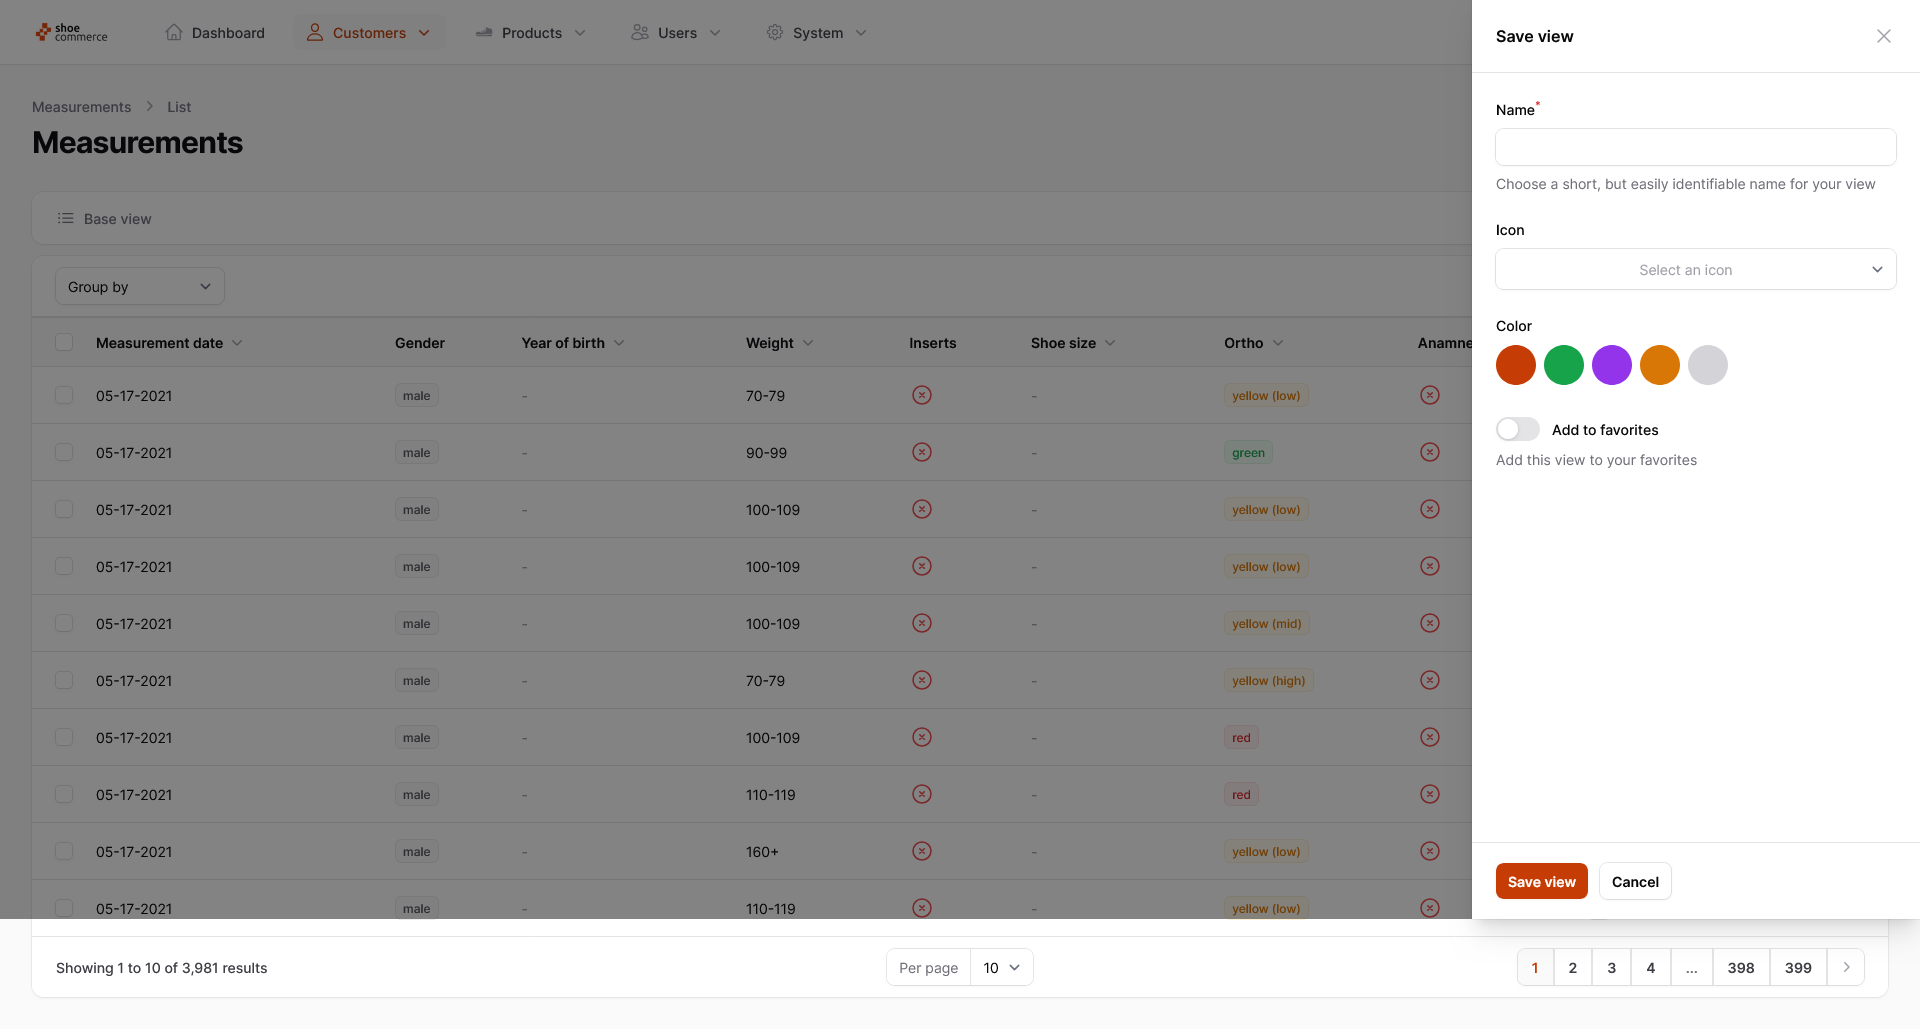
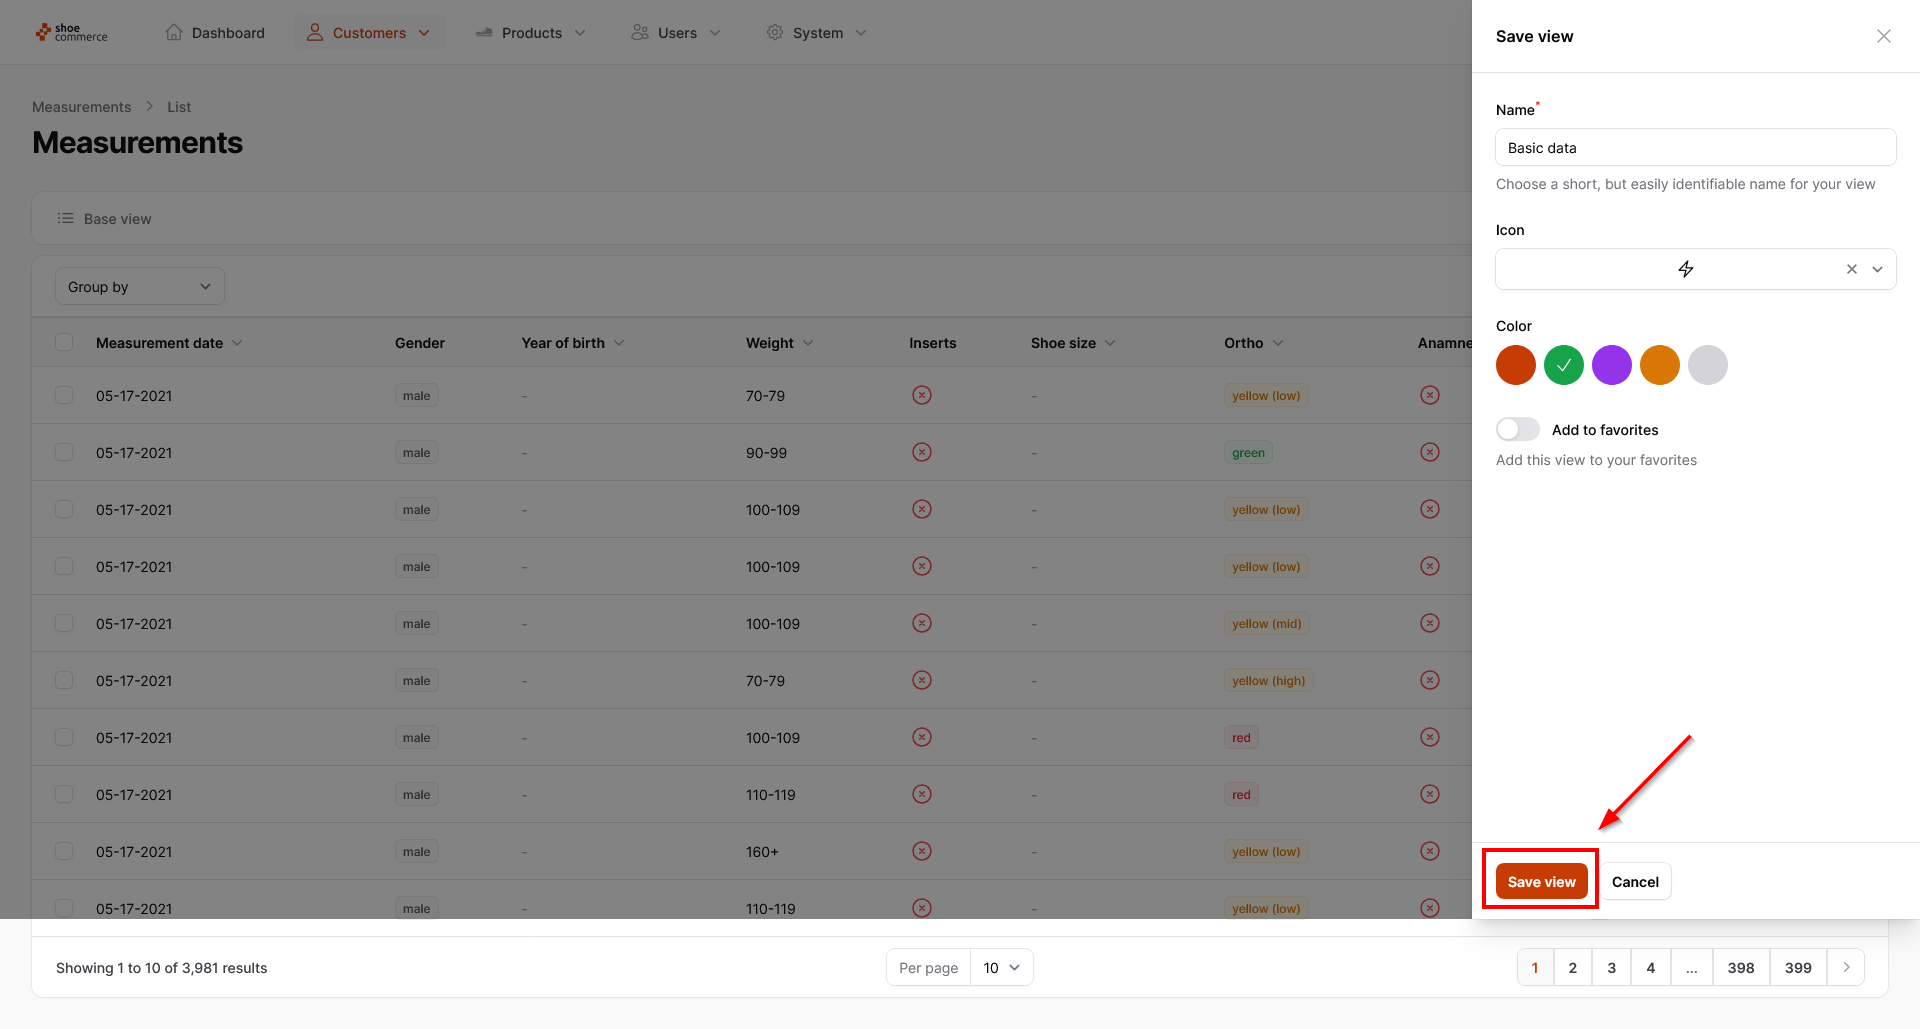
- A new “Save view” menu will now open. From here you can assign a name for your view, an icon (including a search function for this in English) and a color as well as the function to add your view to the favorites. More details on the latter point follow below. In this example, we name the view “Basic data”, assign a symbol in the form of a lightning bolt and select the color green. We leave the “Add to favorites” function deactivated for the moment. Finally, please press the “Save view” button.
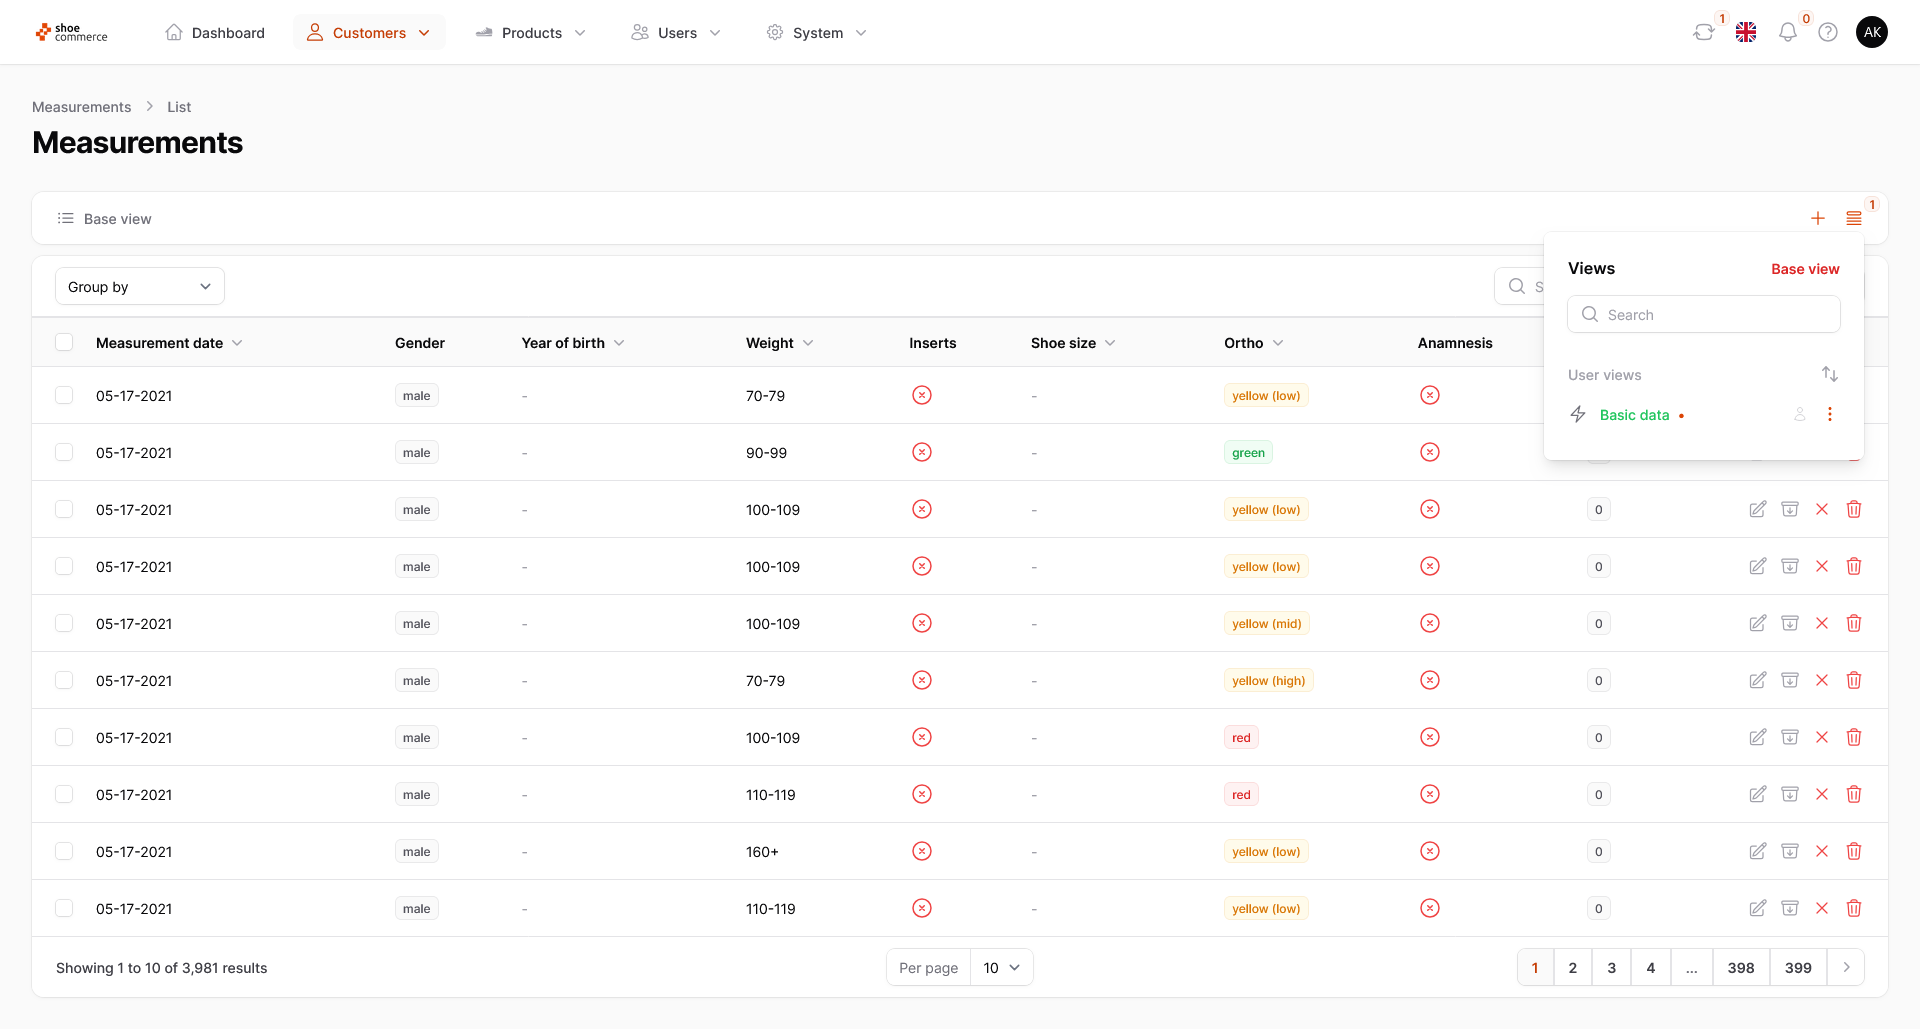
- Using the “Views” menu at the top right of the backend, you can access the view you have just saved or find other views that you have added here before.
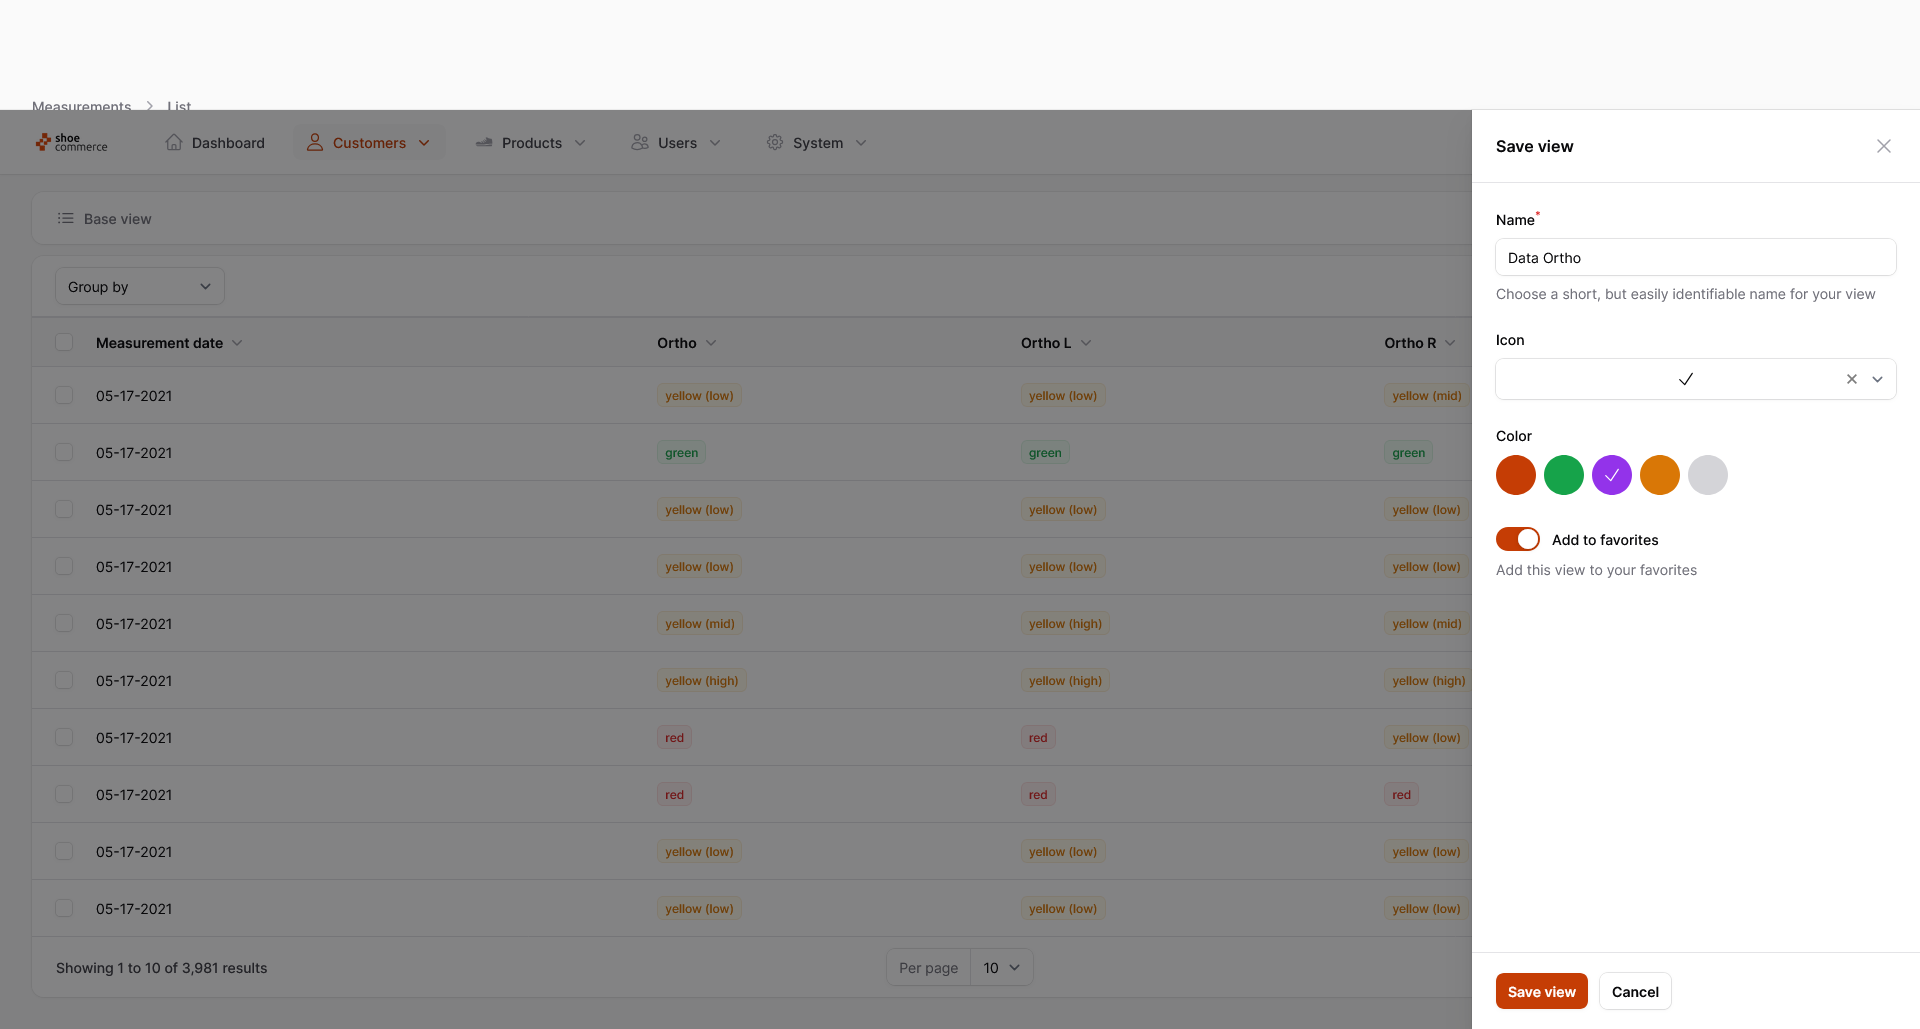
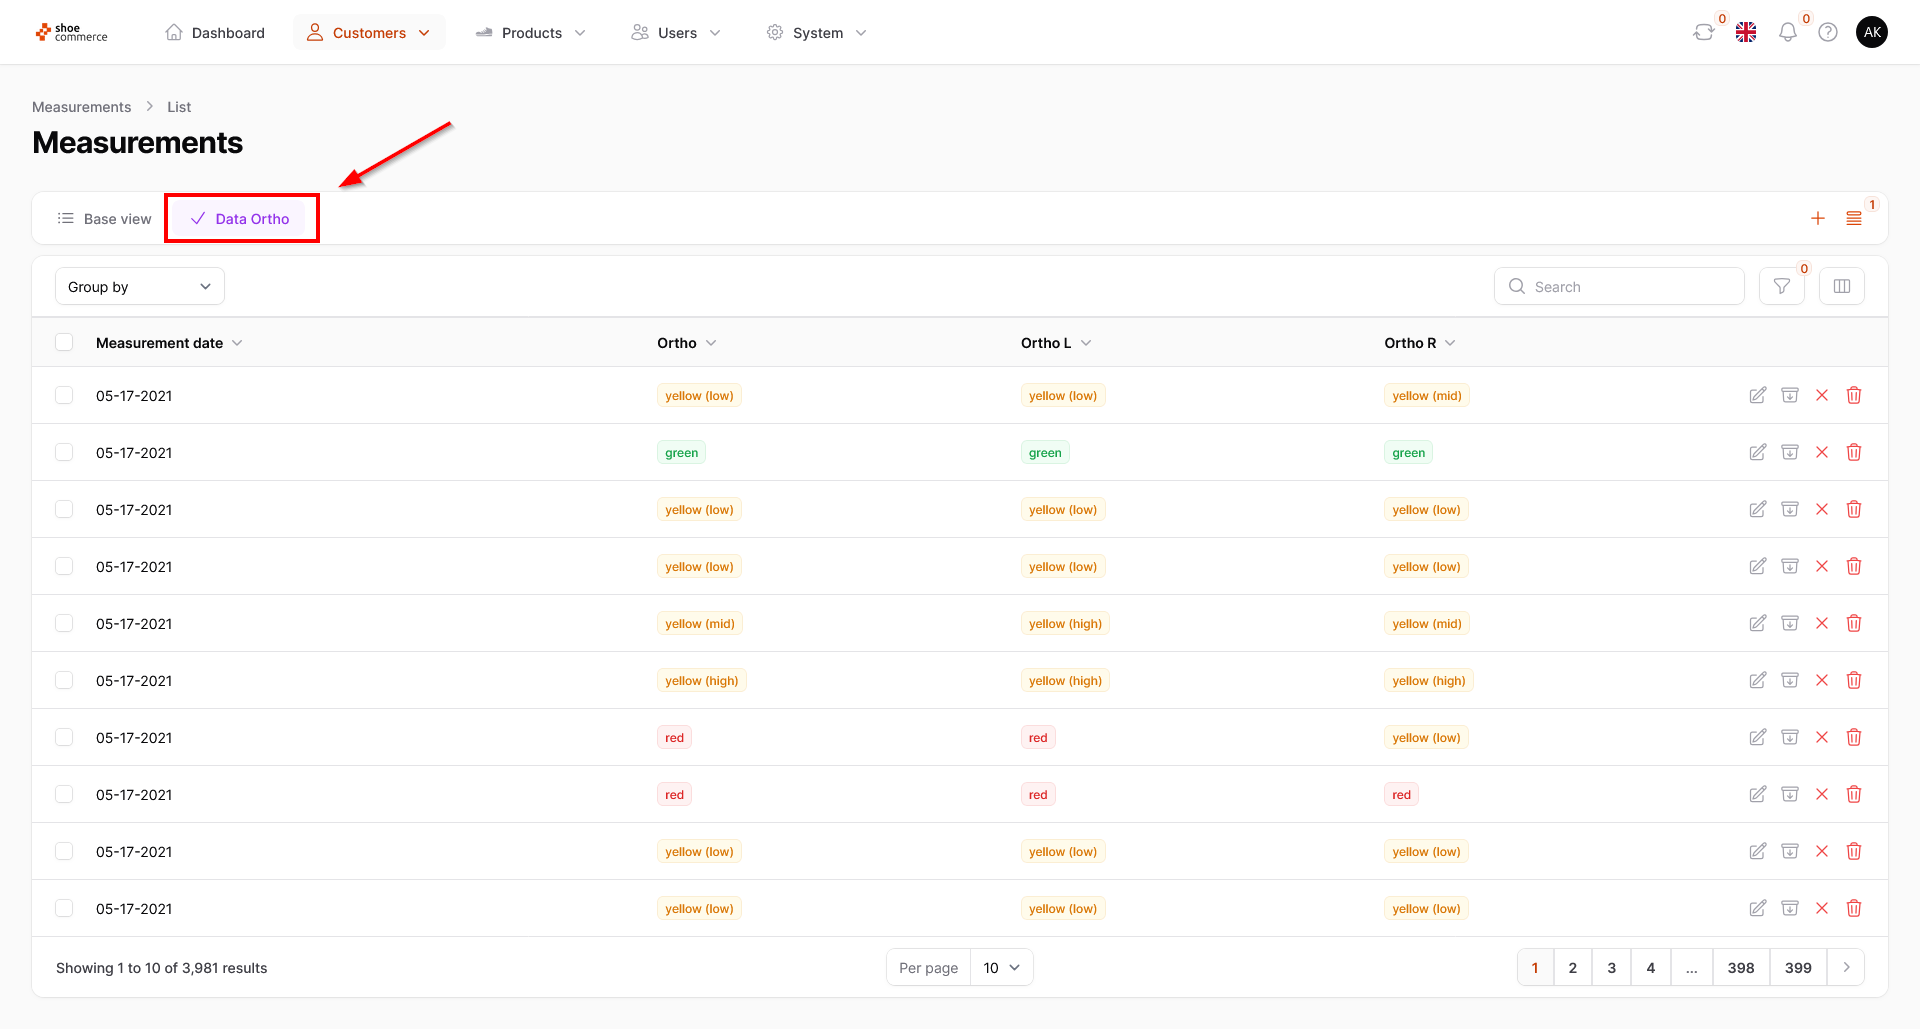
- To be able to explain further functions in the “Views” menu, it is necessary to save a second view. We therefore repeat the steps one and two again with a modified/adapted column view. We now assign the name “Data Ortho”, select a tick as the symbol, assign the color purple and activate the function “Add to favorites”. Click “Save view” to end the process.
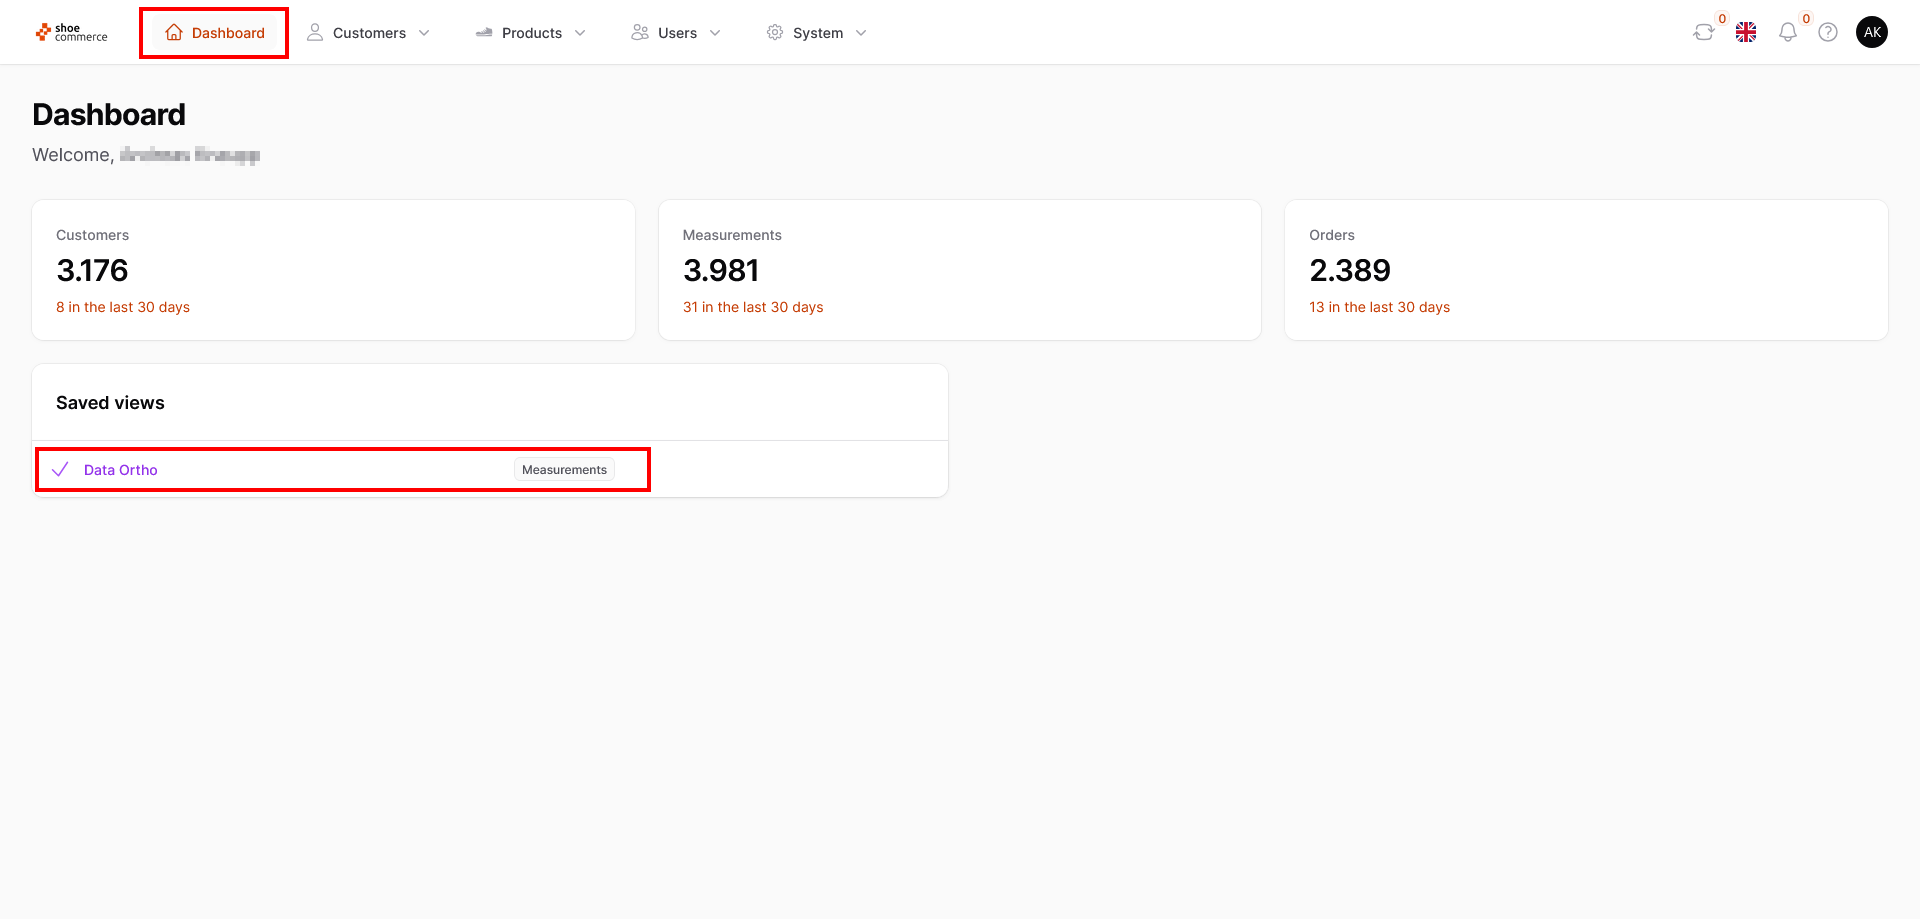
- Using the “Add to favorites” function, the view you have just created is now displayed in two places. Firstly, at the top of the column in the “Measurements” area (or in the menu item in which you created the view), and secondly on the Dashboard of the backend. Here you can also see the menu to which the view refers, in our case “Measurements”. This allows you to quickly switch to the desired view at any time.
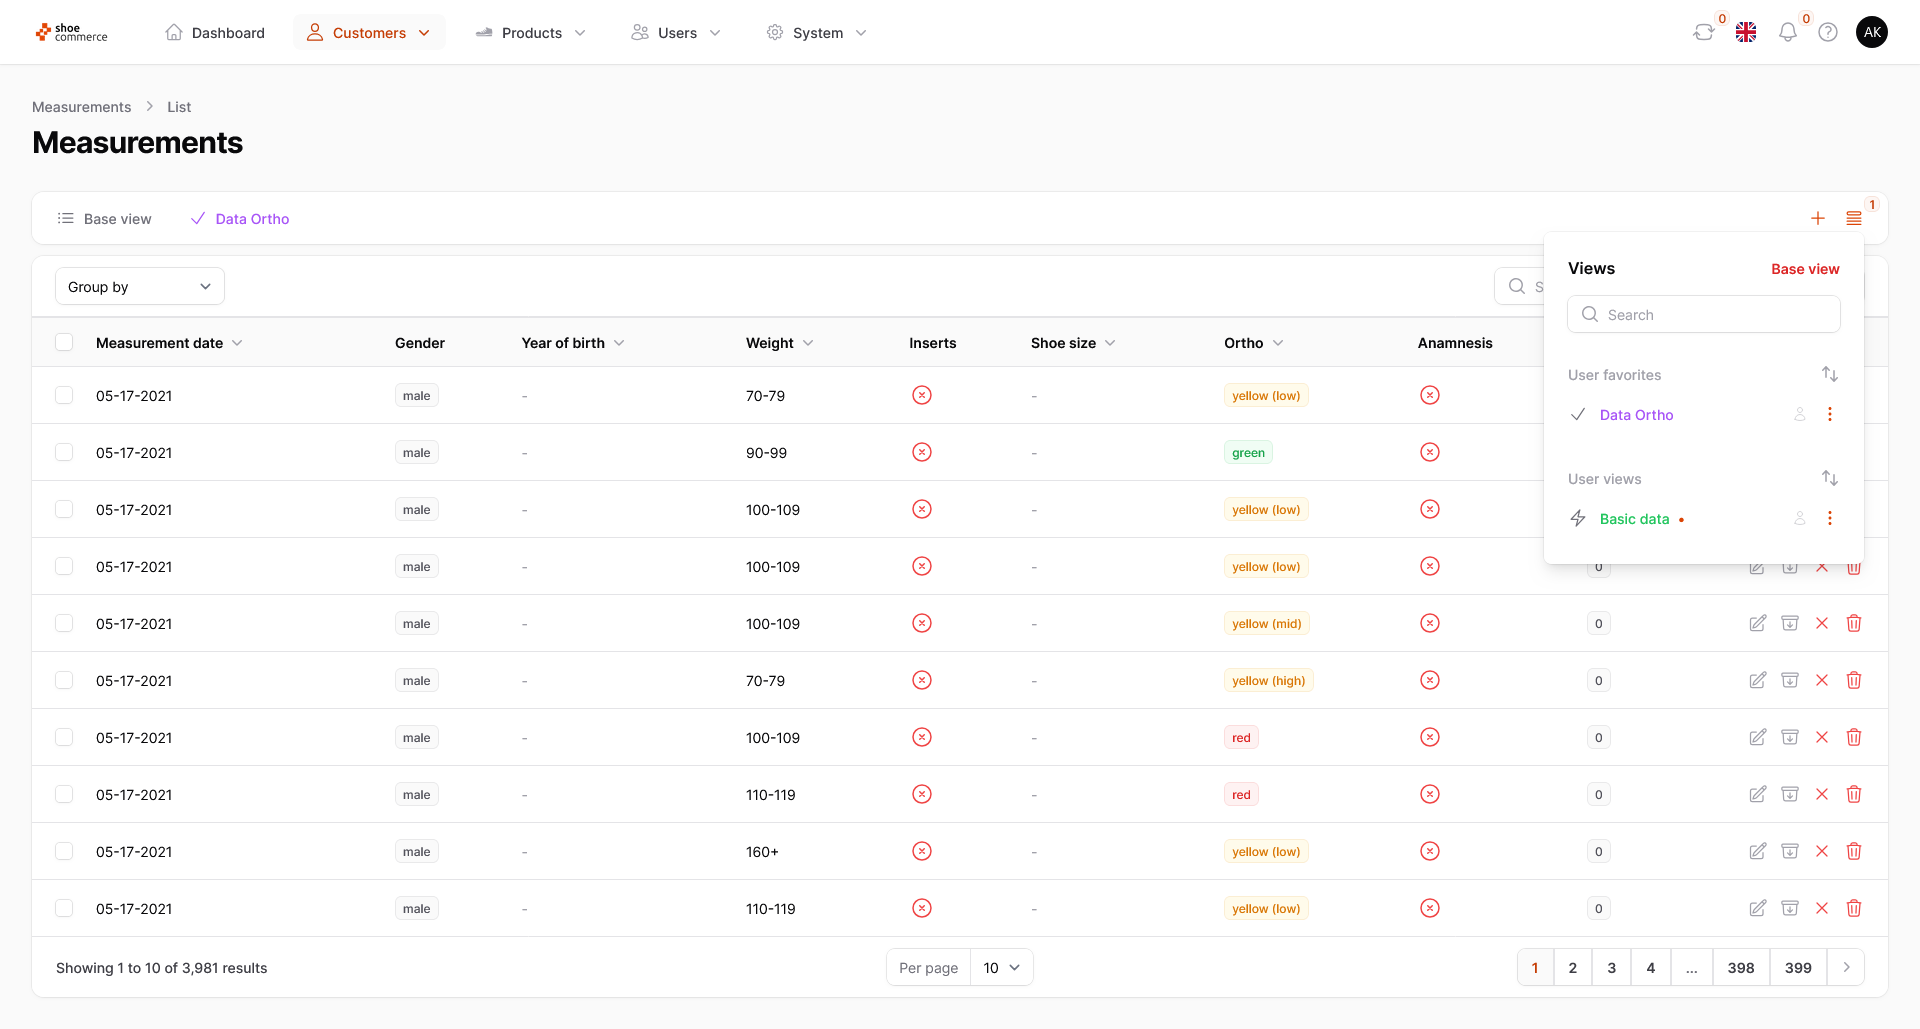
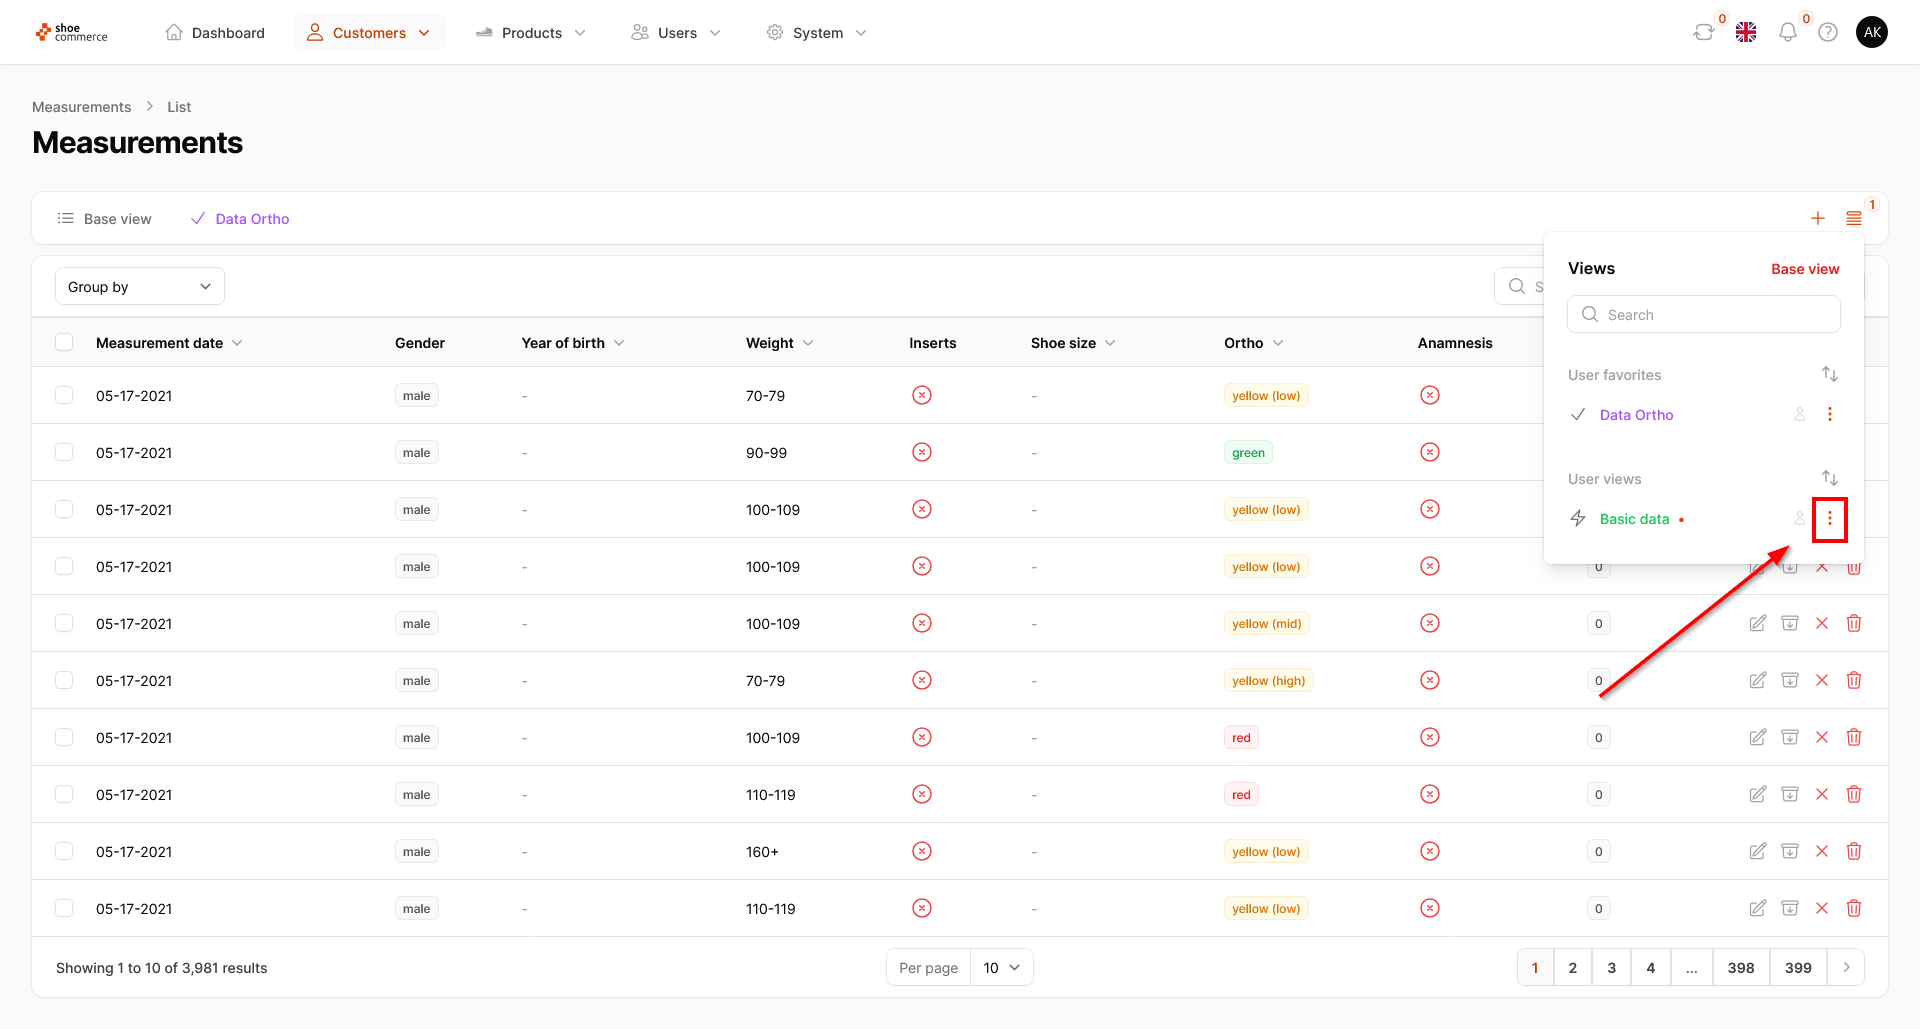
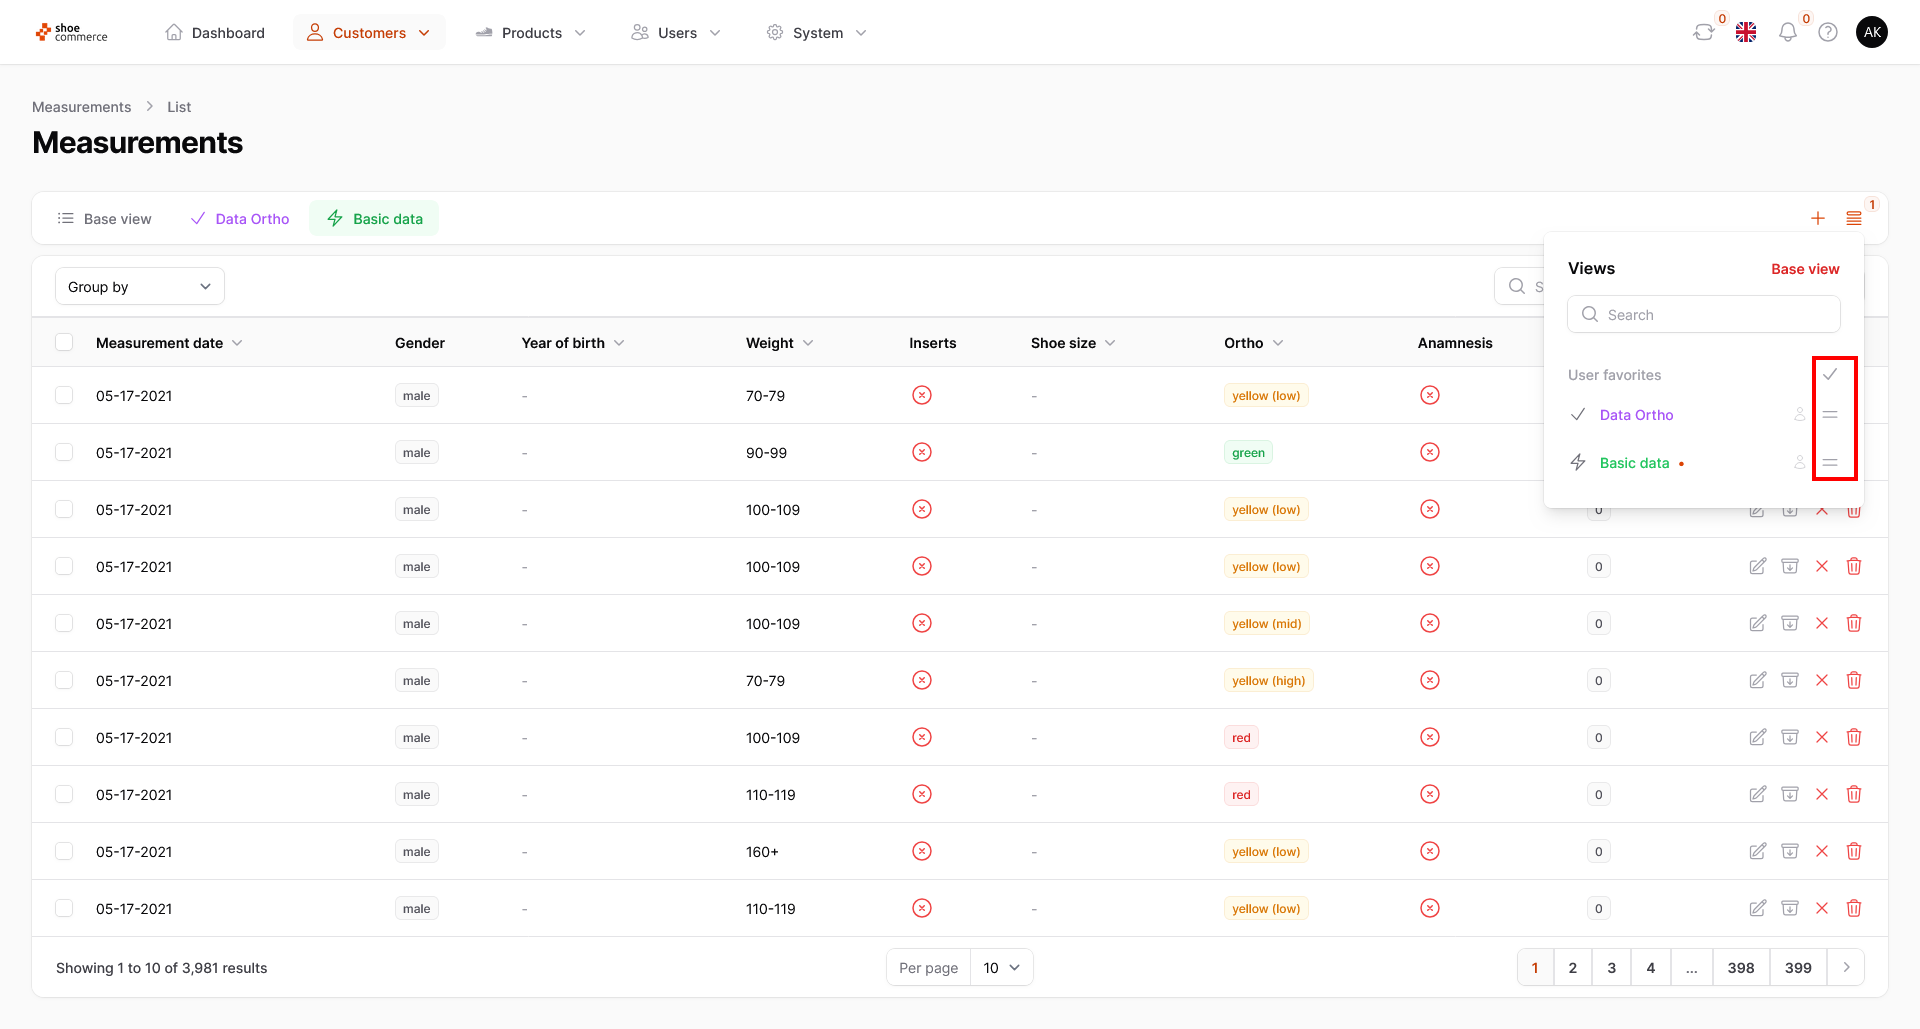
- To explain further functions for the views you have created, we go back to the “Measurements” menu and click on the “Views” icon at the top right. The “Data Ortho” view now appears in the “User favorites” category, while our “Basic data” view, which we have not set as a favorite, appears in the “User views” category. The active view, in our case “Data Ortho”, is indicated by a red dot next to its name. To switch between the views, simply click on the desired view. In our case, the red dot now appears next to the “Basic data” view.
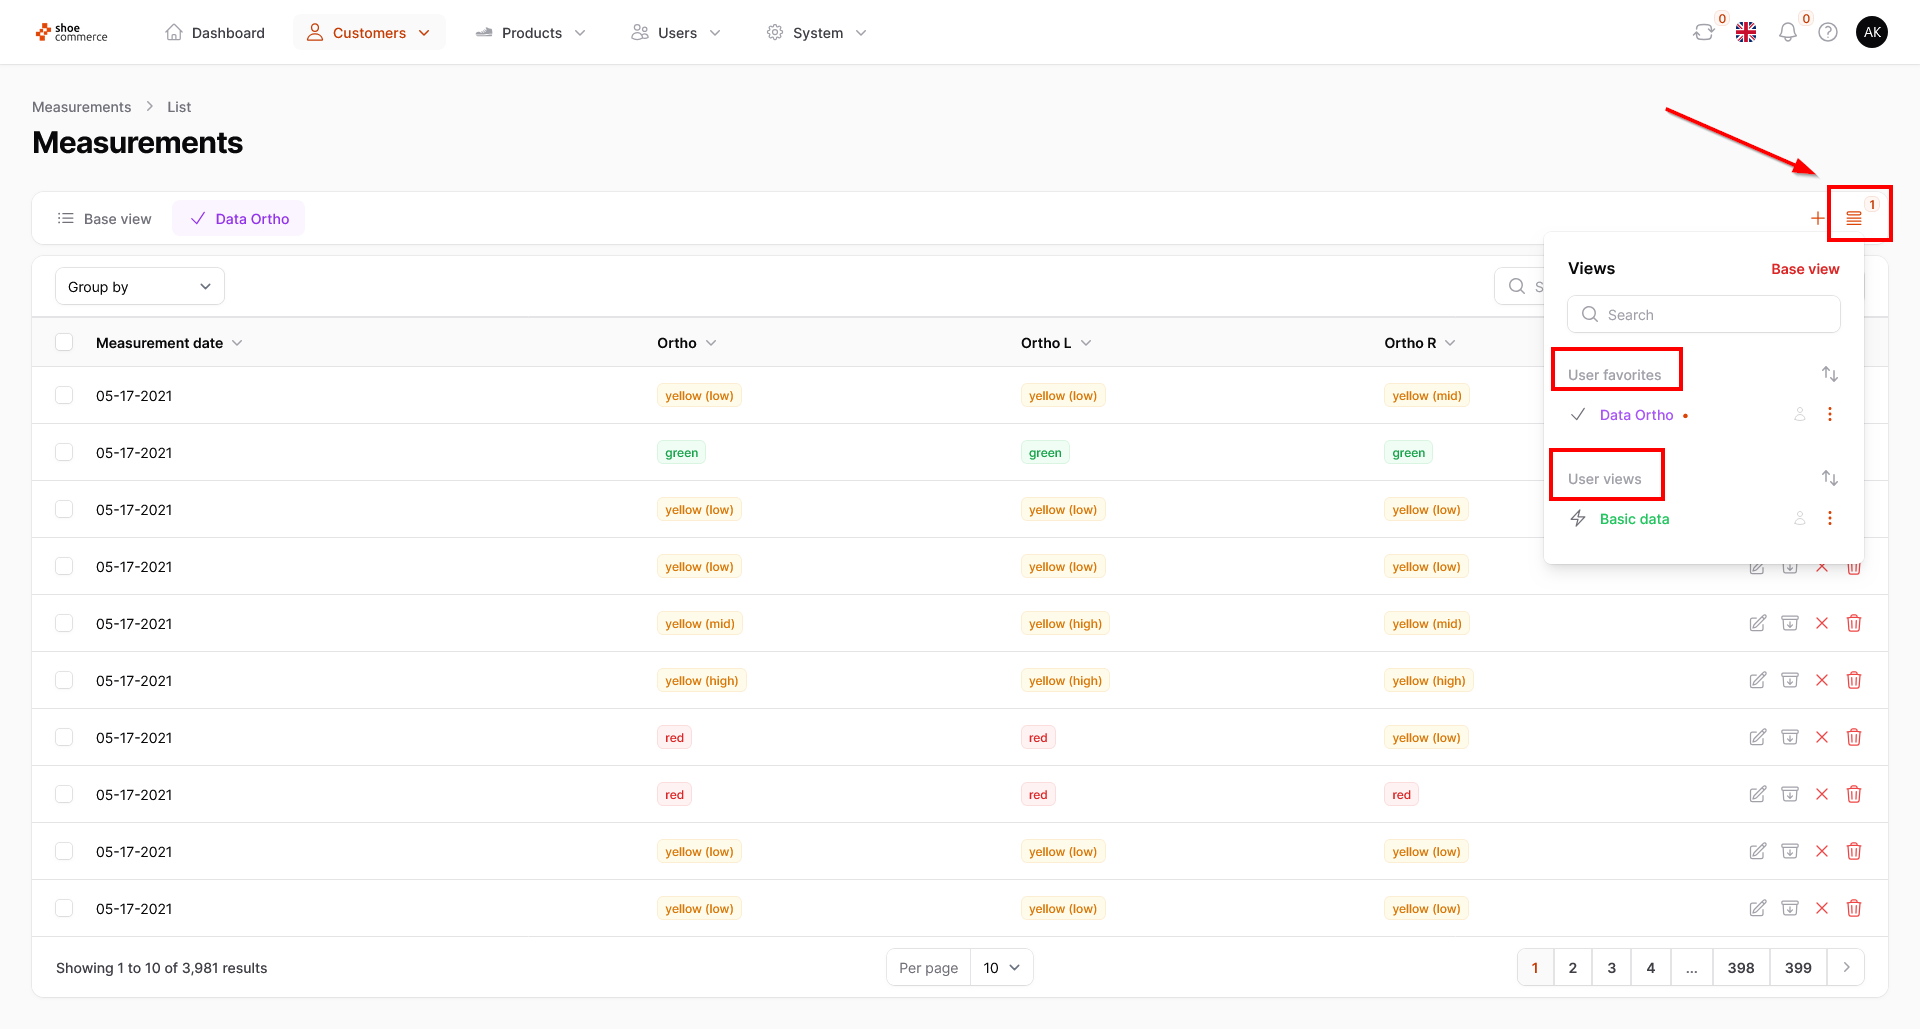
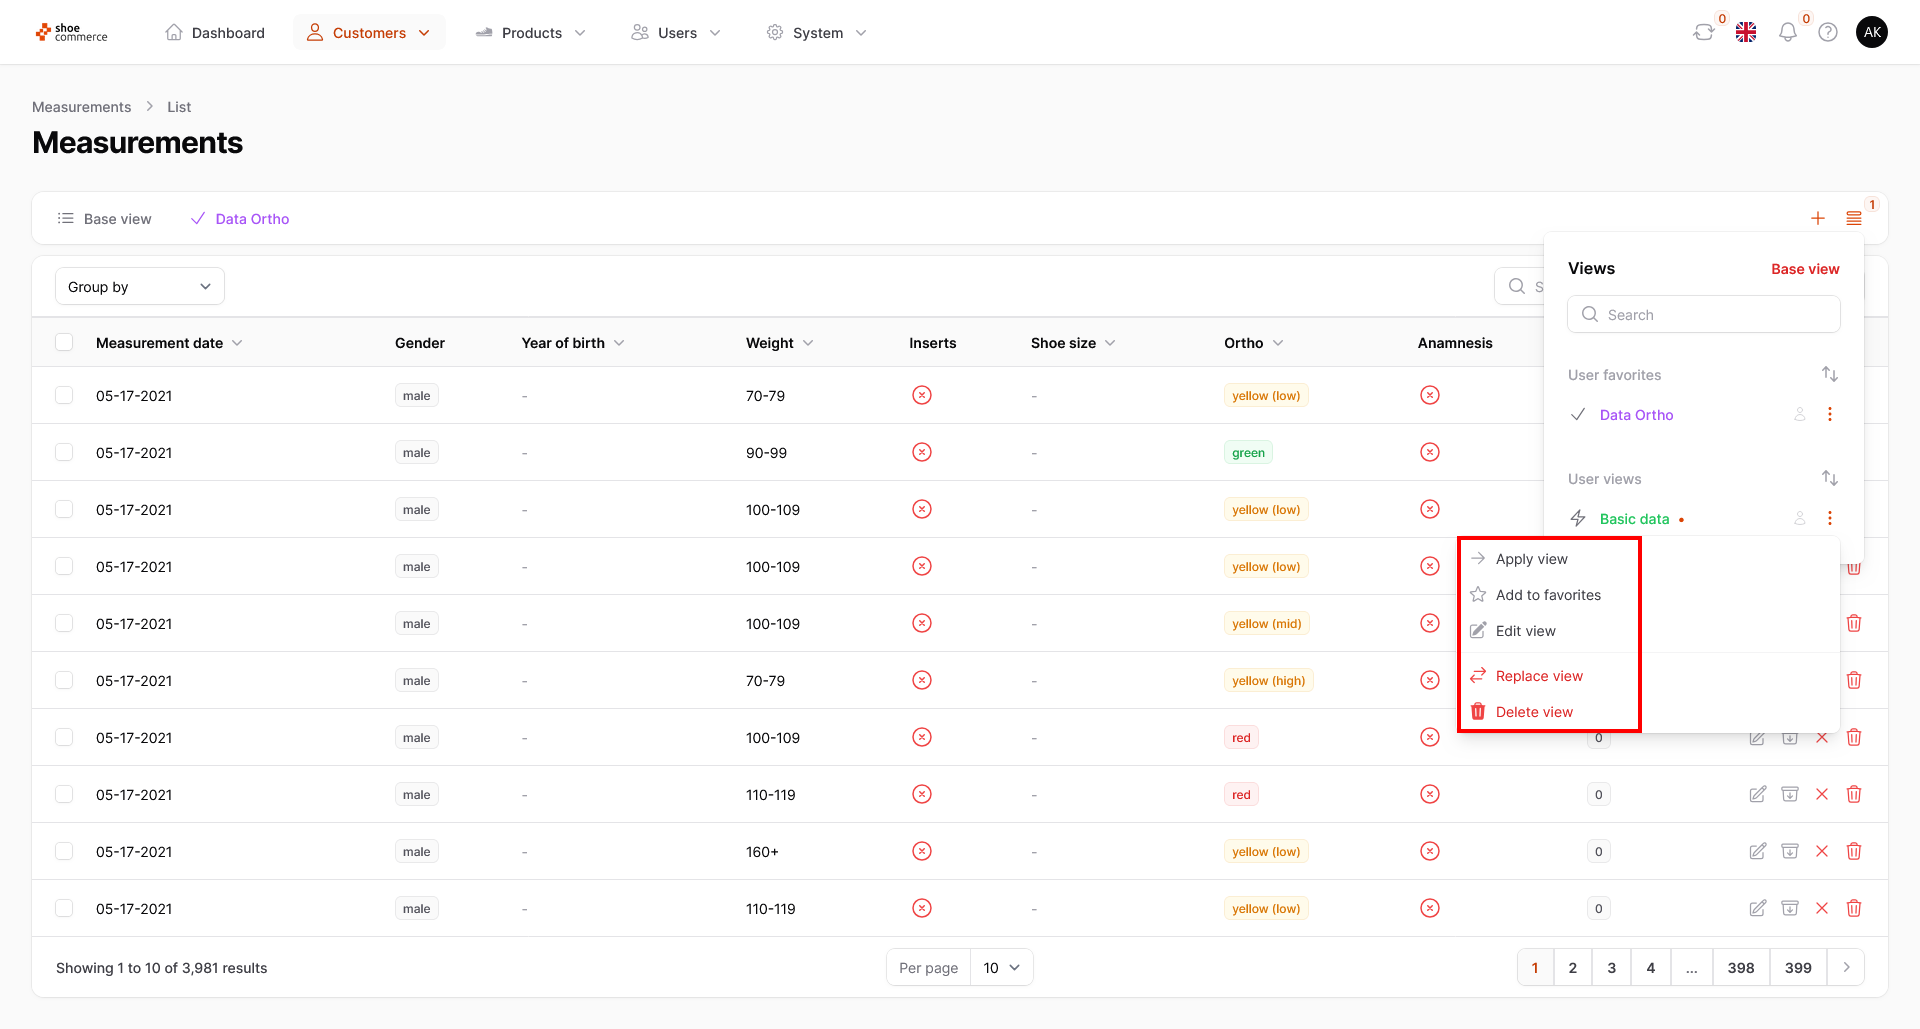
- Additional functions for the particular view can be accessed by clicking on the three stacked dots. These are:
- Apply view: Click on this to switch to the selected view. However, it is also possible to switch to a view by simply clicking with the left mouse button on the name of it. This function is only offered as an additional option.
- Add to favorites: As explained in step 5, this gives you the option of displaying the view you have set up both at the top of the menu bar and on the Dashboard.
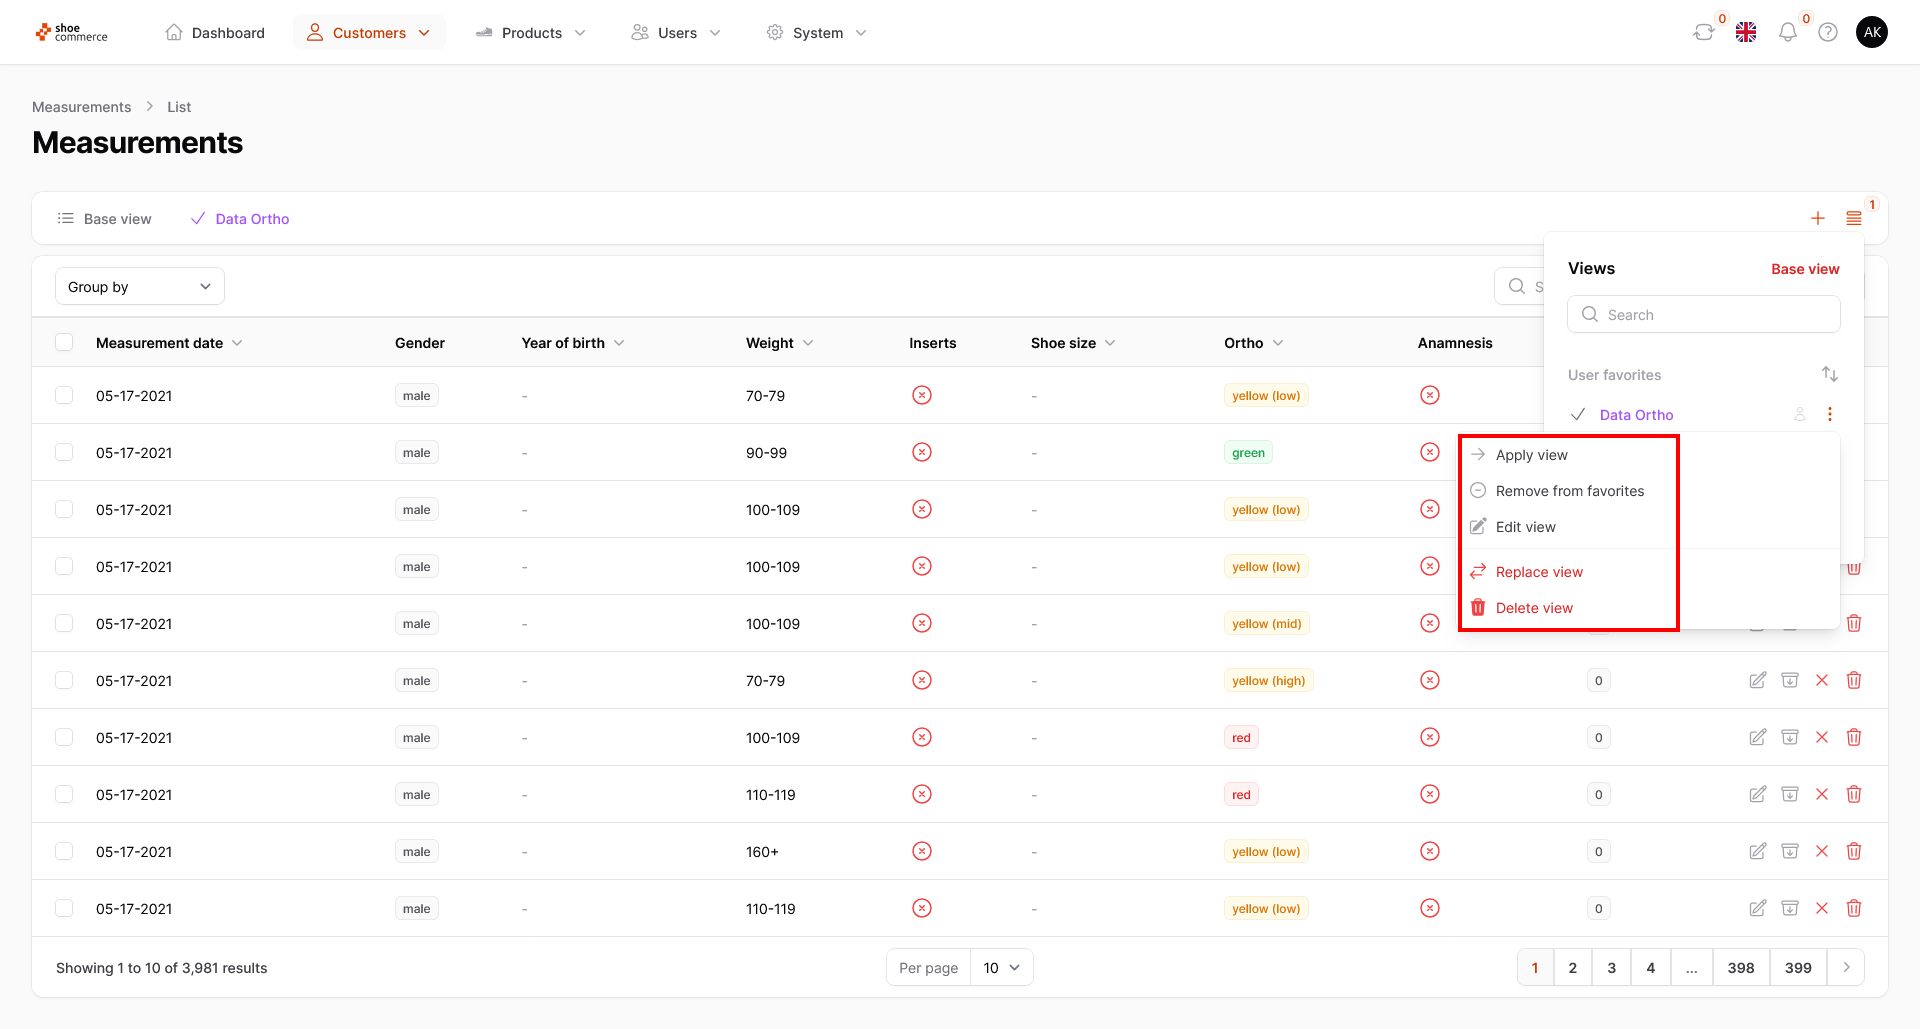
- Remove from favorites: This removes your view from the menu bar and the Dashboard, but does not delete it.
- Edit view: Clicking on this opens the menu of the selected view to change the name, icon and color afterwards. Please do not forget to confirm the changes by clicking on the “Save changes” button.
- Replace view: If you notice that a view you have already created does not include all the required columns or that the order is not correct, you can change this here. To do this, first select the view that you want to replace with other column settings. Make all the changes as required and then click on “Replace view”. You will then be asked again whether you really want to accept the current configuration and can confirm this by clicking on “Replace”.
- Delete view: This permanently deletes the selected view. For security reasons, you will be asked again whether you really want to complete the deletion.
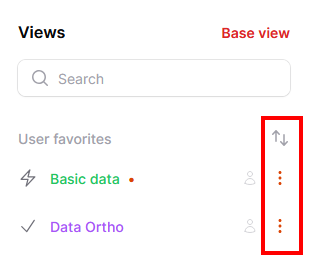
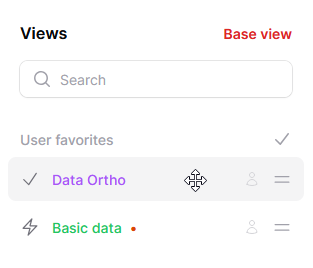
- Furthermore, you have the option to change the order of views. To do this, first click on the arrow icon next to the “User favorites” or “User views” category, whereupon the symbols change.
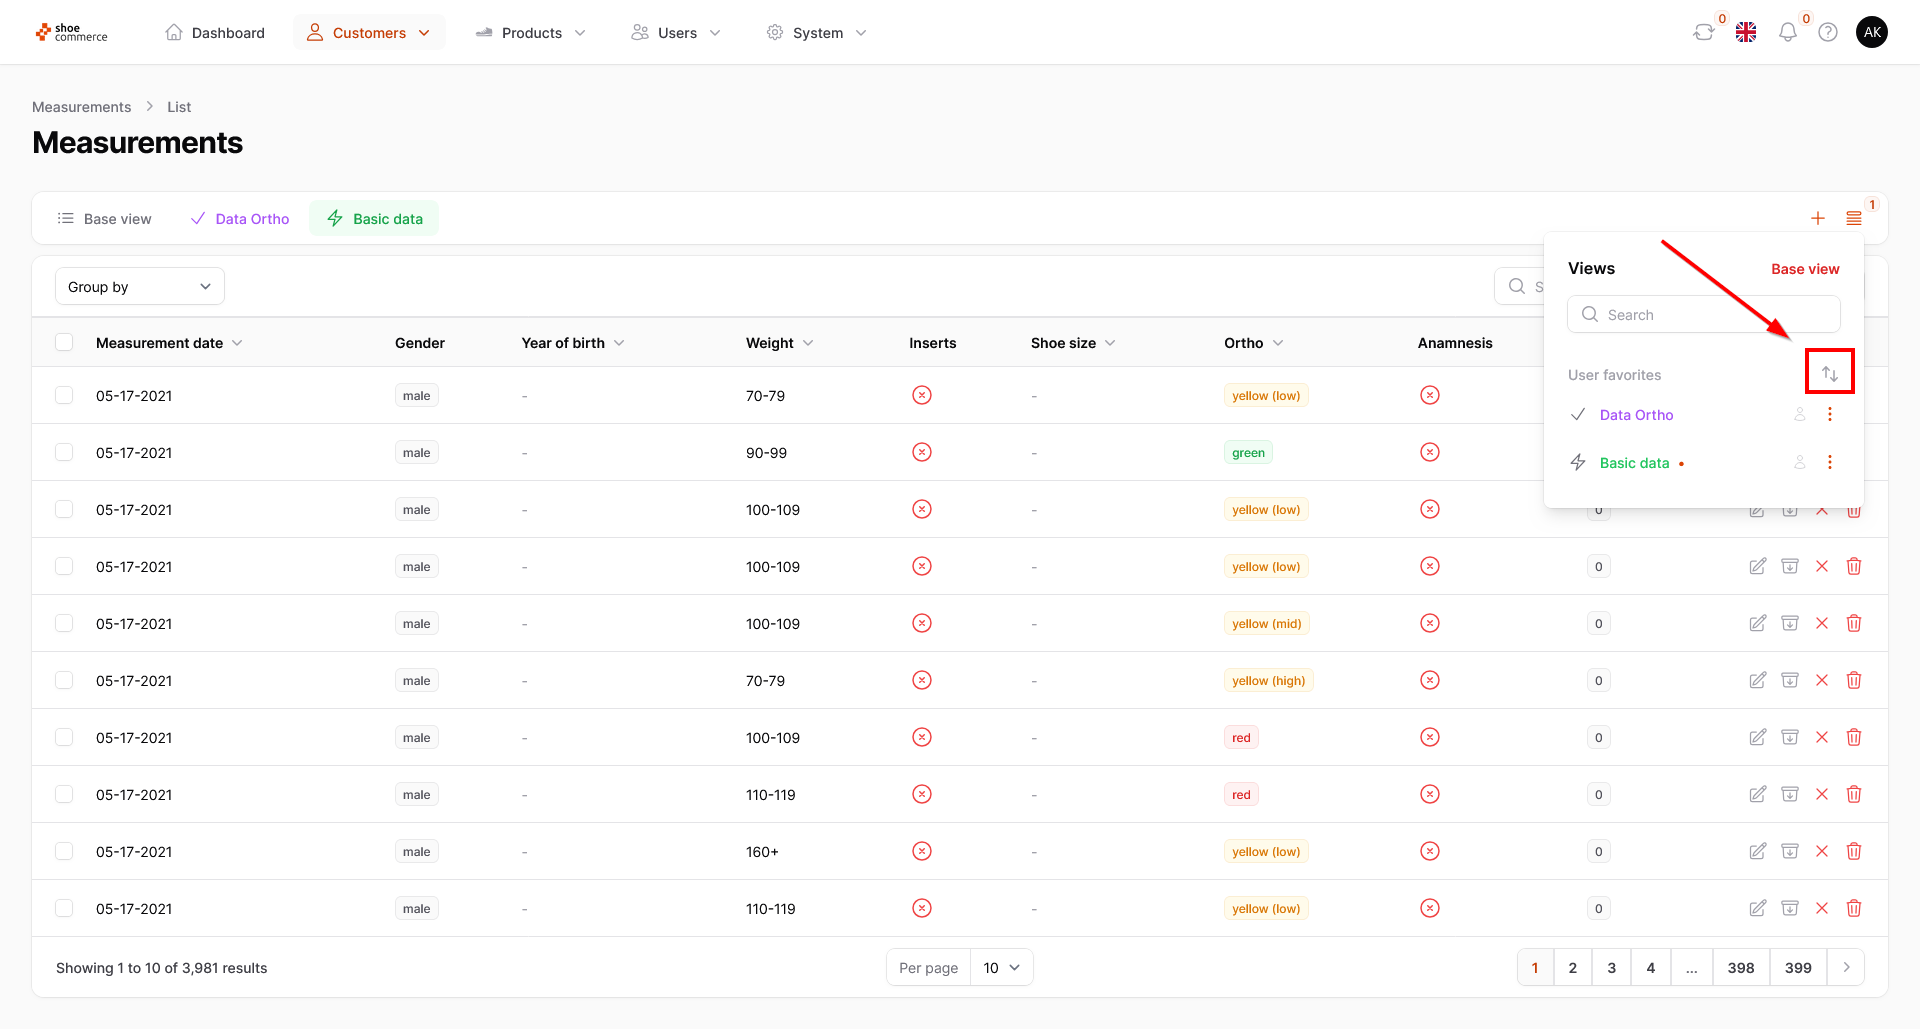
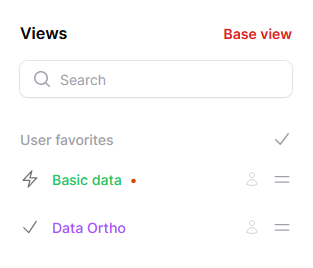
- In this example, we would like to move the “Data Ortho” view to the second position respectively move it to the right at the top of the menu bar. To do this, first move the mouse over the “Data Ortho” text displayed in the opened menu. The cursor now changes to another symbol with four arrows. Now hold down the left mouse button and drag the column to the corresponding position. In the backend, you can see directly that the view is now also in the intended position.
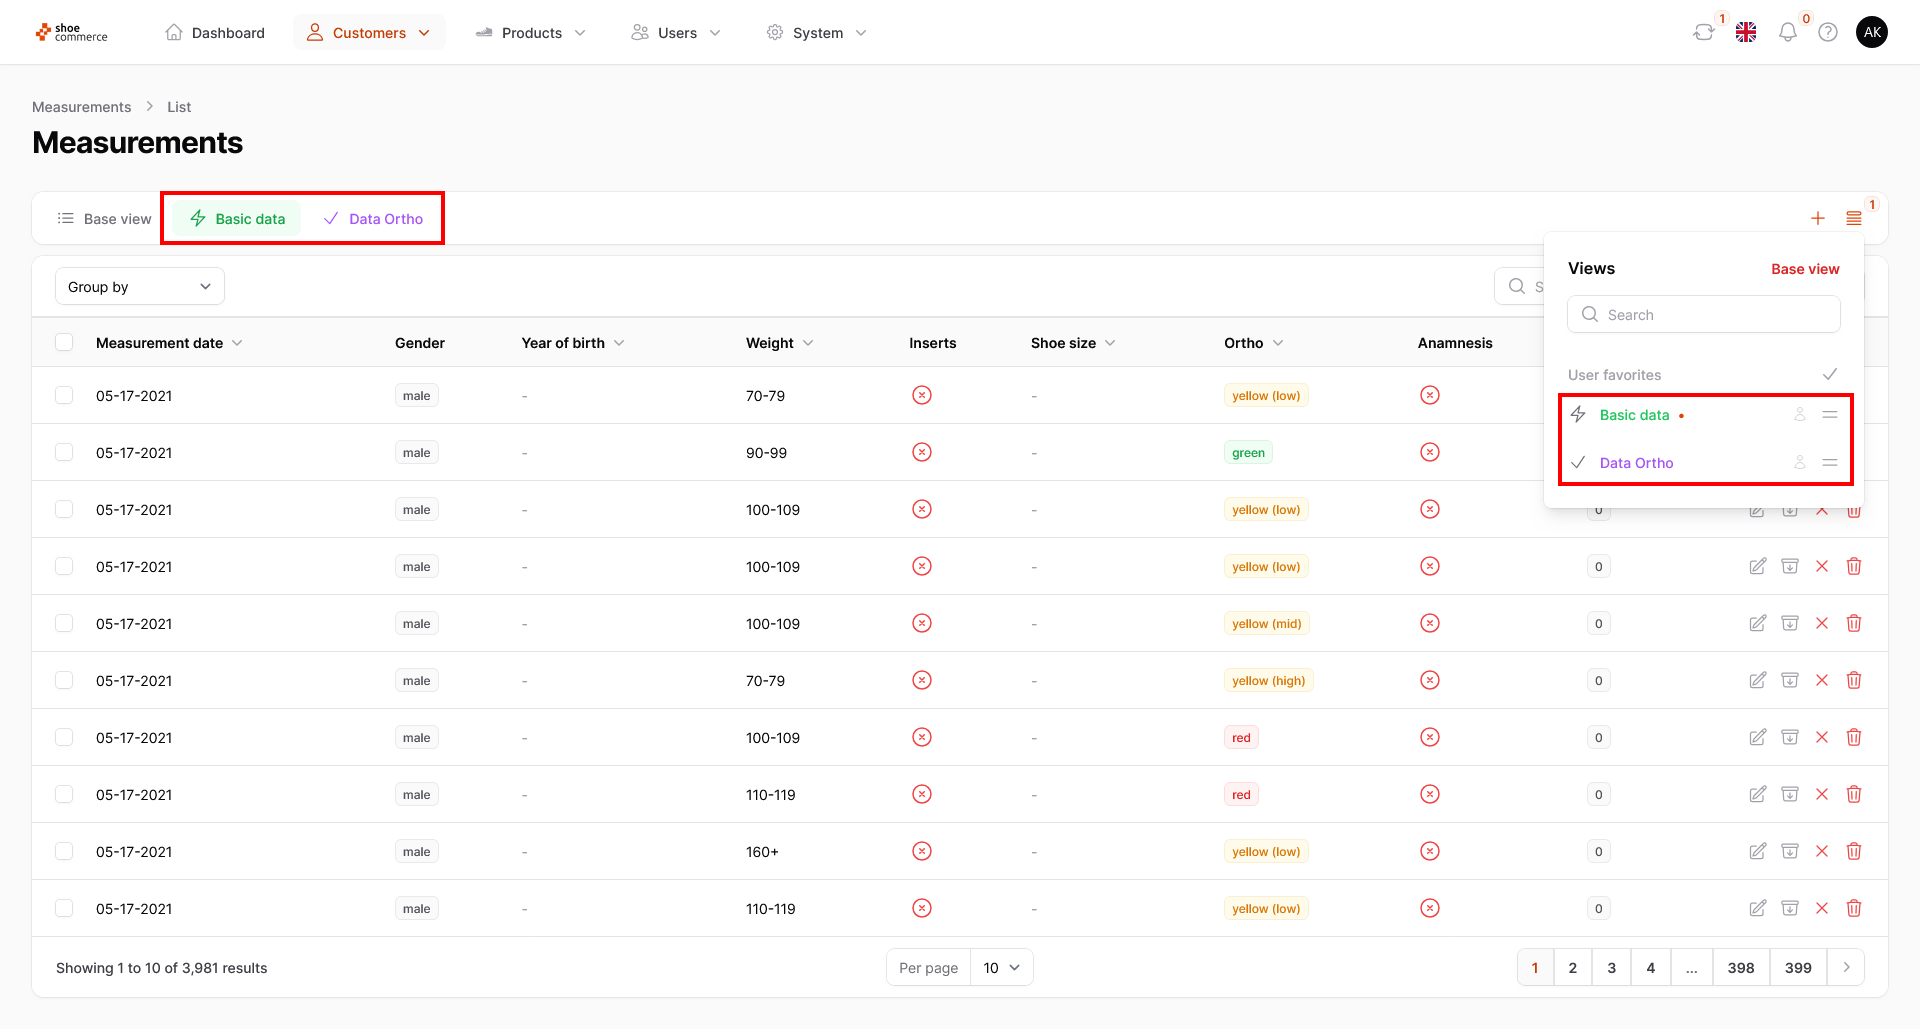
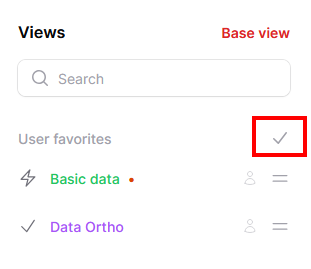
Click on the gray tick to return to the original menu structure.