Table of Contents
- Optimization of User Guidance and Usability
- Optimized User Selection
- New Login Method "Company/Name/Email"
- Optimized Date of Birth Entry
- Warning for Differences in Foot Length
- Optimized Product Selection with New Filter Feature
- Print or Save the Order Form
- Send the Order Form Directly by Email
- Open Debug Mode Directly from the Backend
- Merge Duplicate Accounts
Release 3.1.2639
 Updated
by Andreas Knaupp
Updated
by Andreas Knaupp
- Optimization of User Guidance and Usability
- Optimized User Selection
- New Login Method "Company/Name/Email"
- Optimized Date of Birth Entry
- Warning for Differences in Foot Length
- Optimized Product Selection with New Filter Feature
- Print or Save the Order Form
- Send the Order Form Directly by Email
- Open Debug Mode Directly from the Backend
- Merge Duplicate Accounts
Optimization of User Guidance and Usability
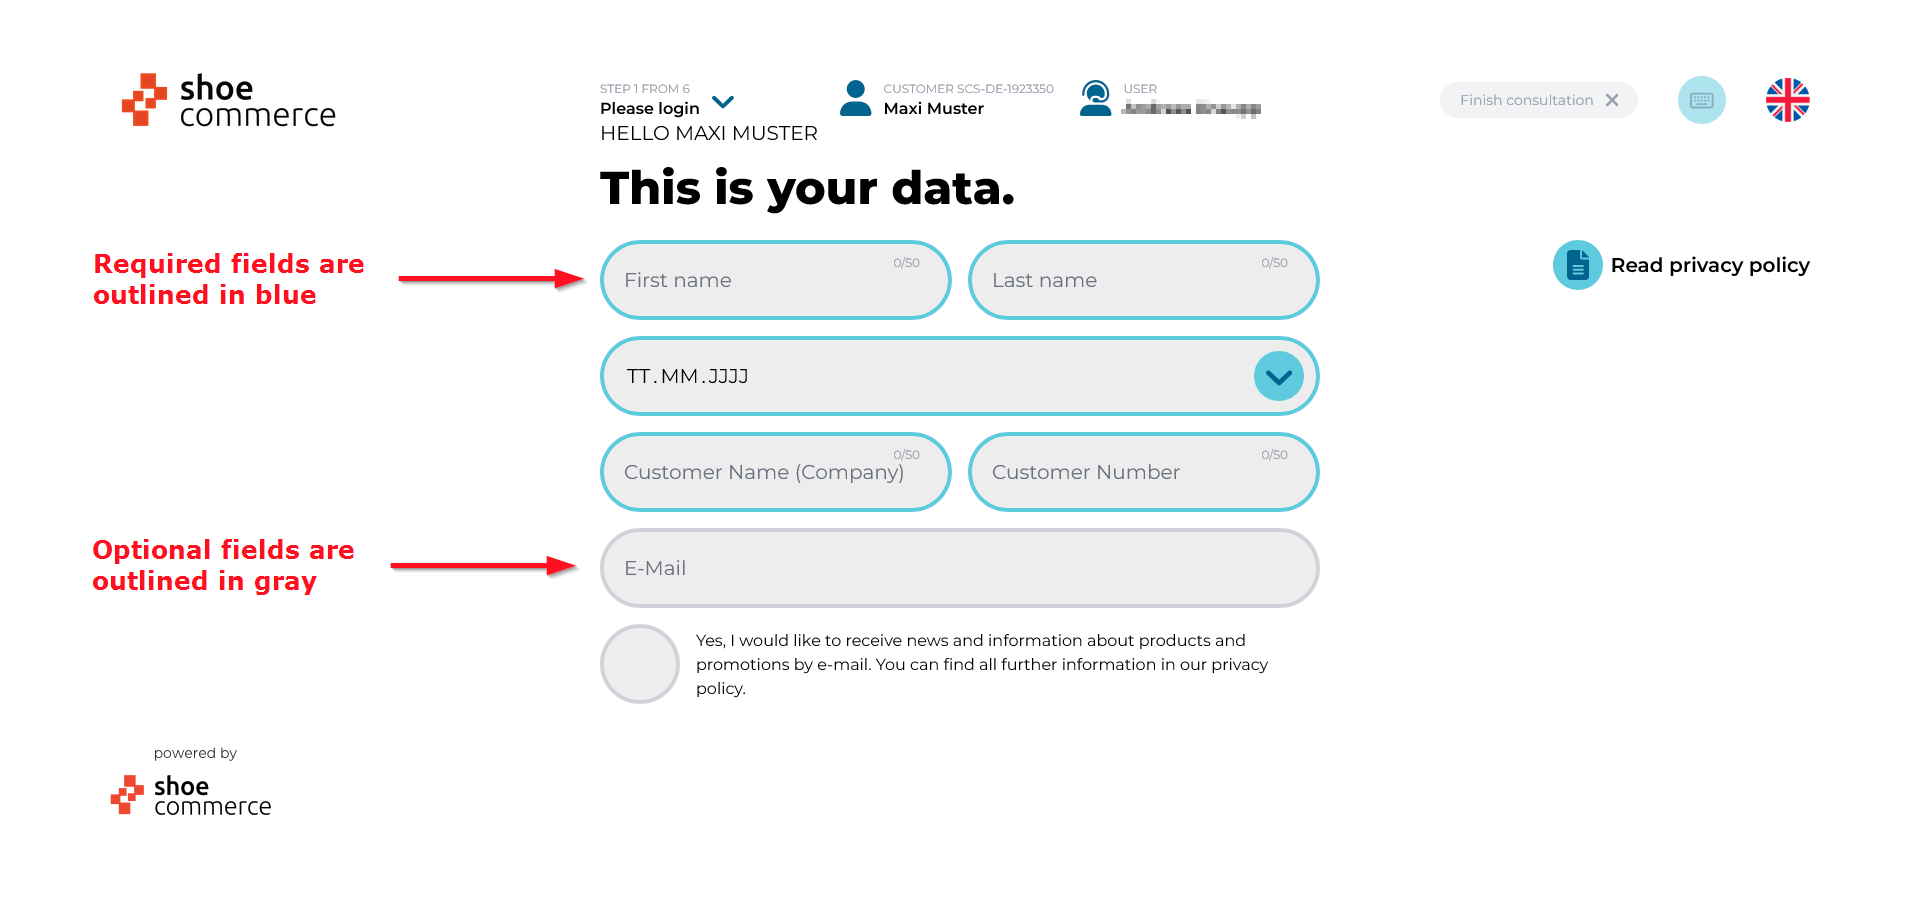
The marking of required and optional fields has been thoroughly optimized.
- Required fields are now highlighted with a blue border.
- All other optional fields are marked with a gray border.
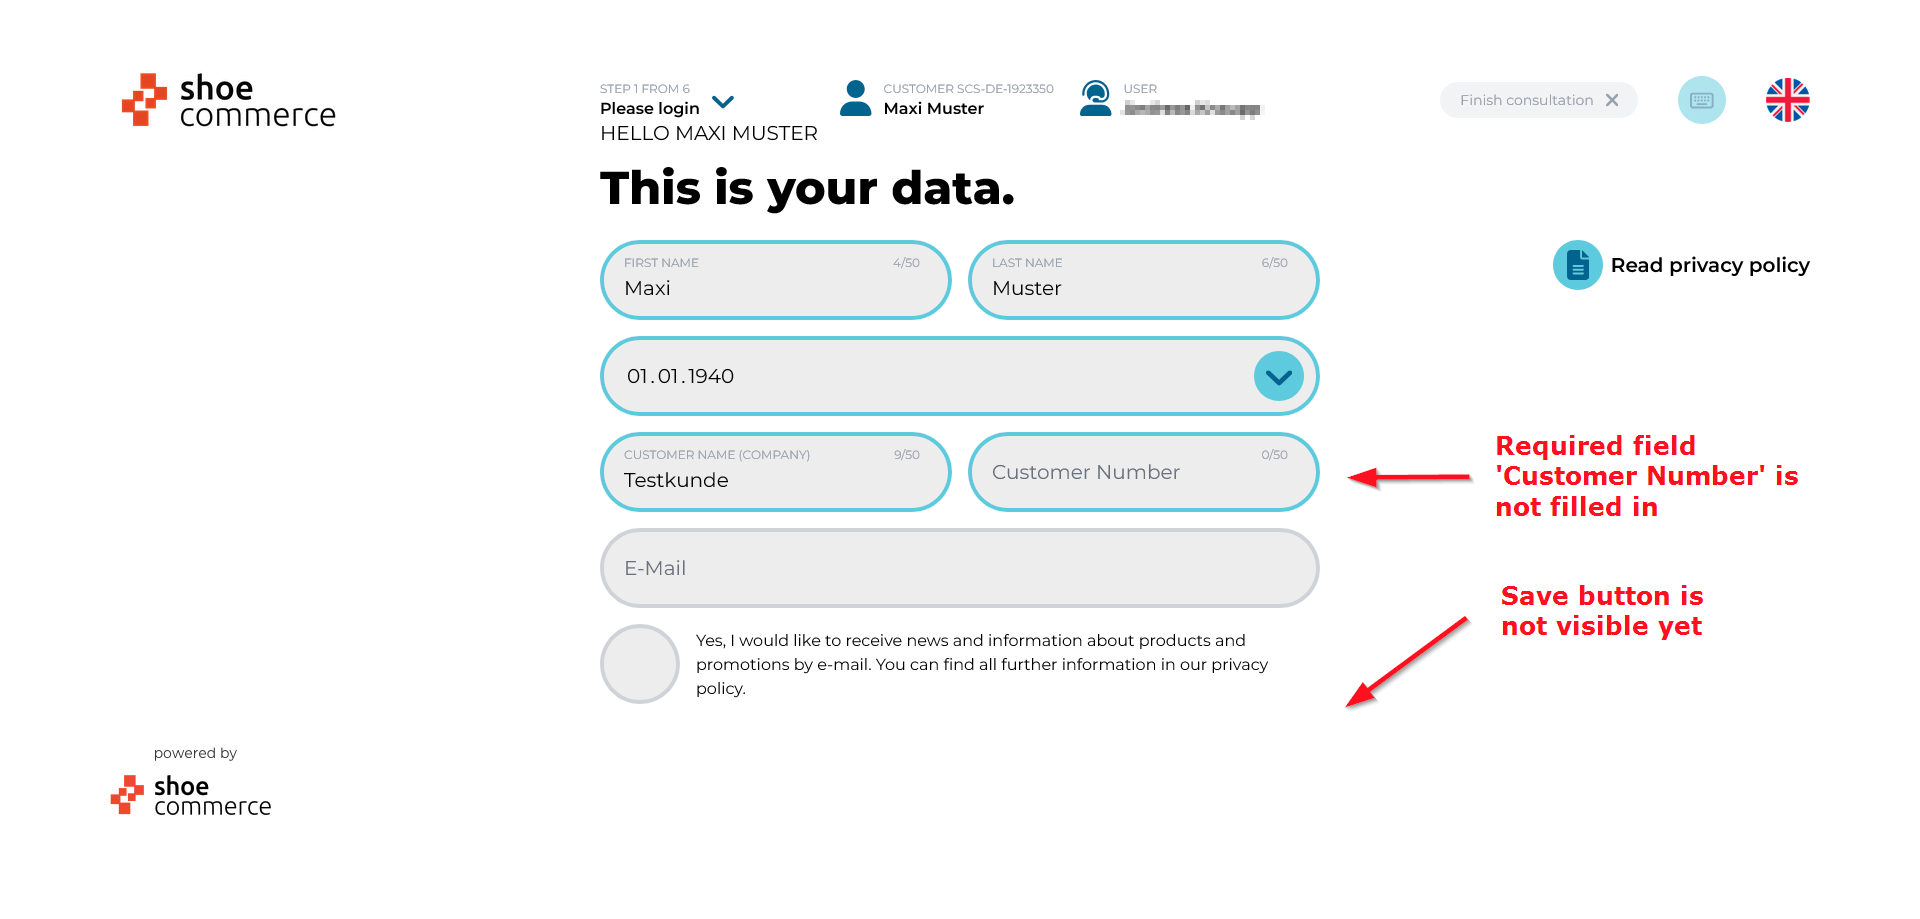
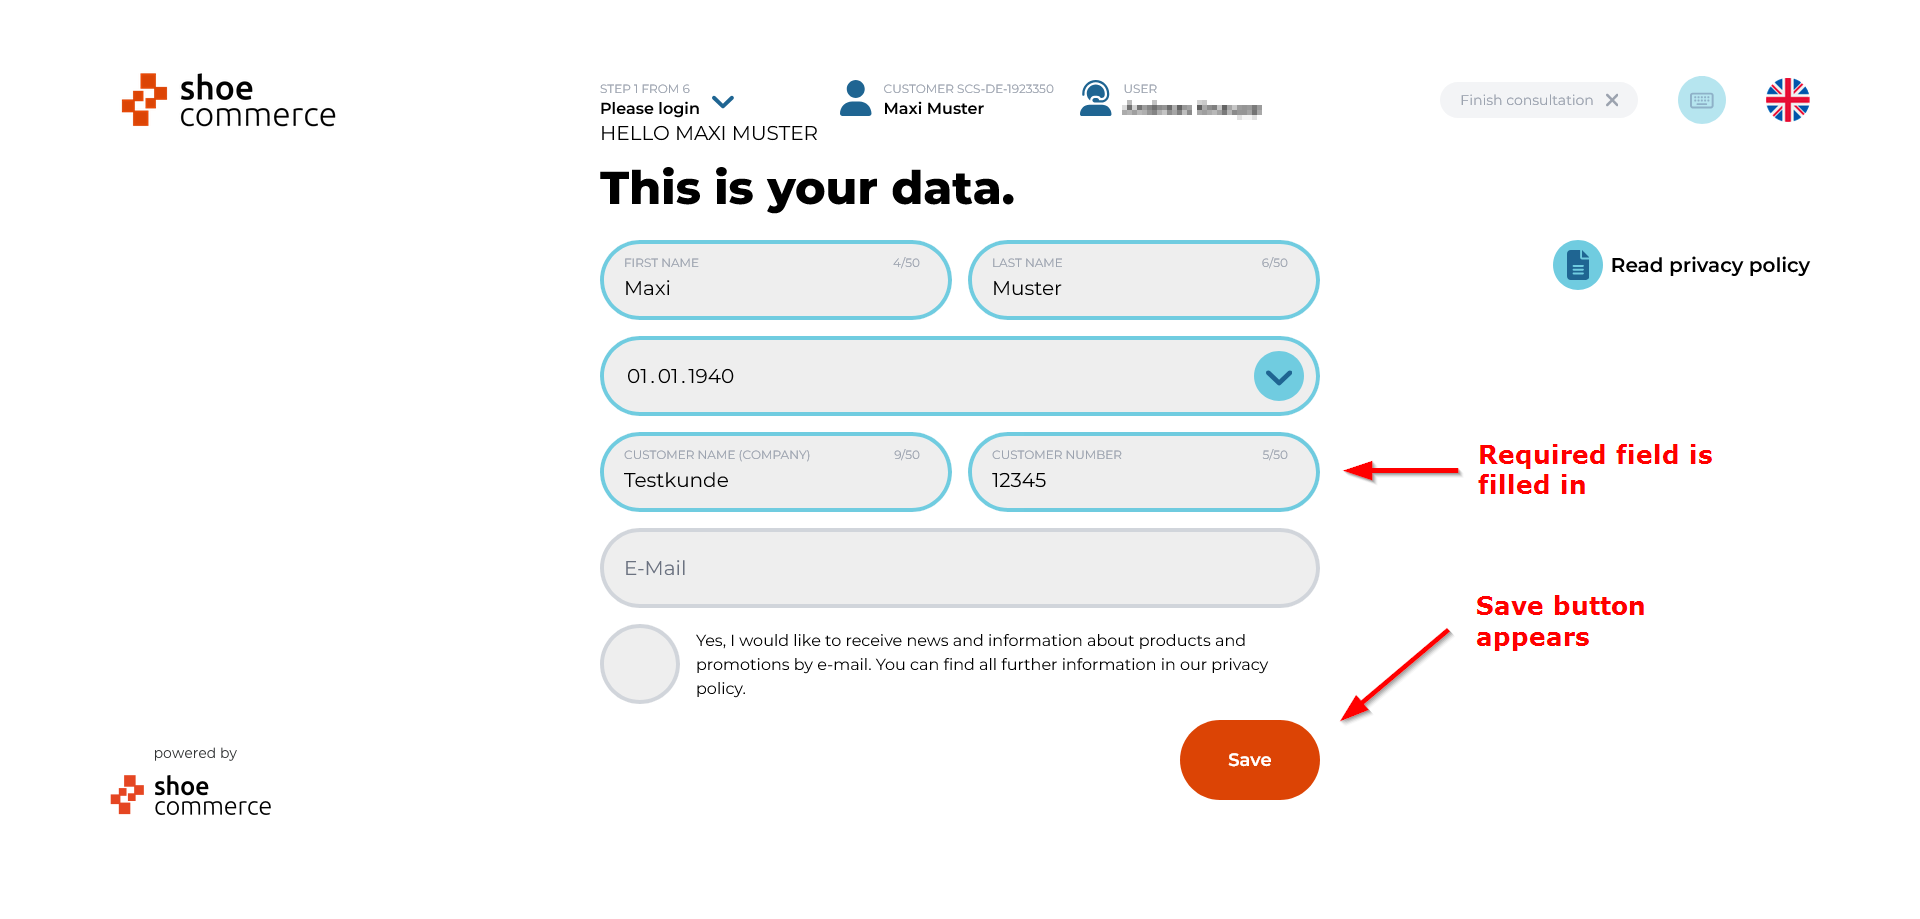
The orange 'Save' button (or the button to proceed to the next step) only appears at the bottom once all required fields are filled out.
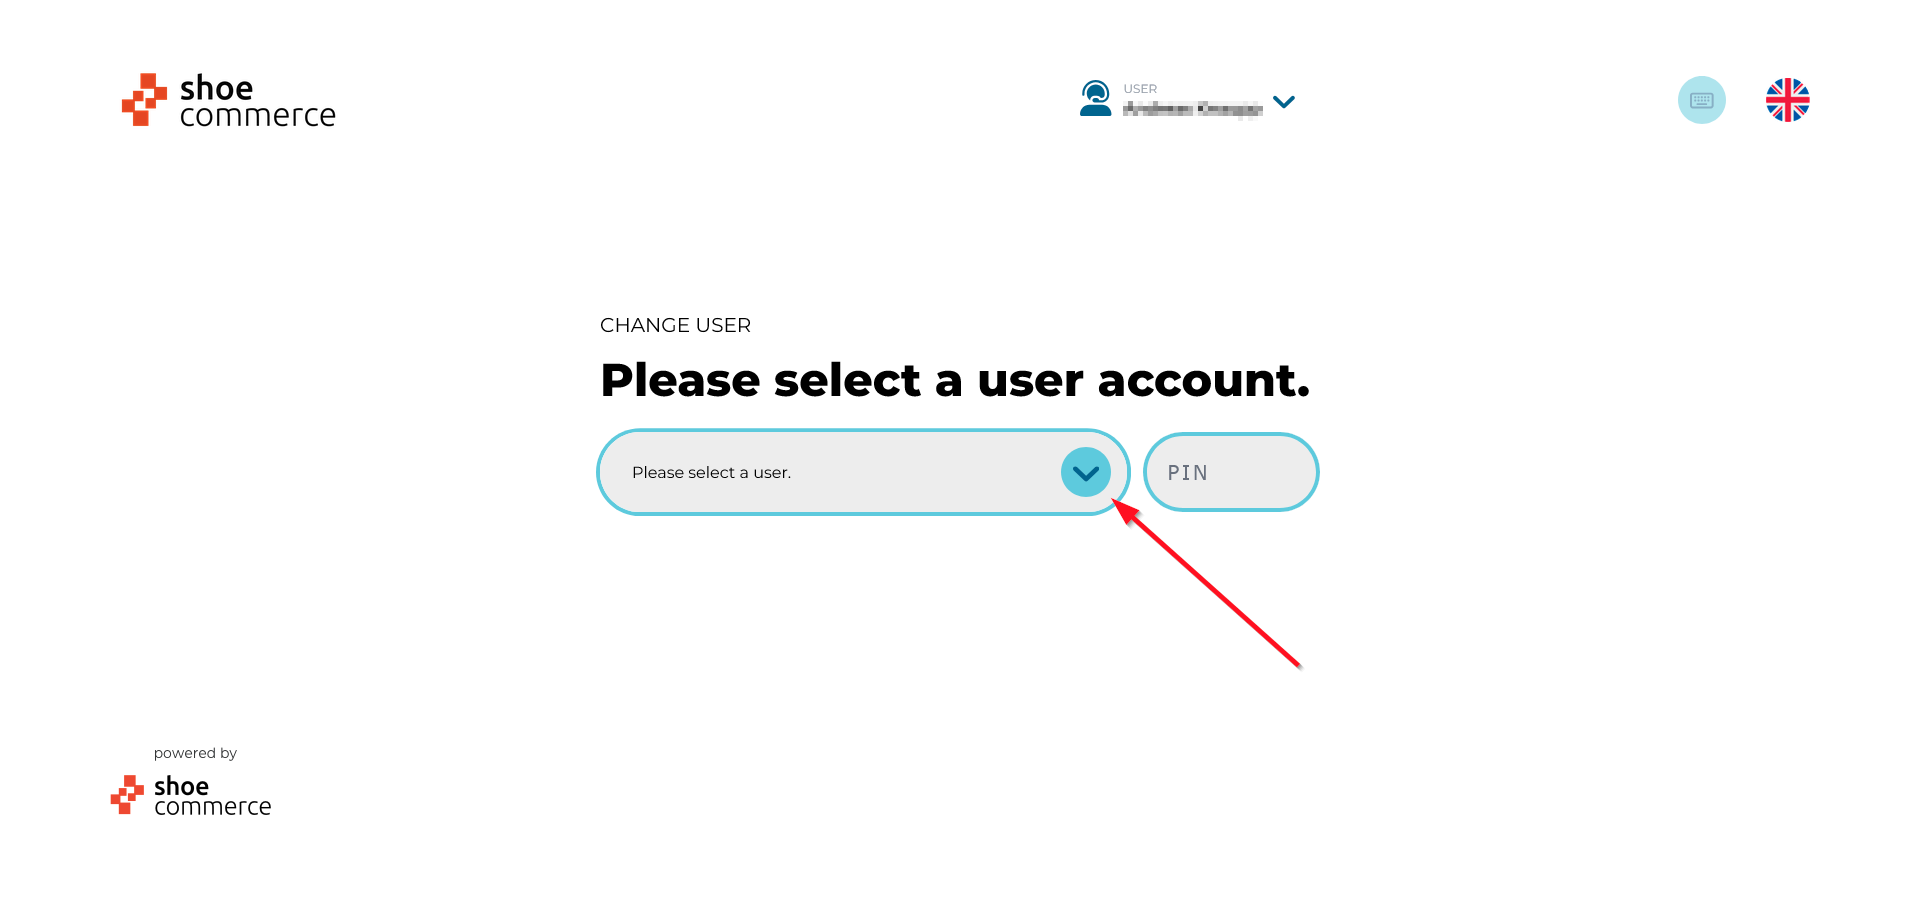
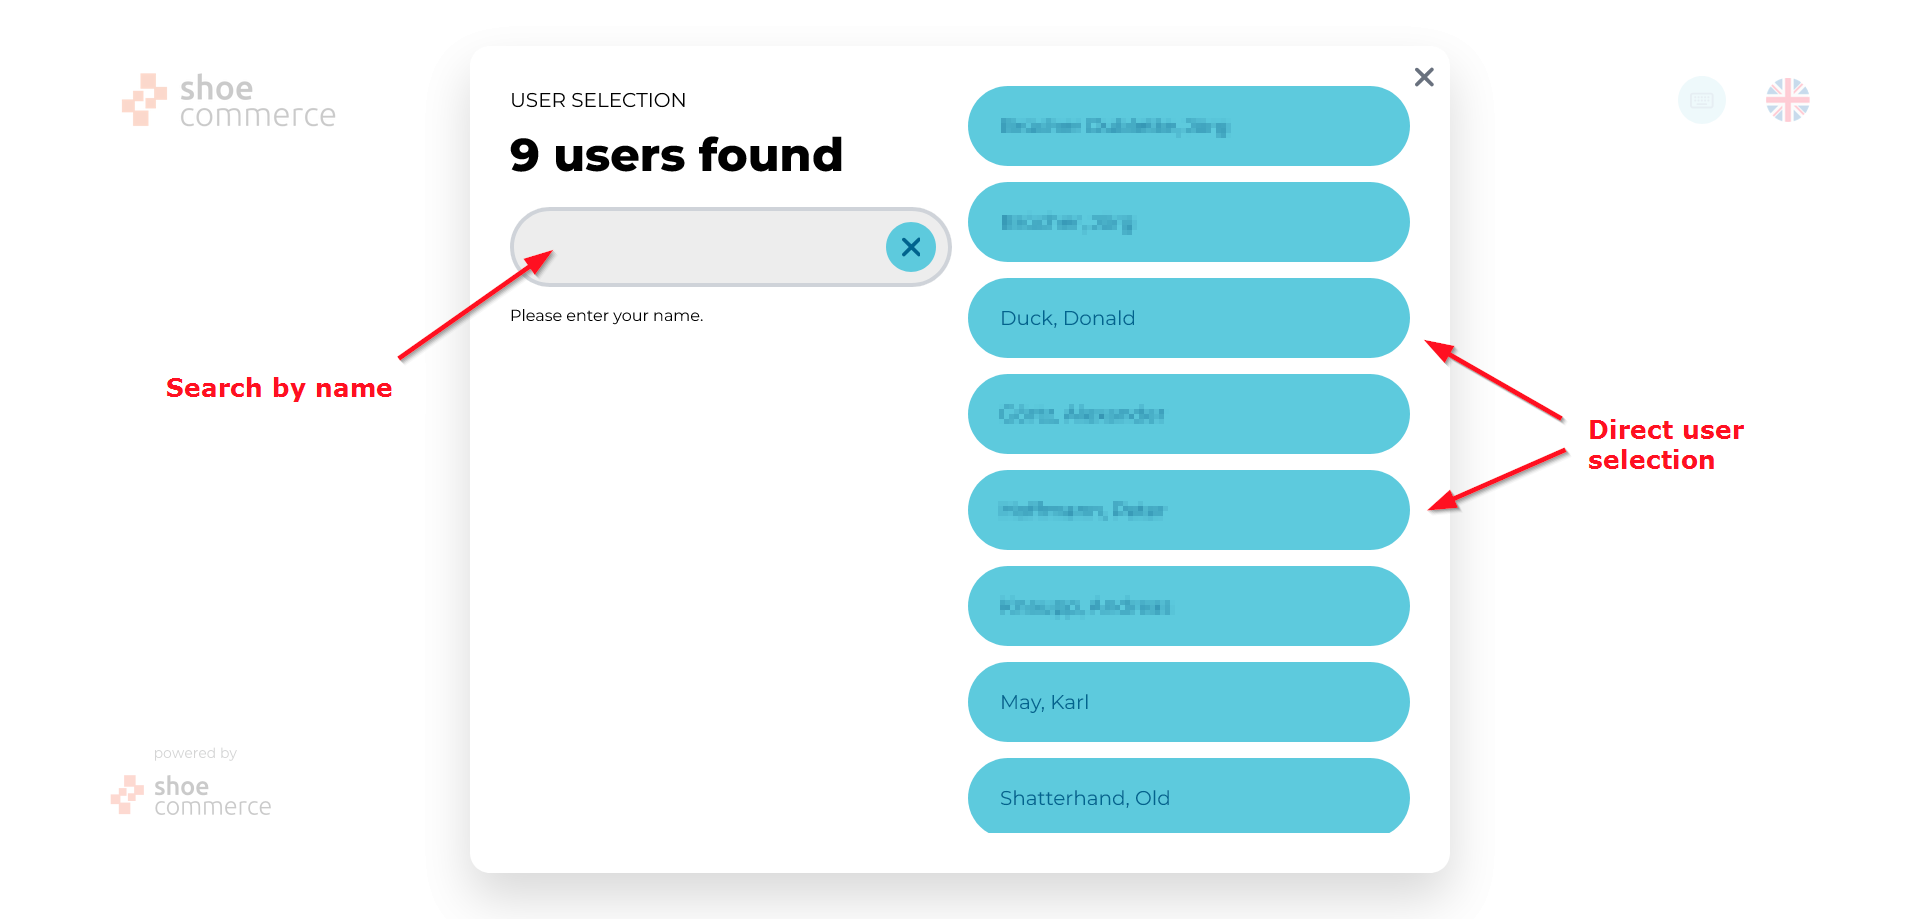
Optimized User Selection
Selecting a user from a large list when logging into an account is now significantly more convenient. Additionally, a name search field has been integrated.
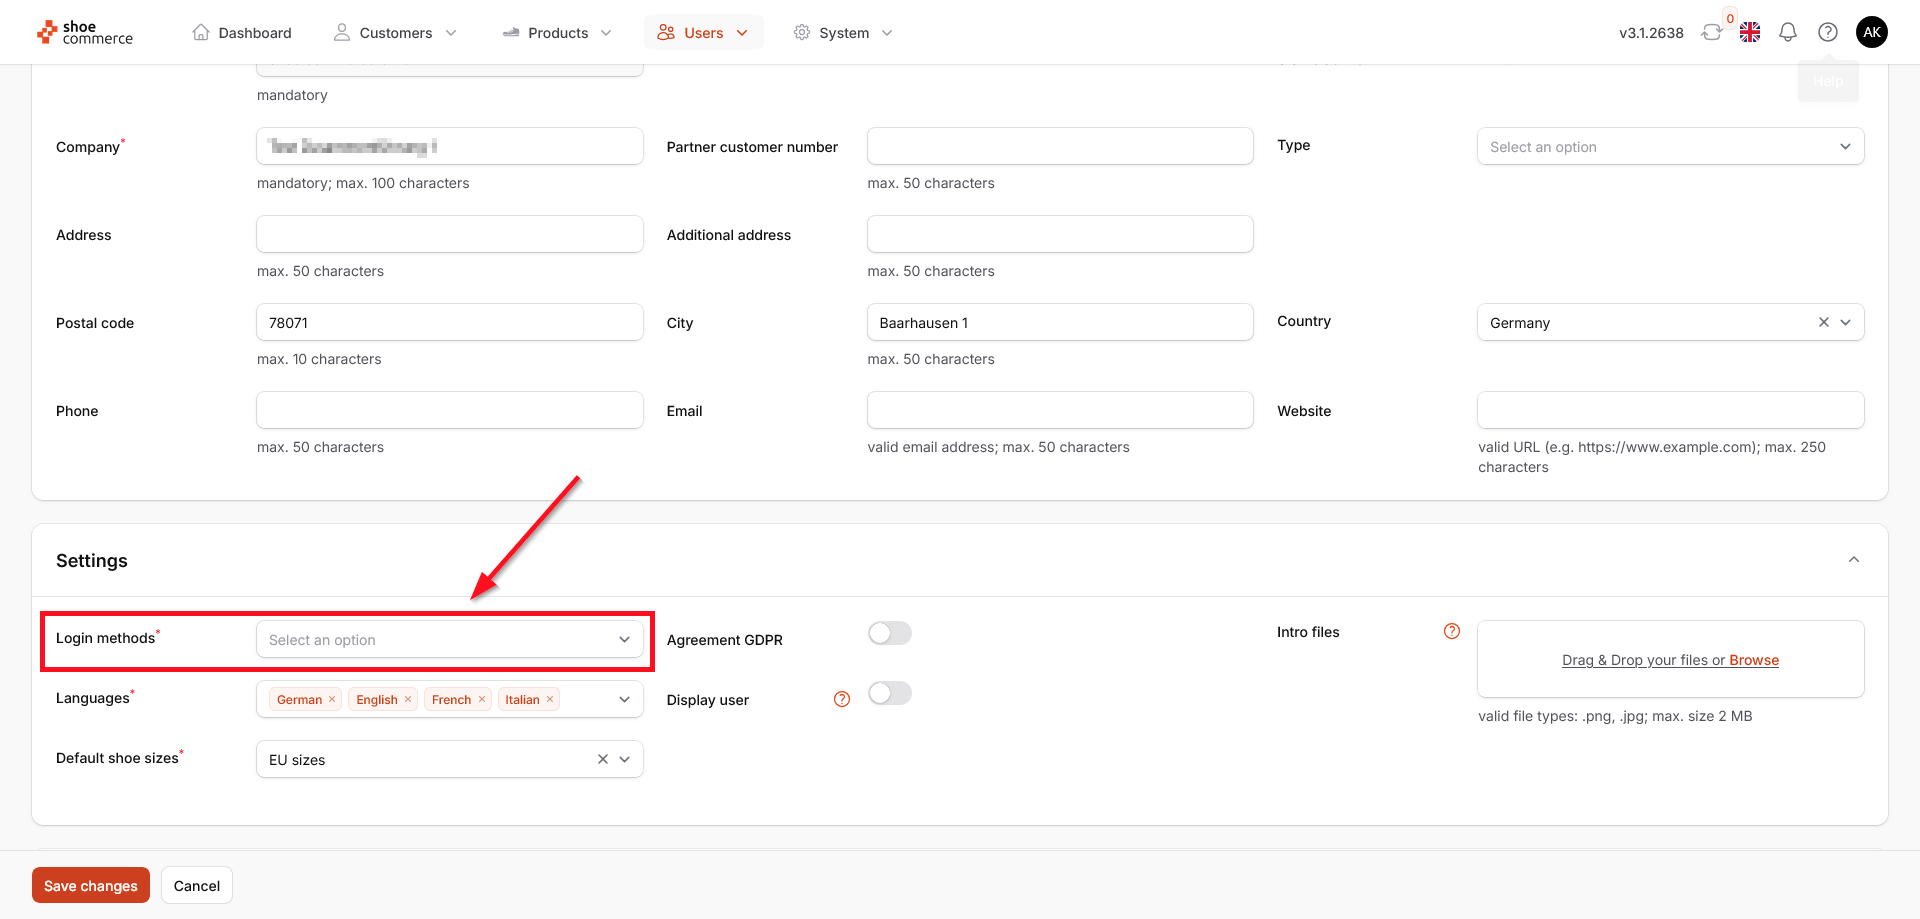
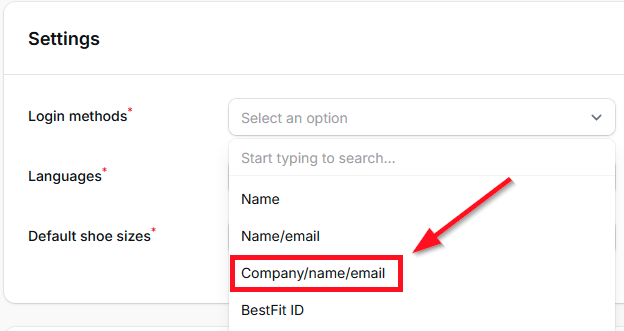
New Login Method "Company/Name/Email"
You can now set the new login method "Company/name/email" in the account settings. This is especially useful for accounts (stores, branches) that serve customers from different companies.
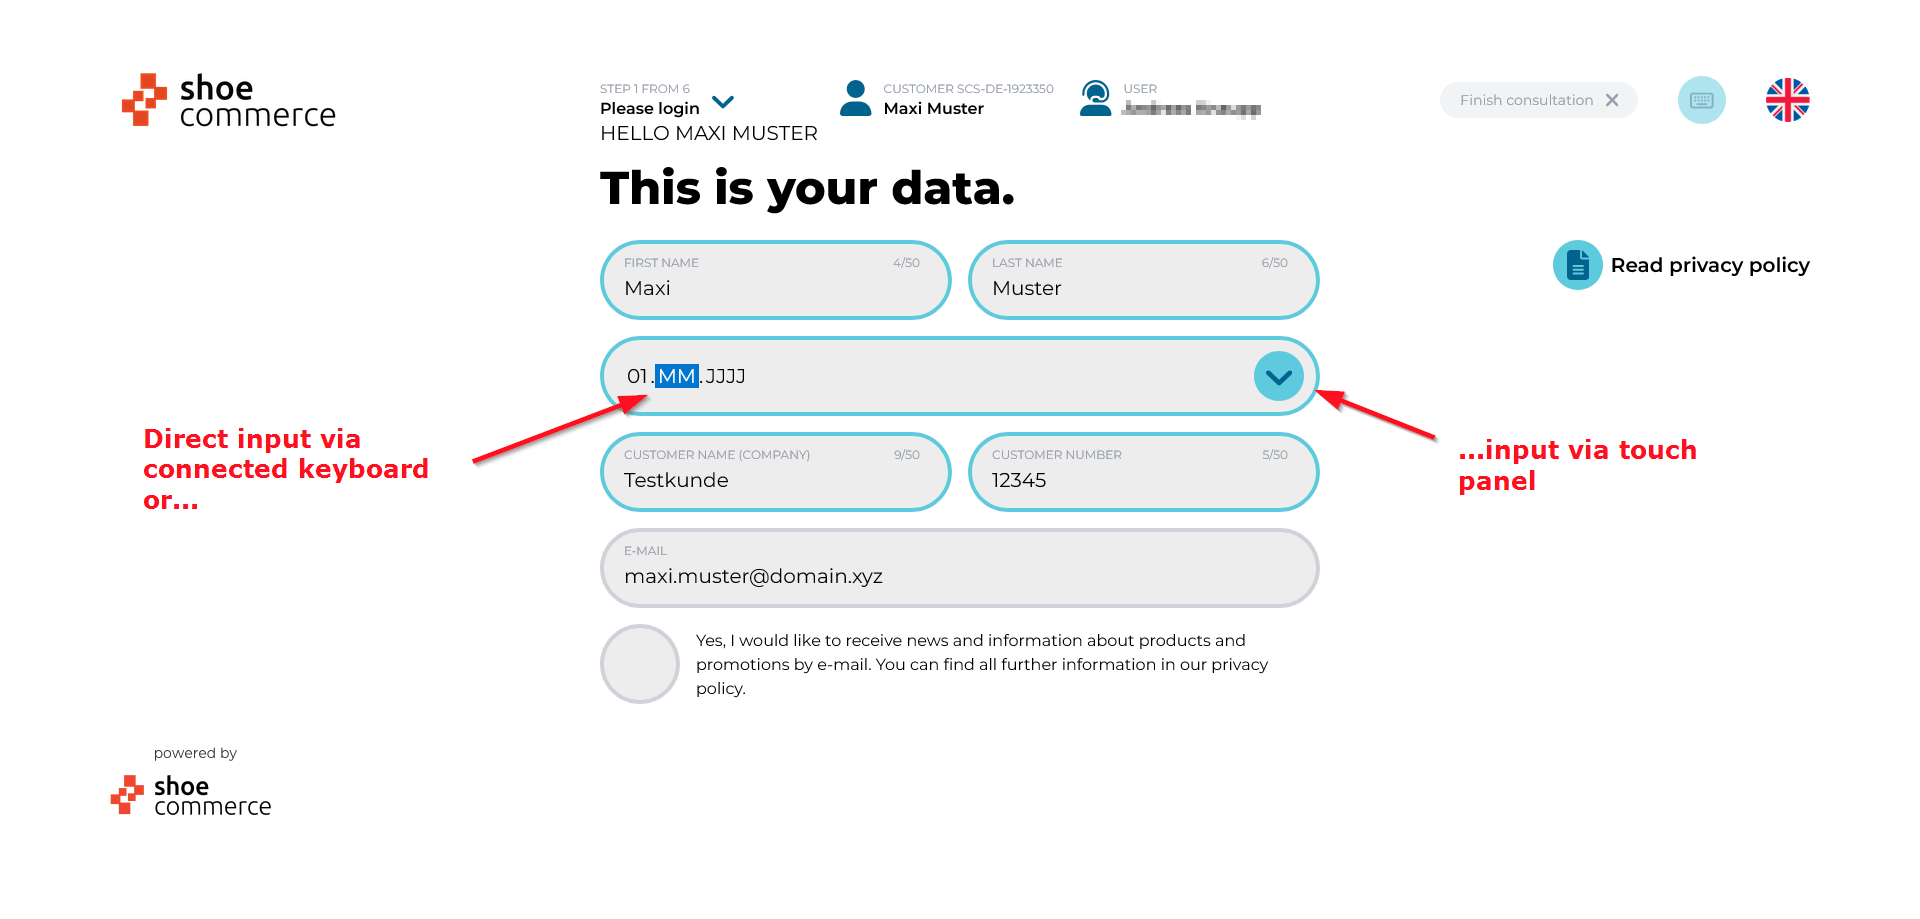
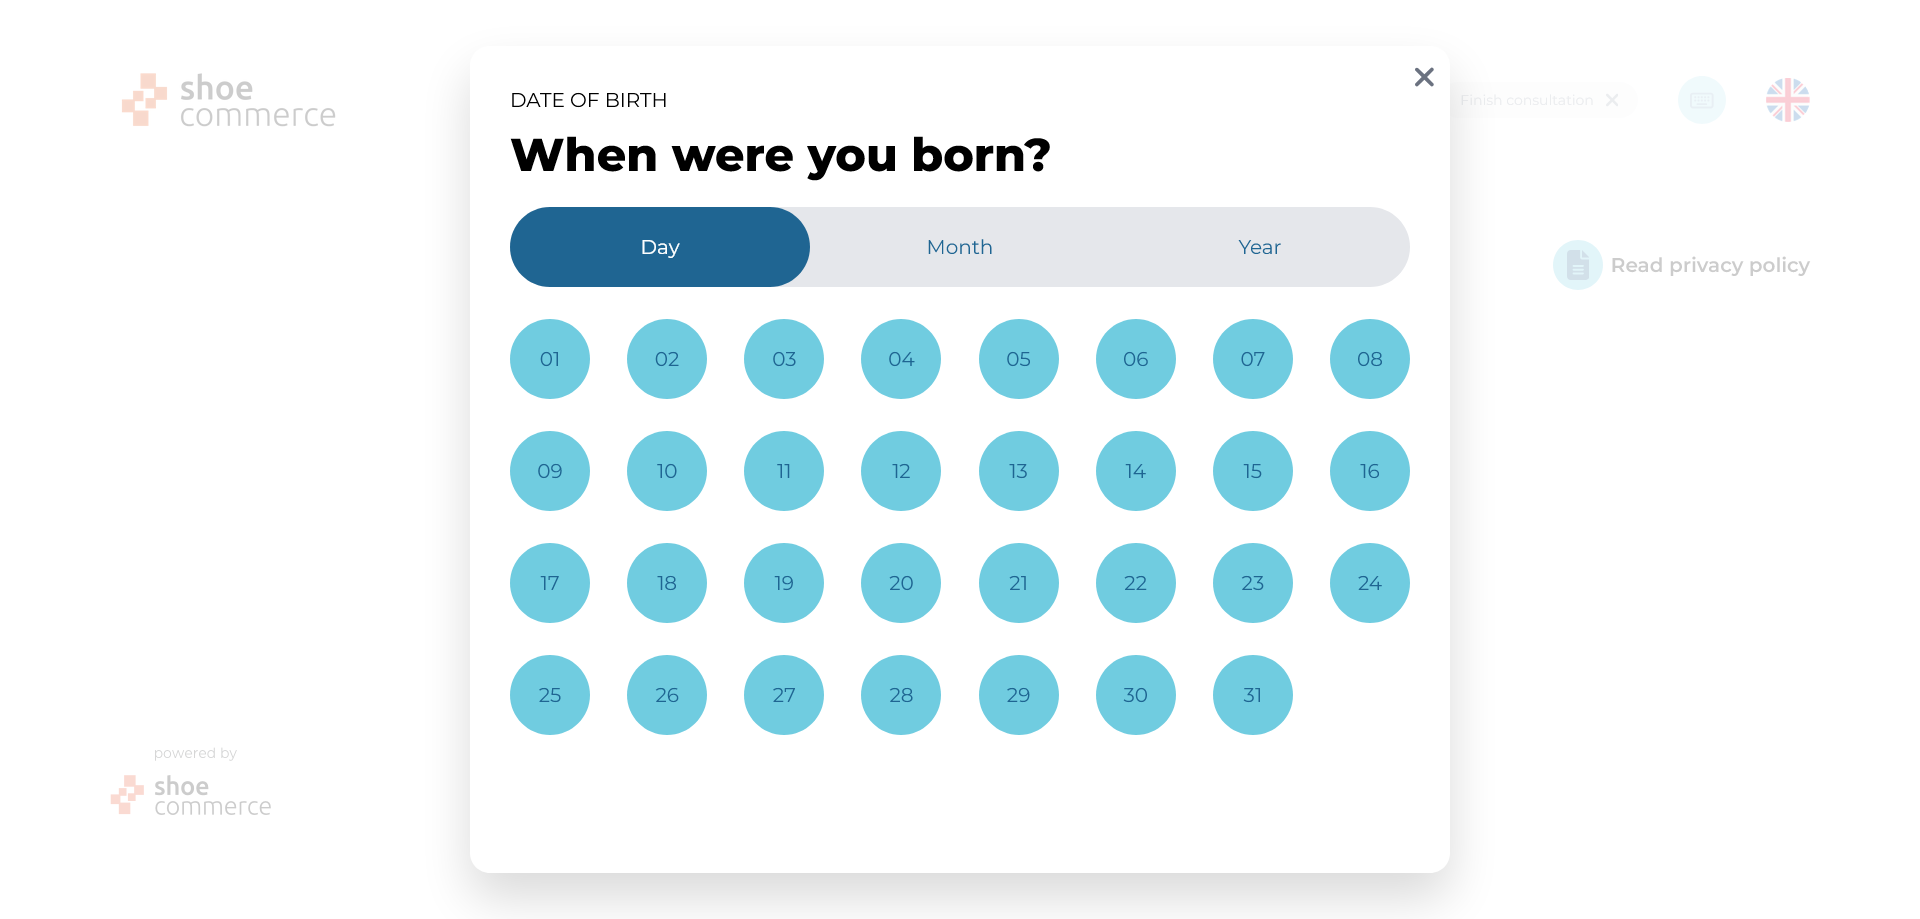
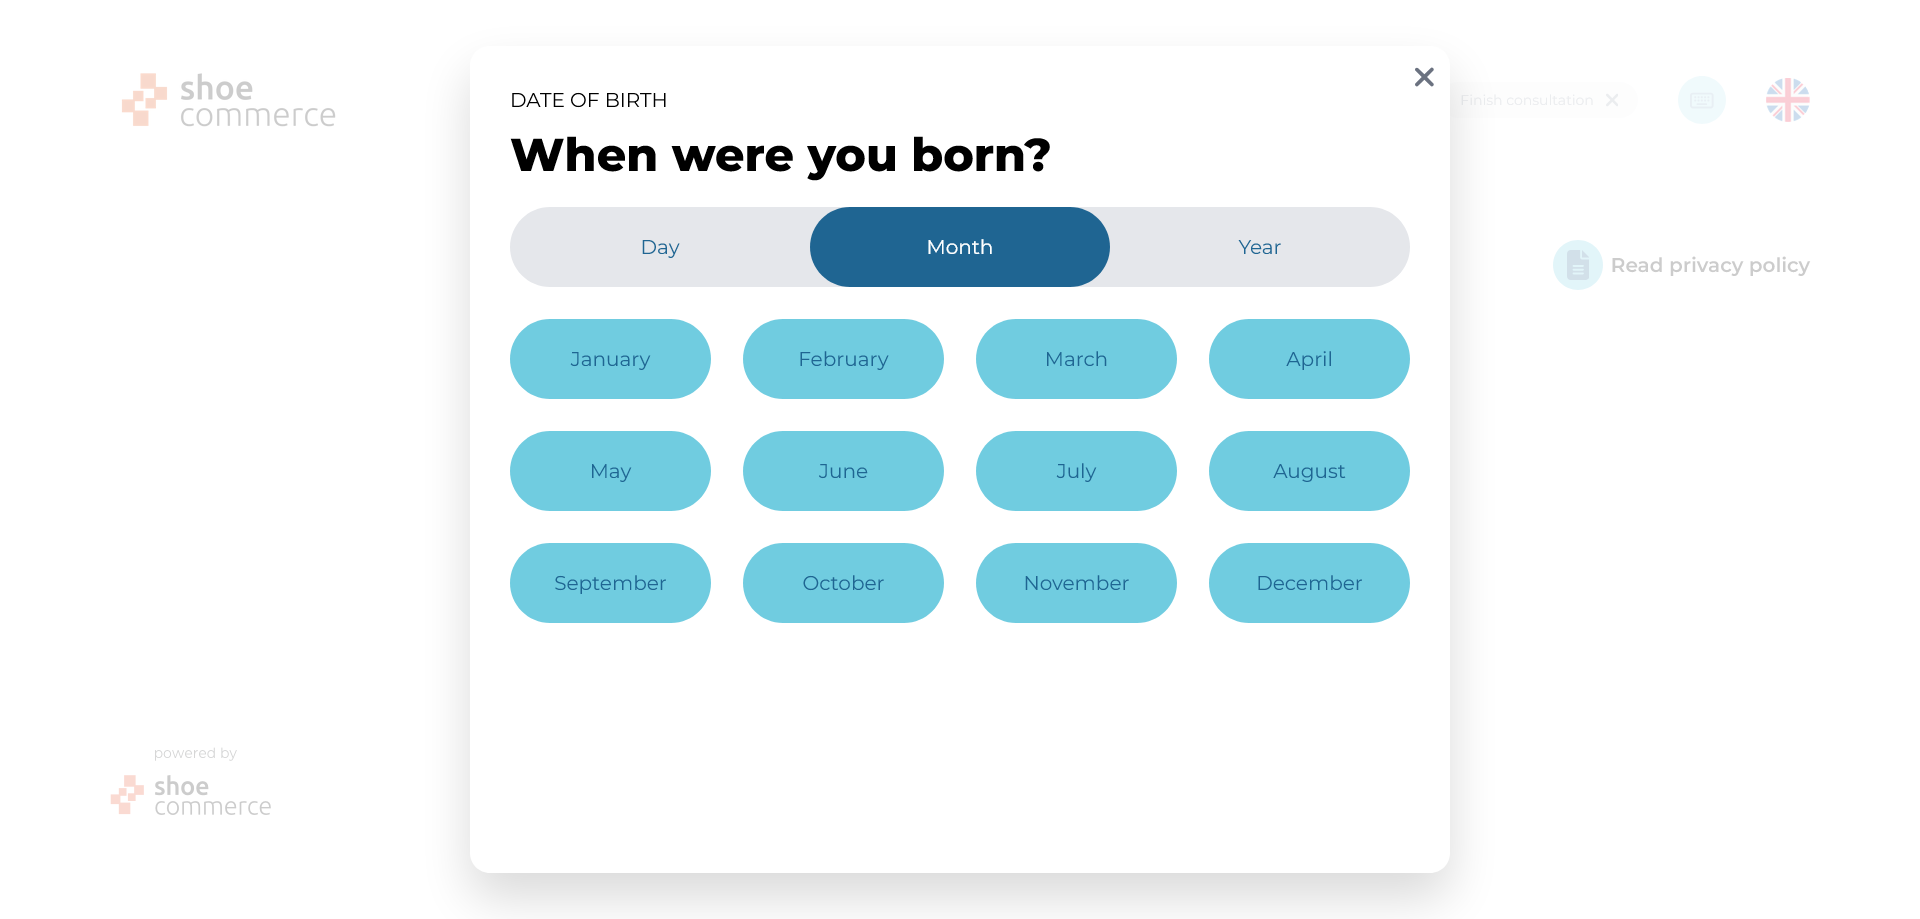
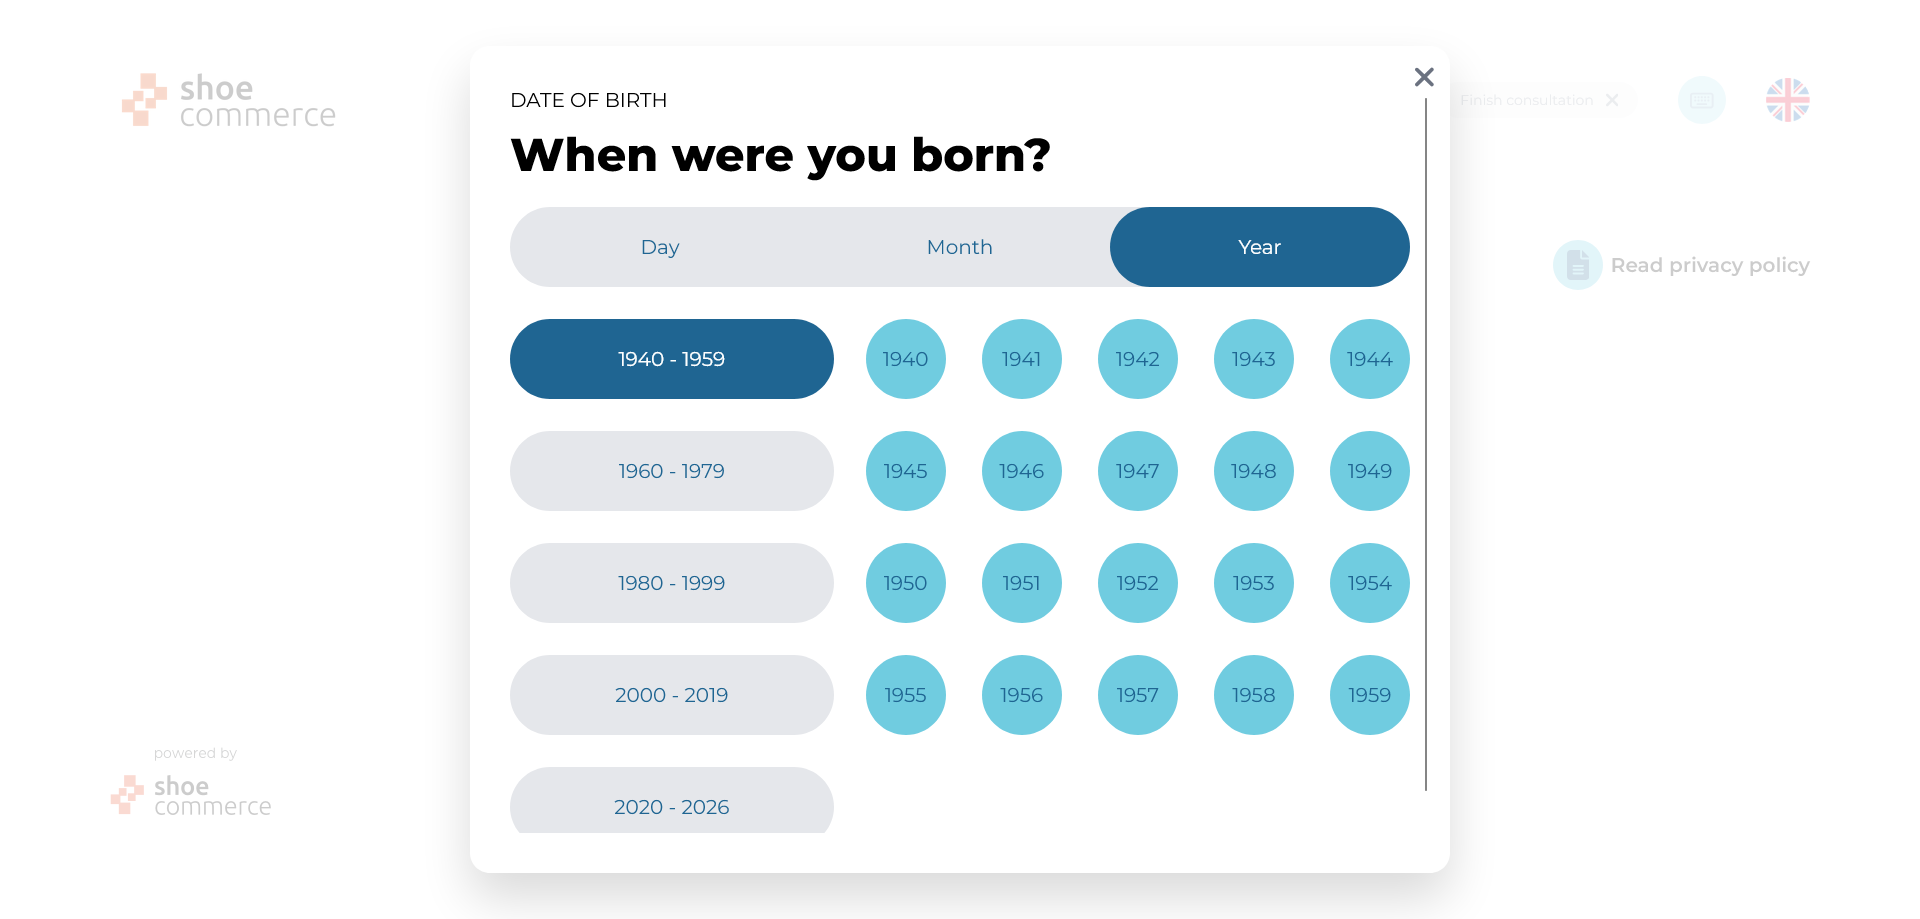
Optimized Date of Birth Entry
Entering a customer's date of birth using touch or keyboard has been redesigned and made much easier.
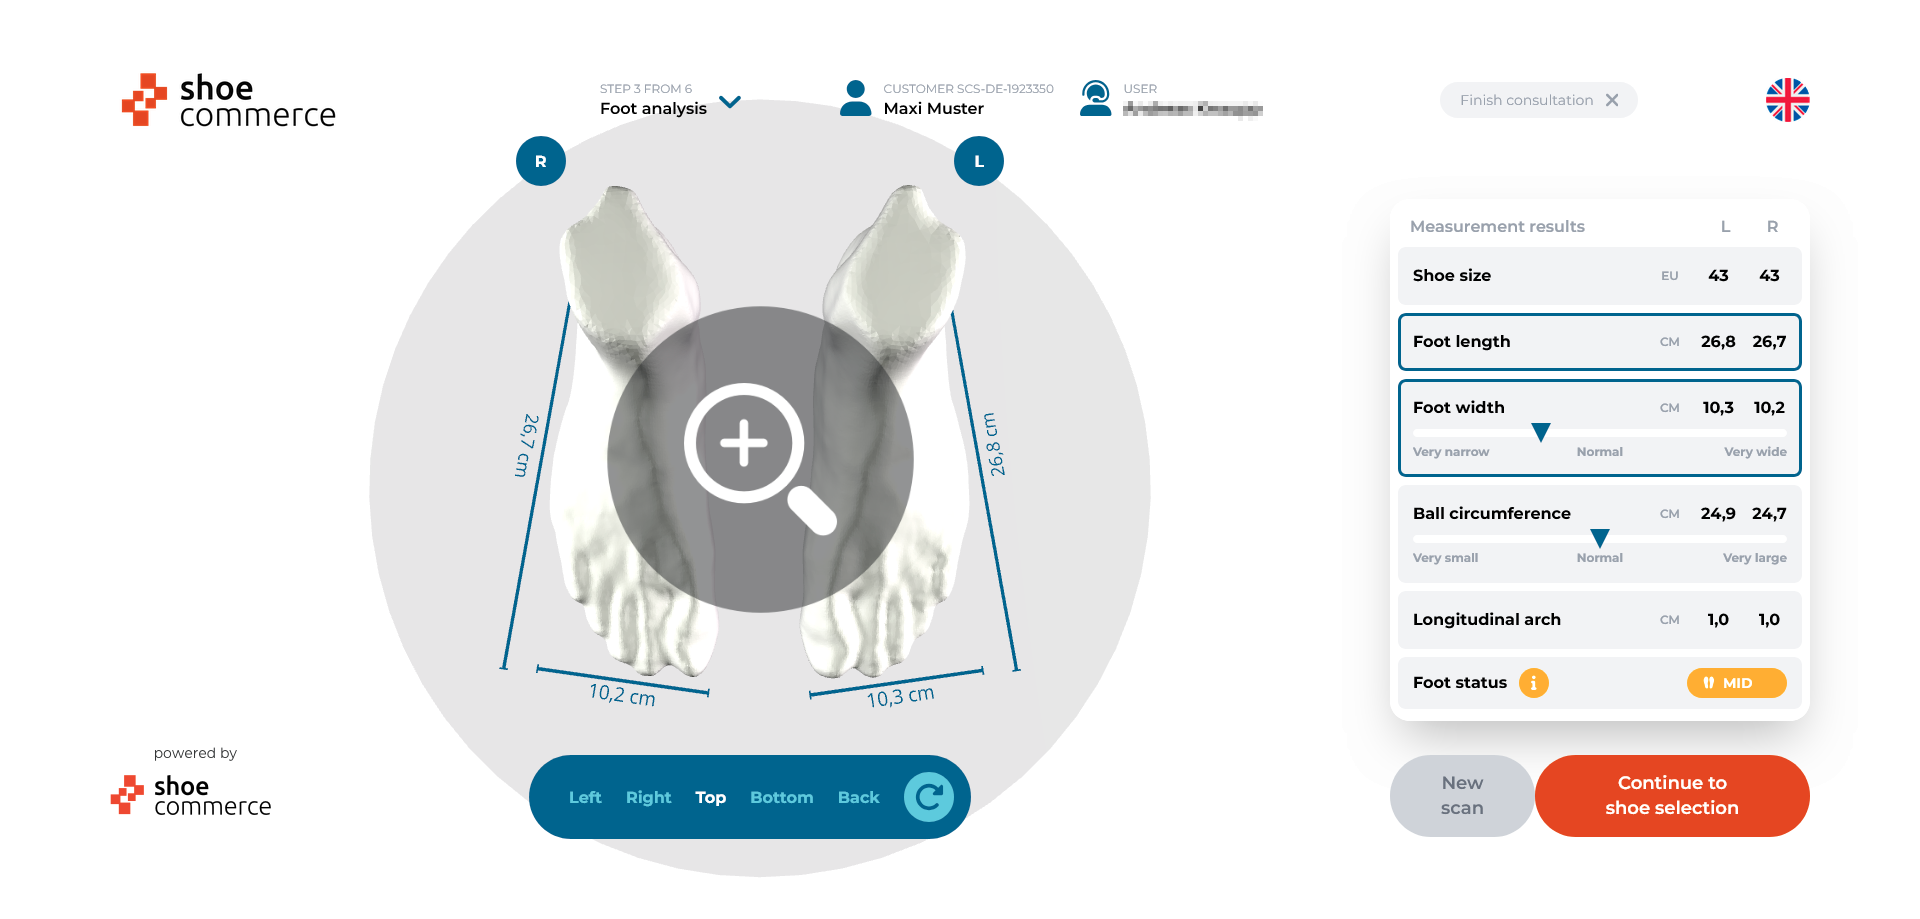
Warning for Differences in Foot Length
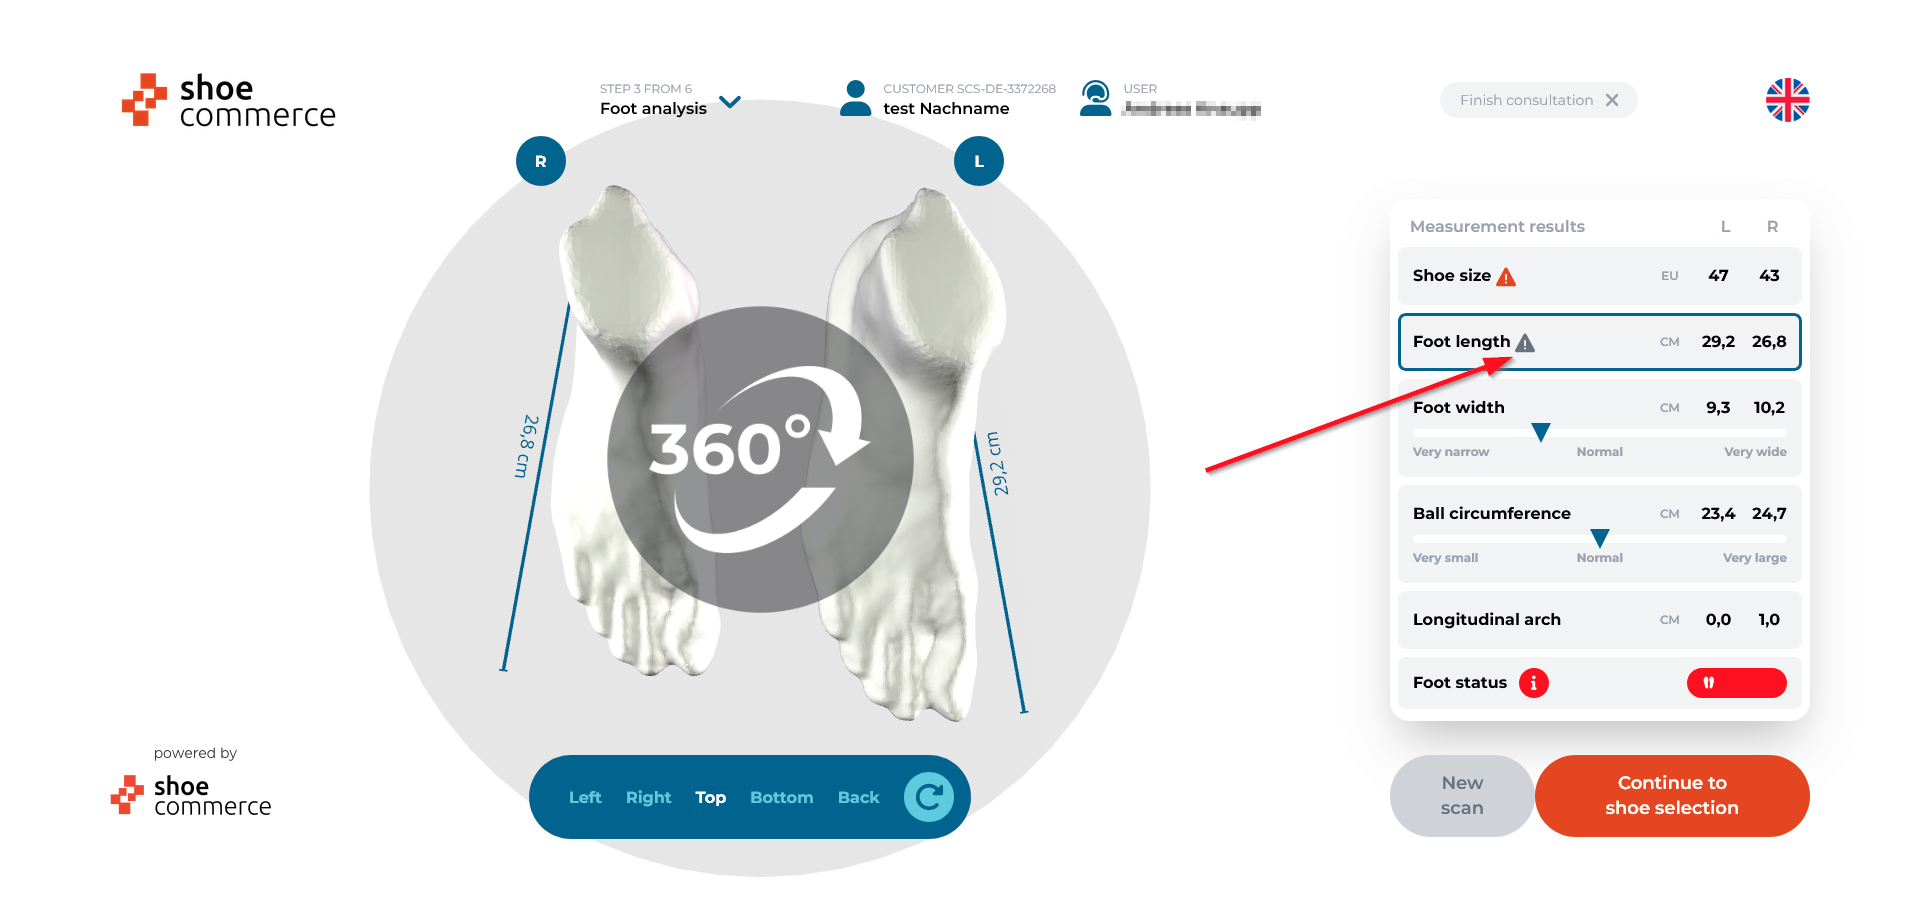
In the foot analysis section, a warning now appears if there is a noticeable difference in length between the left and right foot.
Optimized Product Selection with New Filter Feature
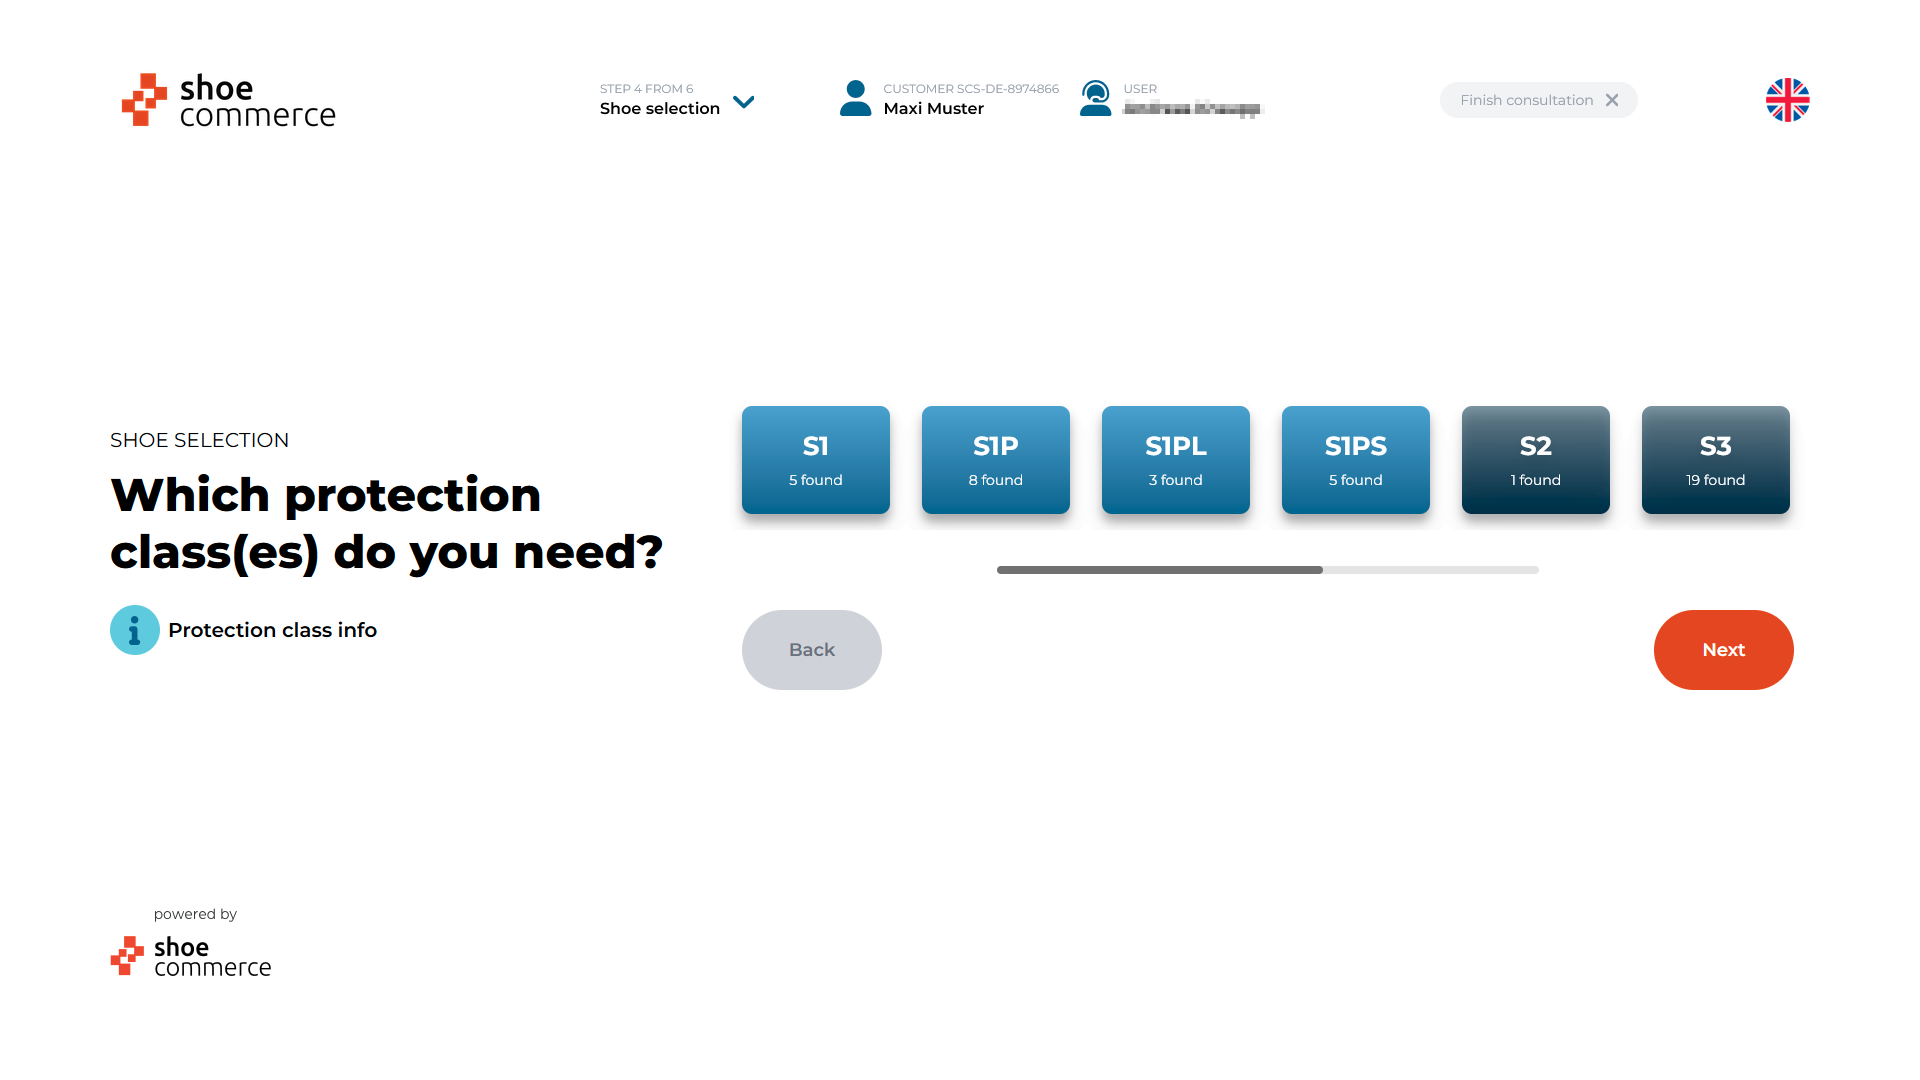
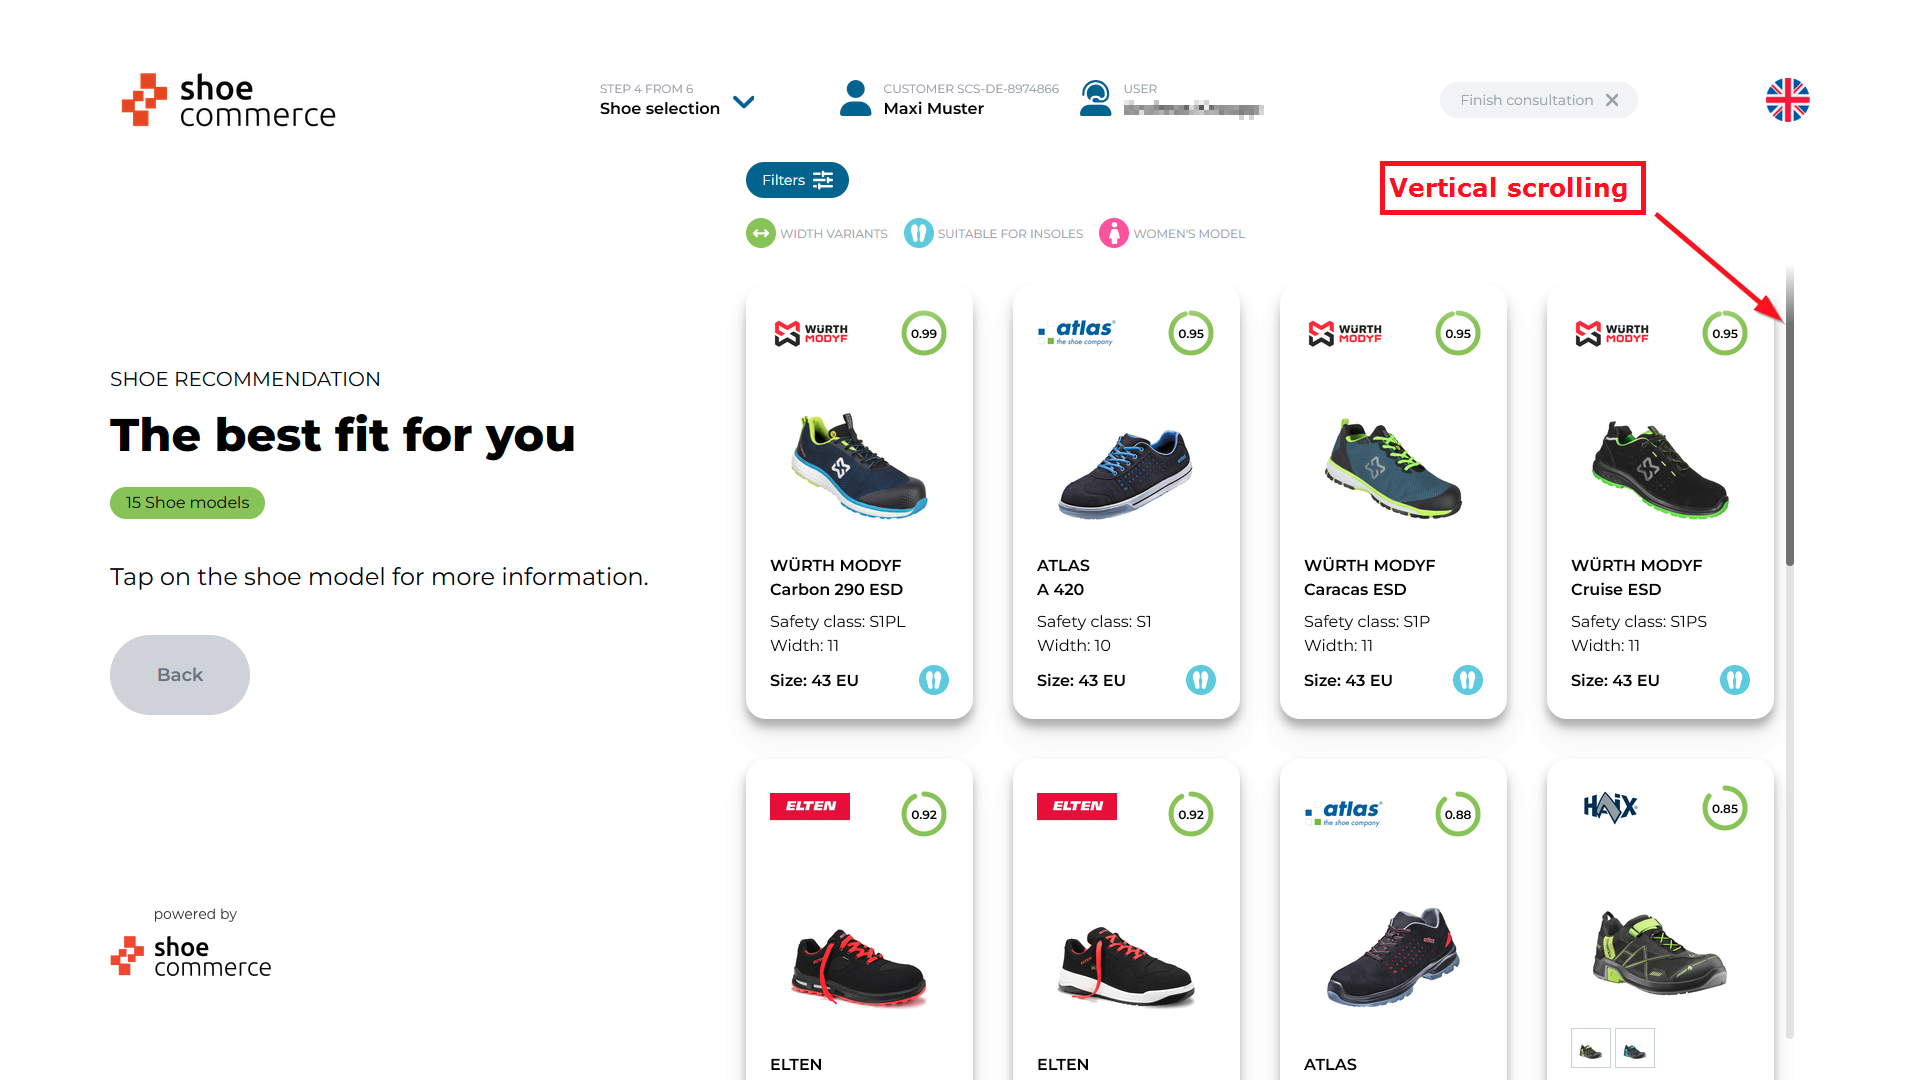
Thanks to the optimized product selection, you can now navigate through the range even more efficiently. Smooth vertical scrolling allows for uninterrupted browsing of items, while the new filter options deliver targeted results.
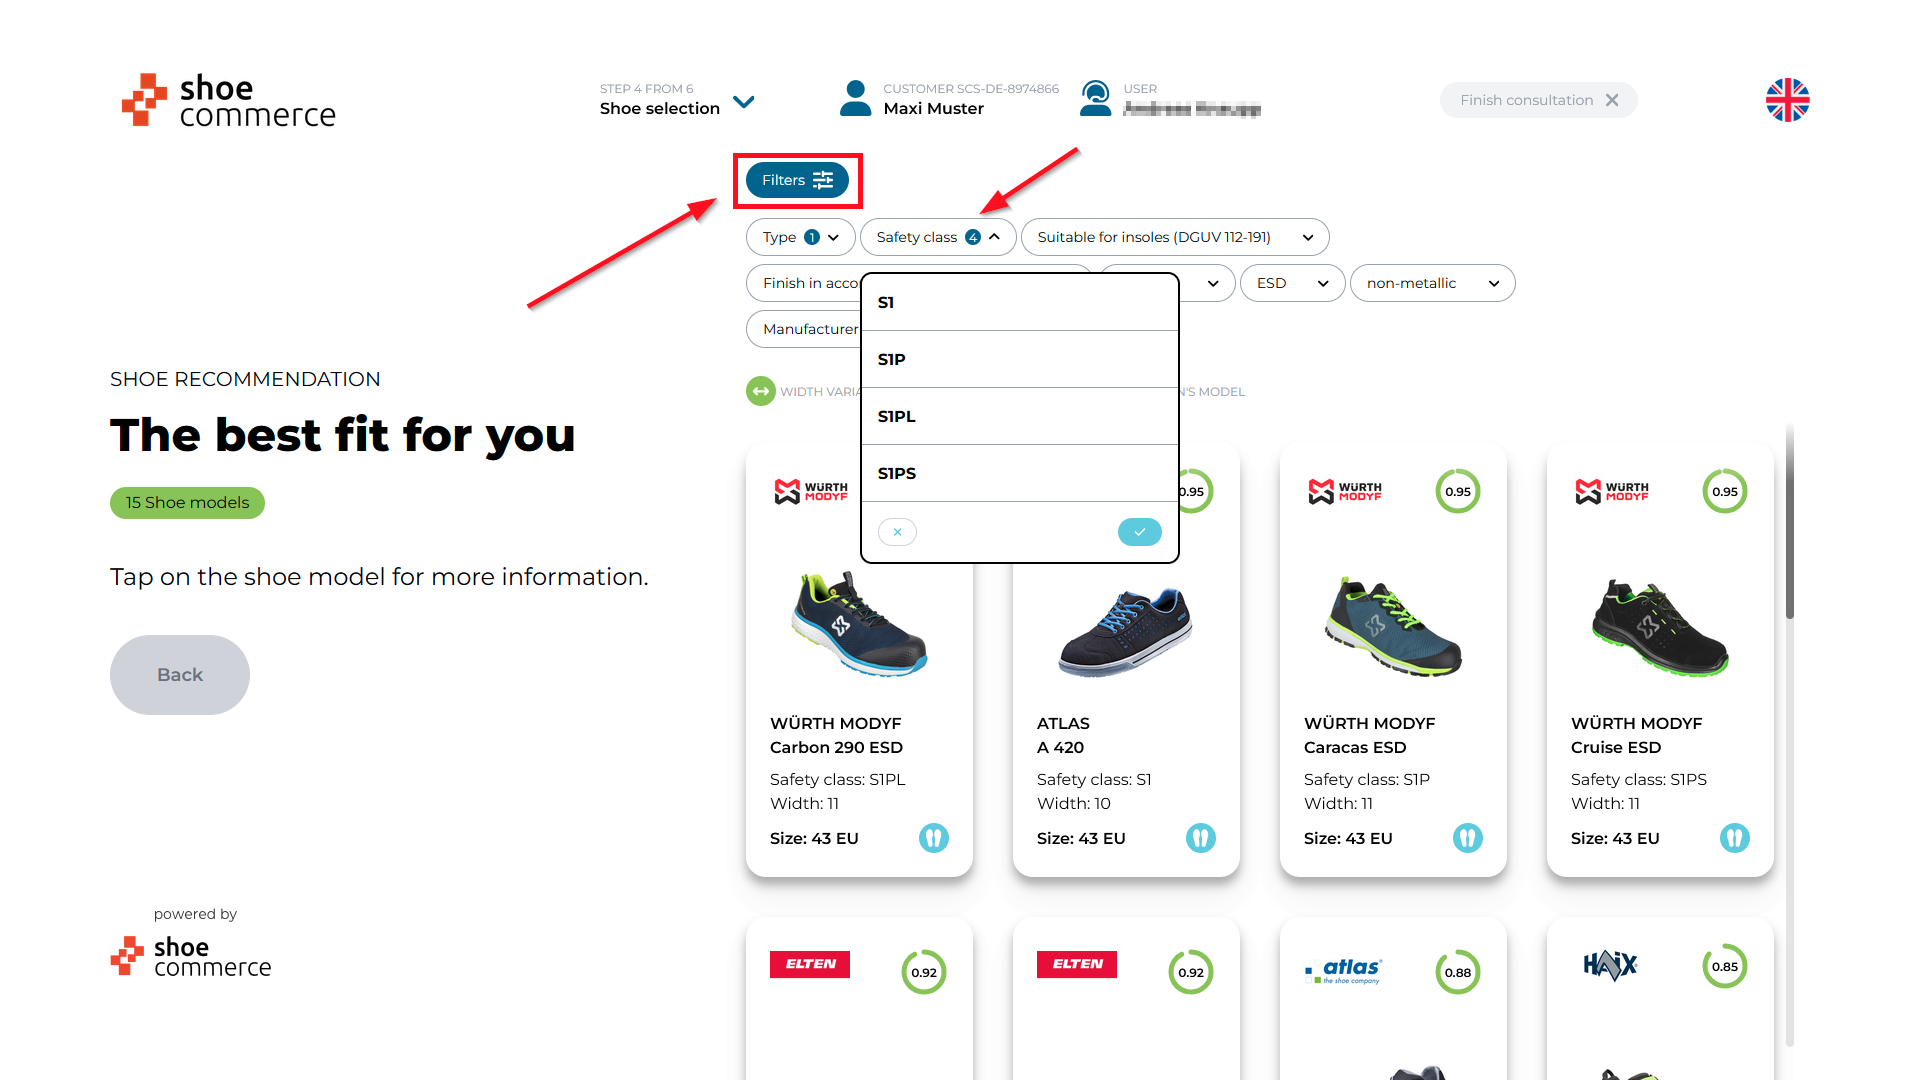
Click the "Filters" button to view the available criteria. Selected filter options are displayed in bold within the list. Click on individual entries to select or deselect them, and confirm by clicking the blue checkmark to filter your search results immediately.
Print or Save the Order Form
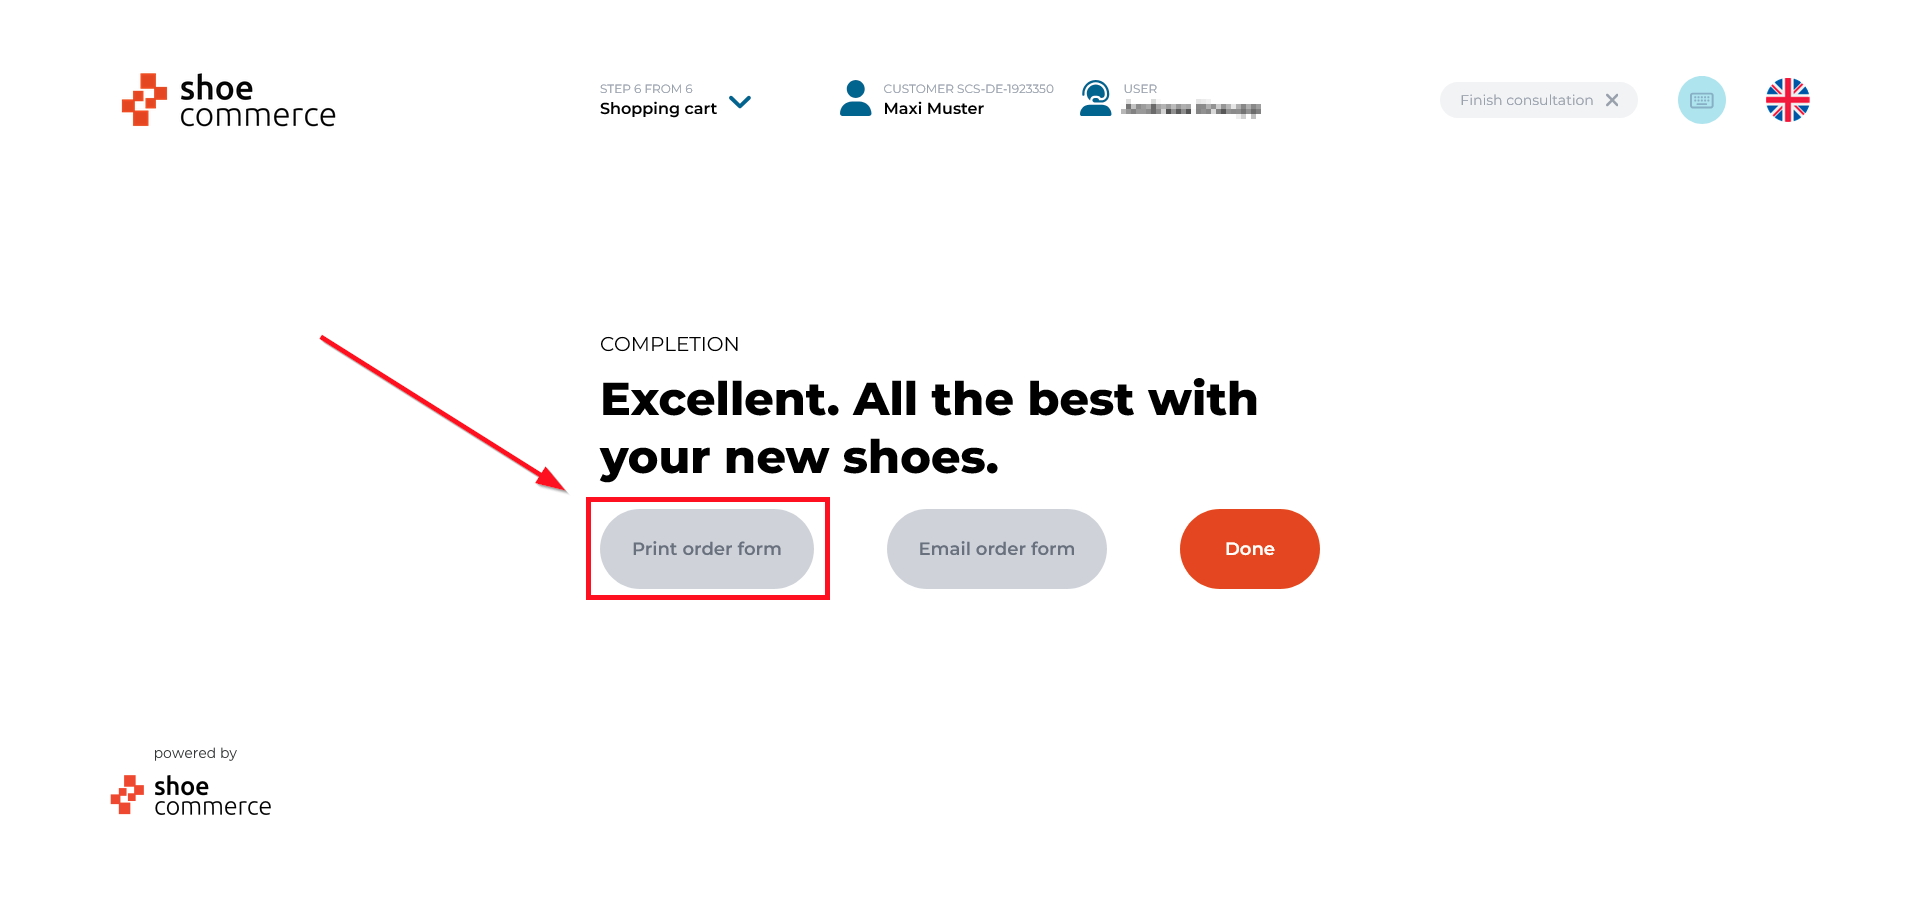
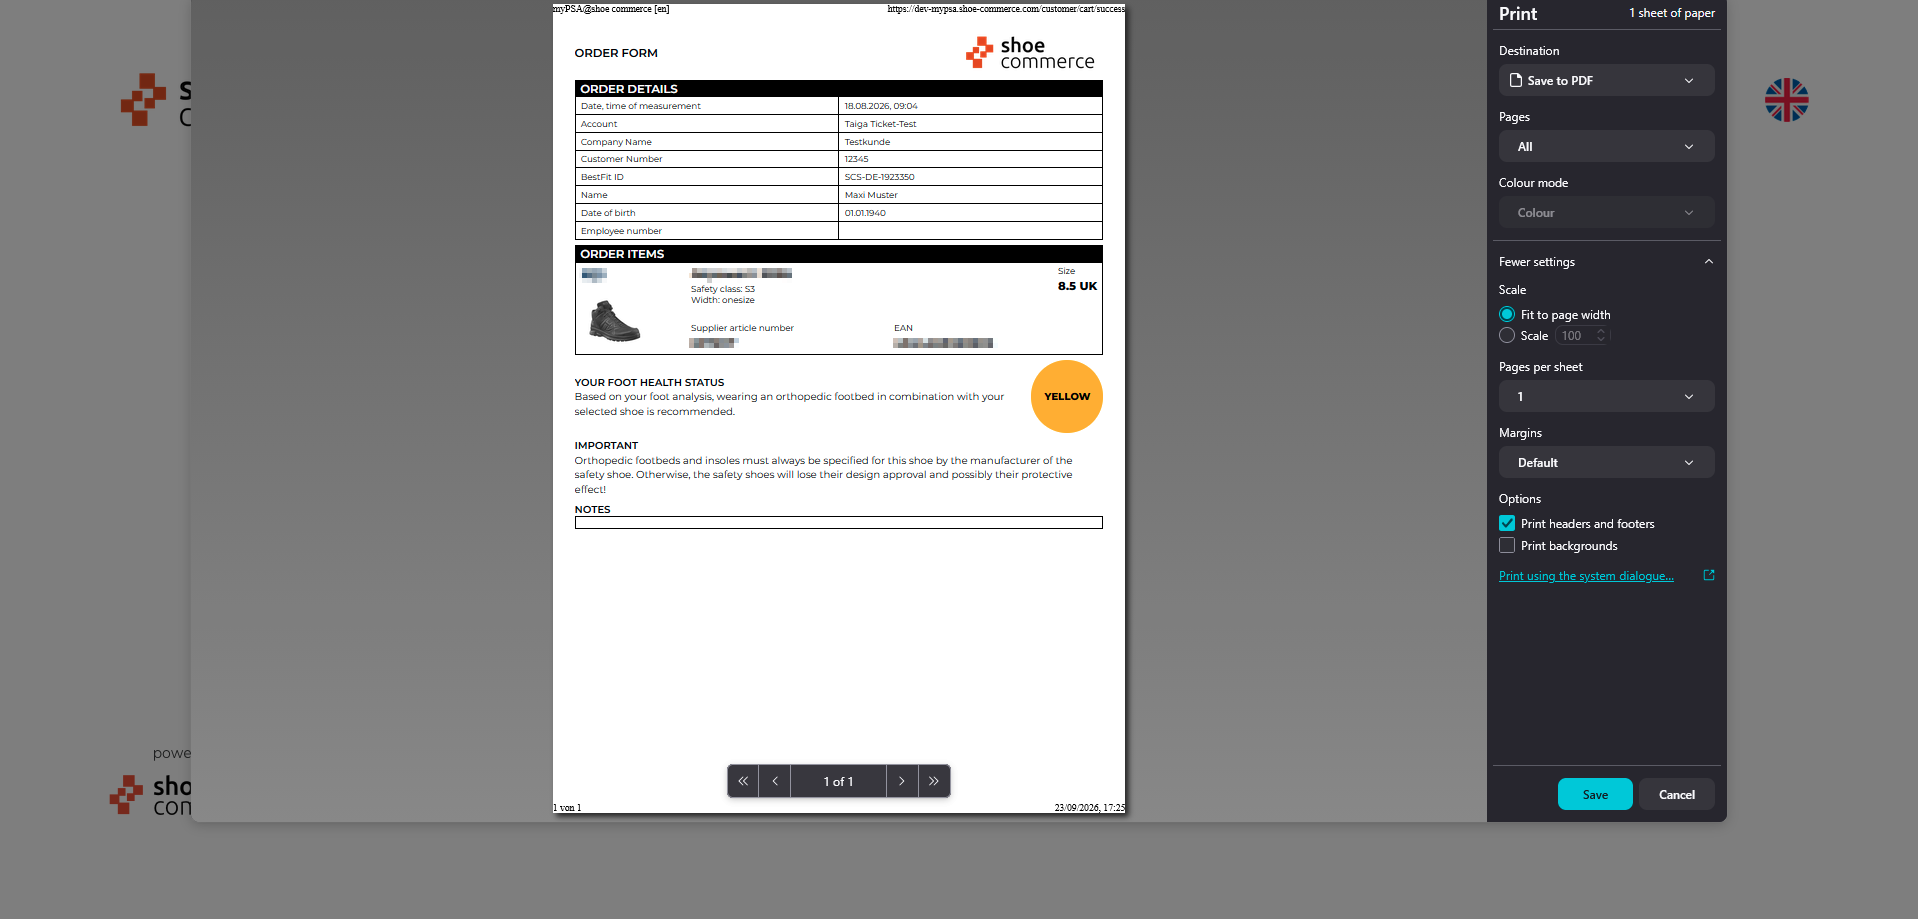
At the end of the ordering process, you can now print the order form directly or save it to your device.
Send the Order Form Directly by Email
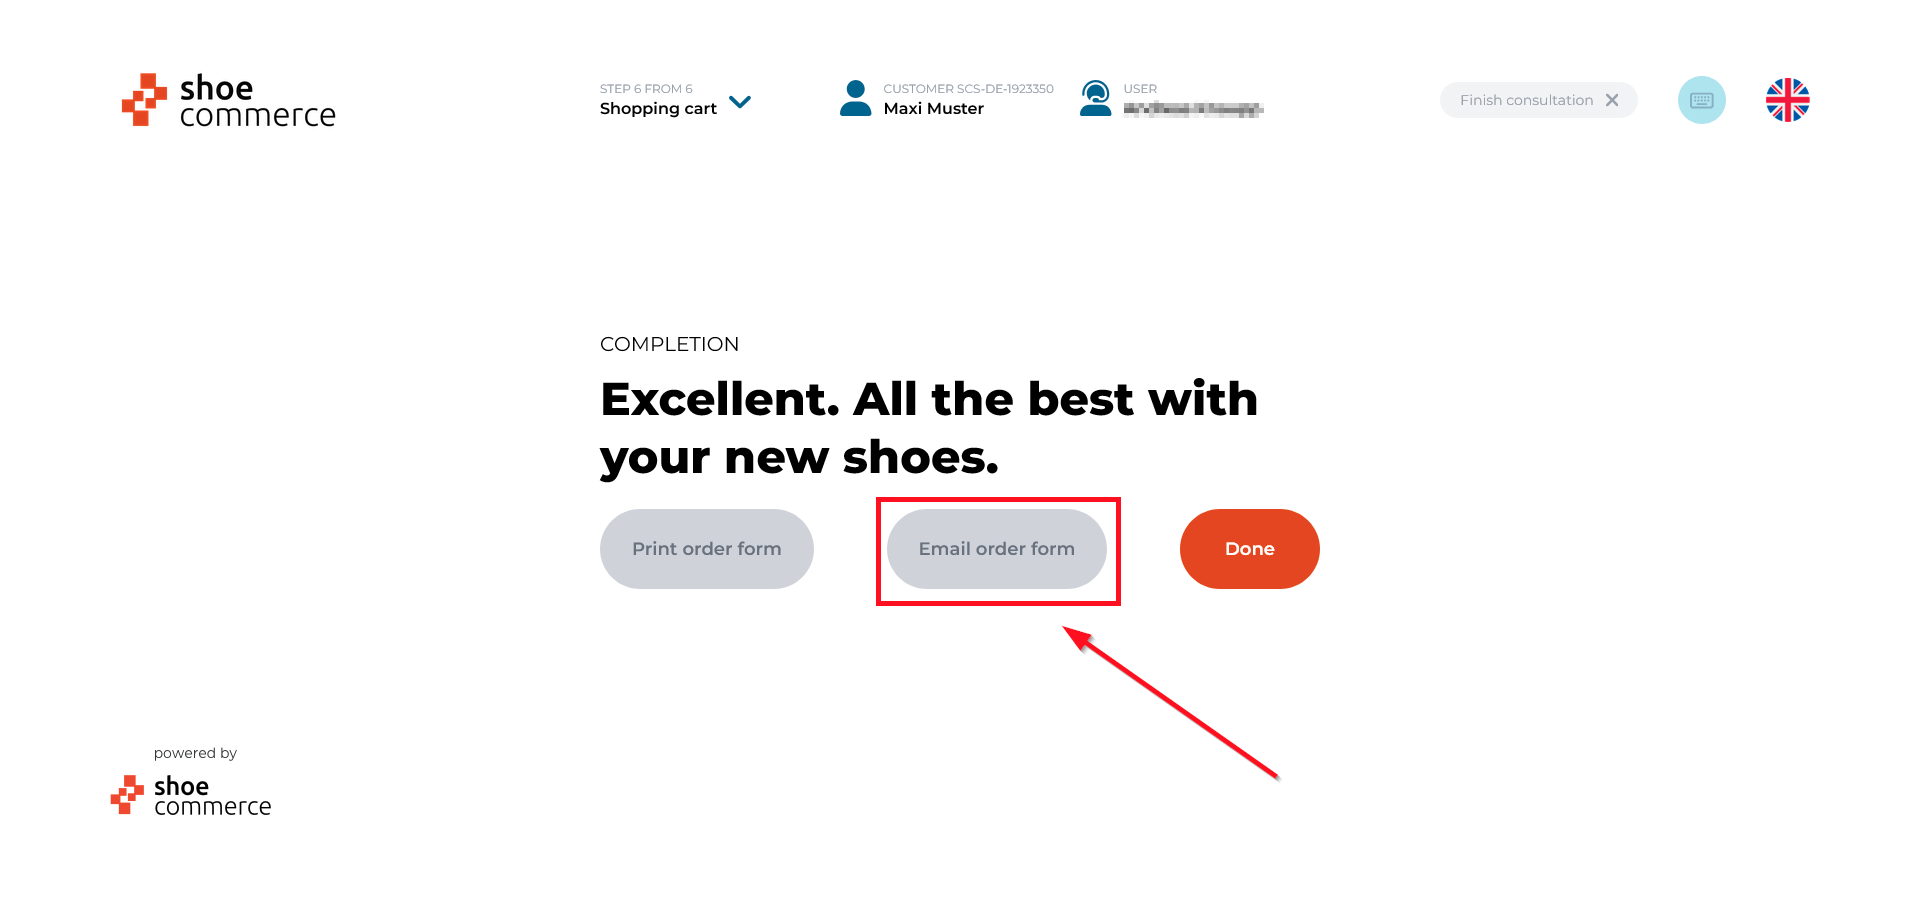
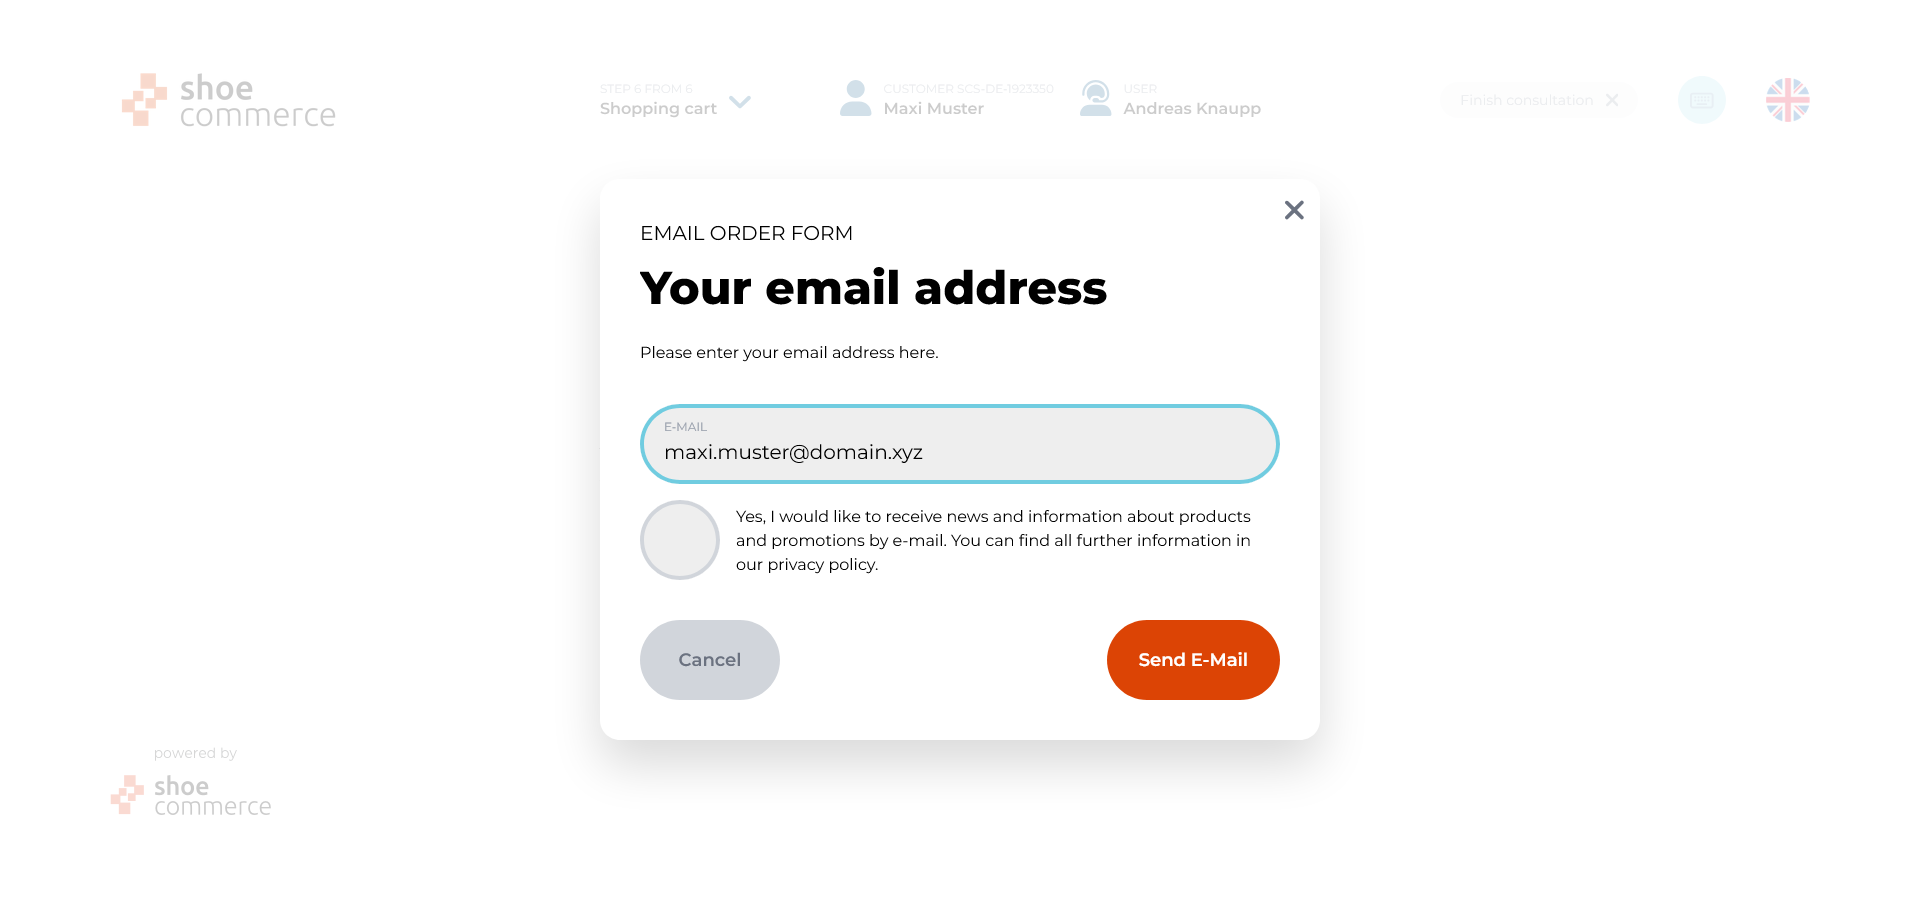
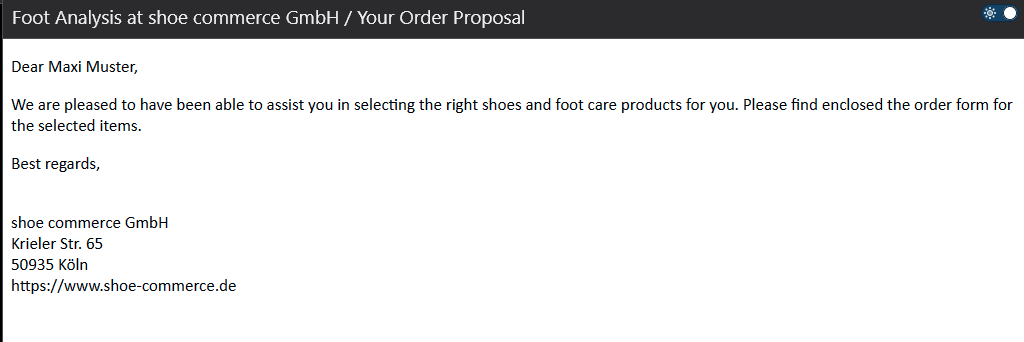
As an alternative to printing or saving the order form, it can be sent directly via email. To do this, first click "Email order form" and then "Send E-Mail" to start sending.
Open Debug Mode Directly from the Backend
You can now access debug mode directly from the backend. This allows you to reopen a foot measurement—even without a connected scanner—right from a customer record.
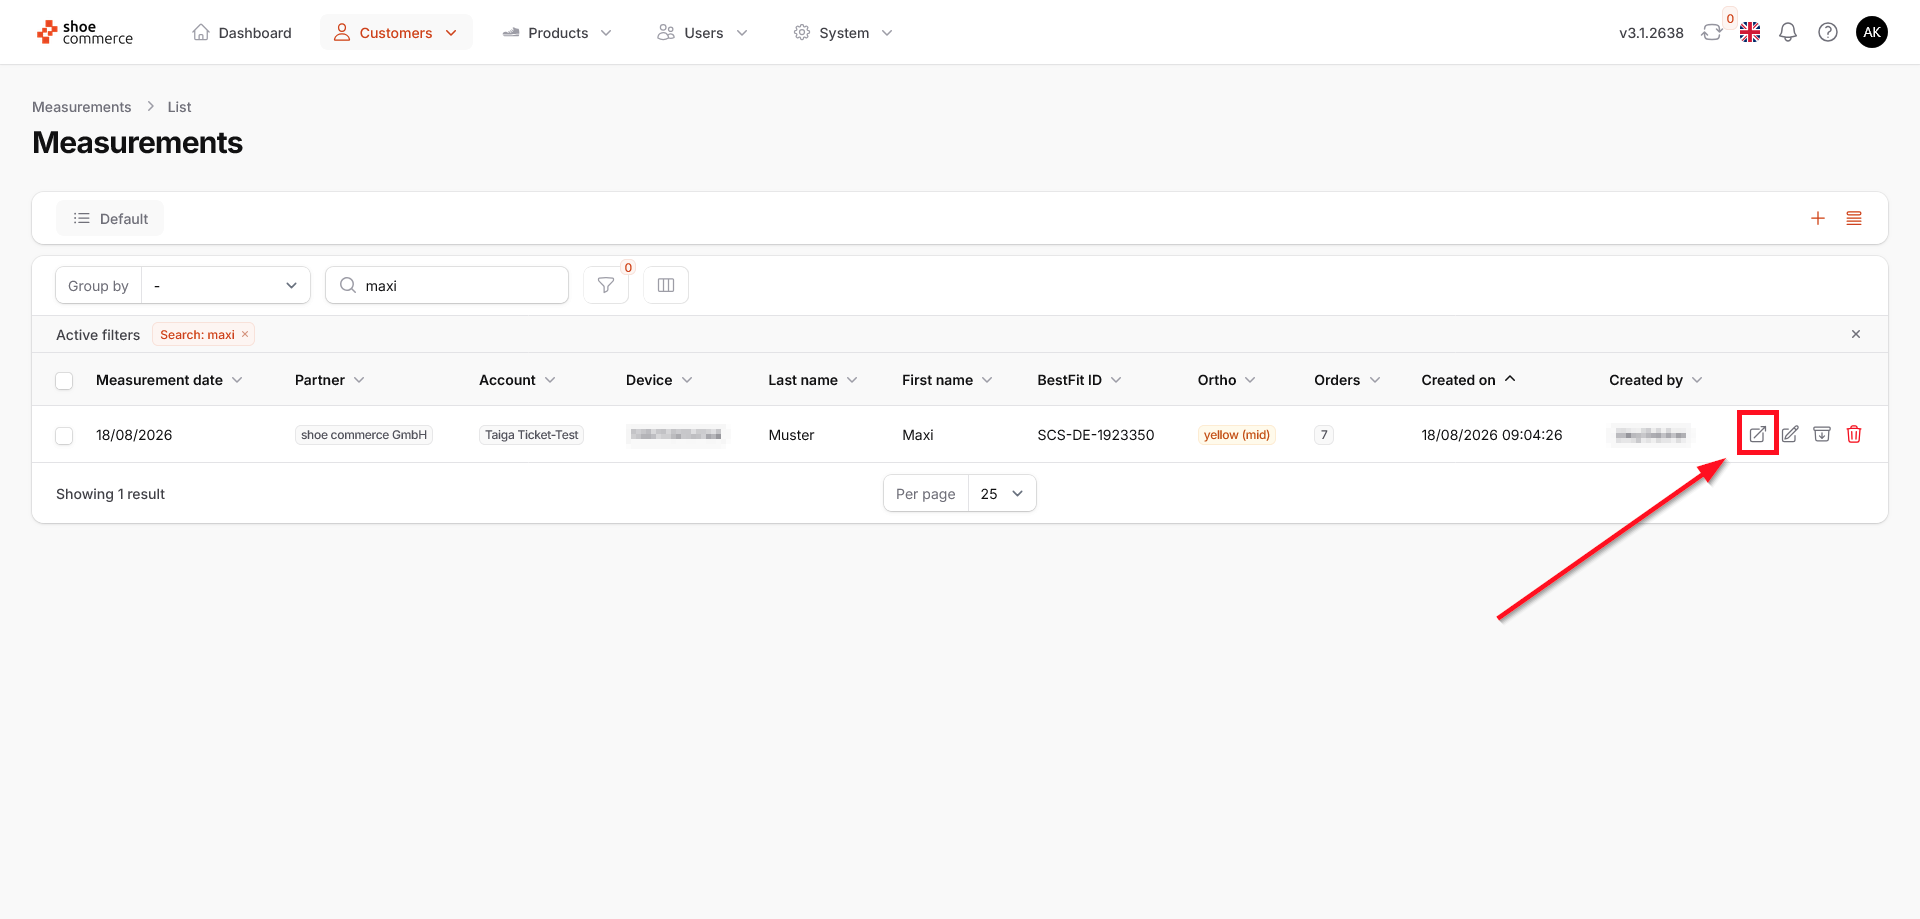
- Go to "Measurements" in the backend and find the measurement you want to open.
- Click the "Open in frontend" icon on the far left.
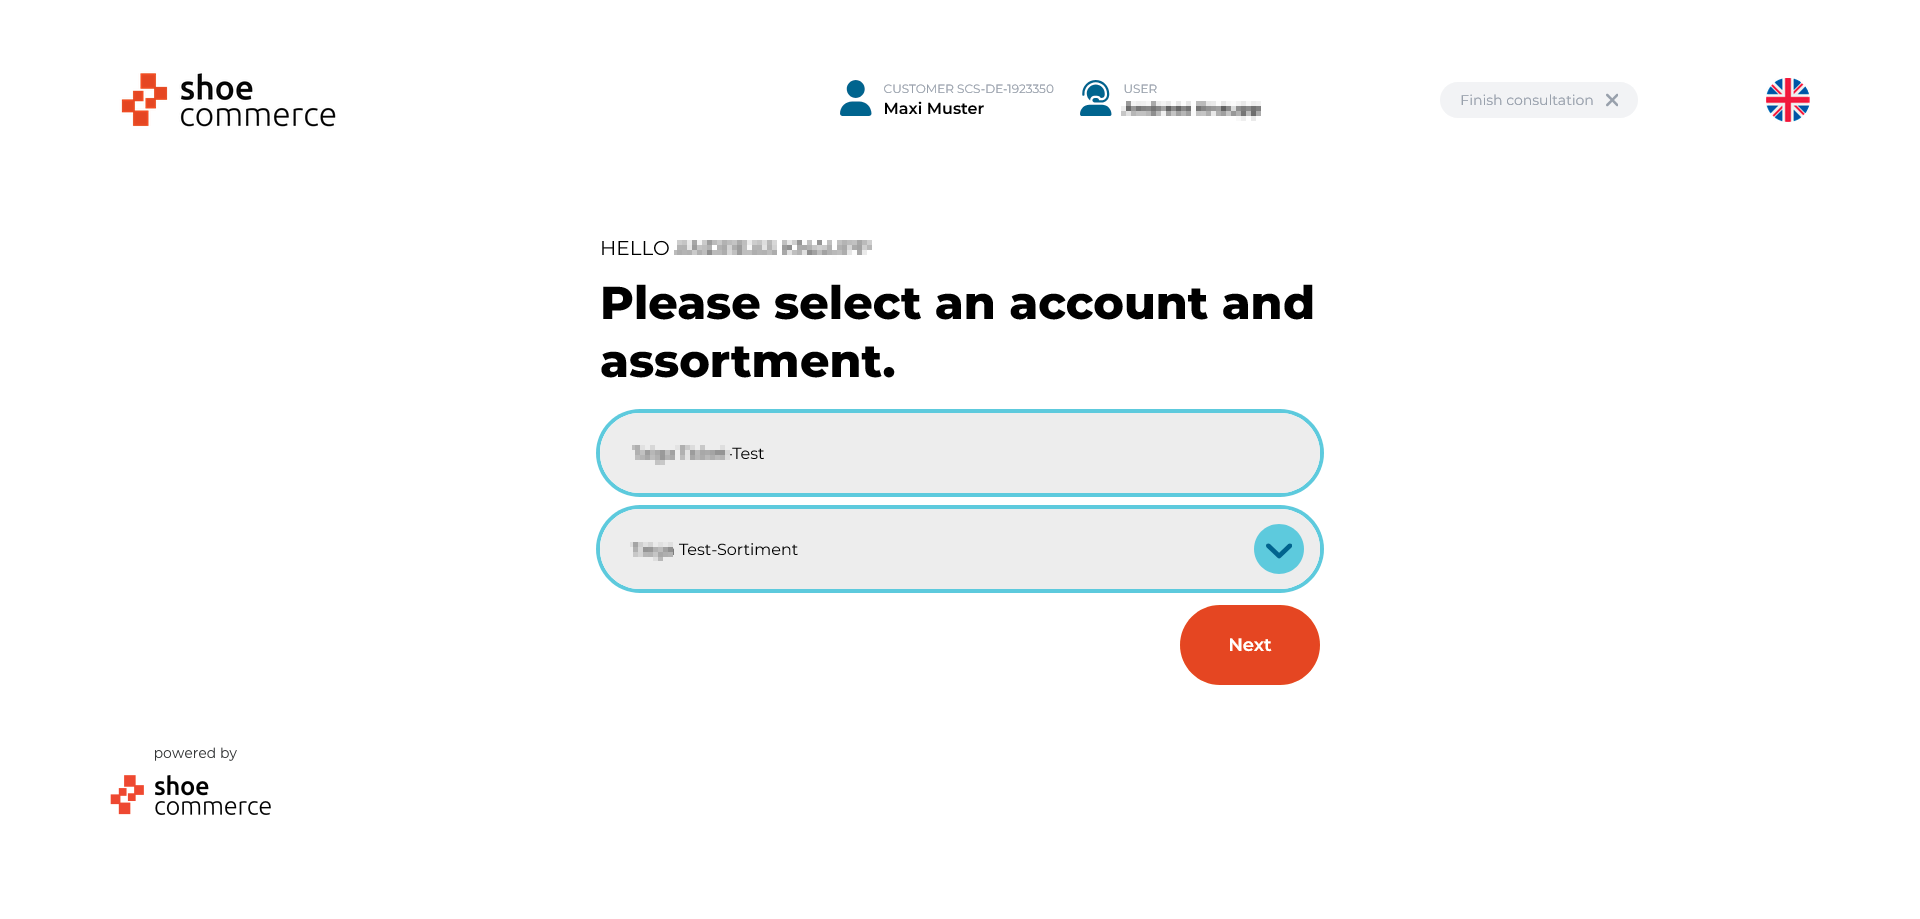
- Now select the appropriate assortment and then click "Next".
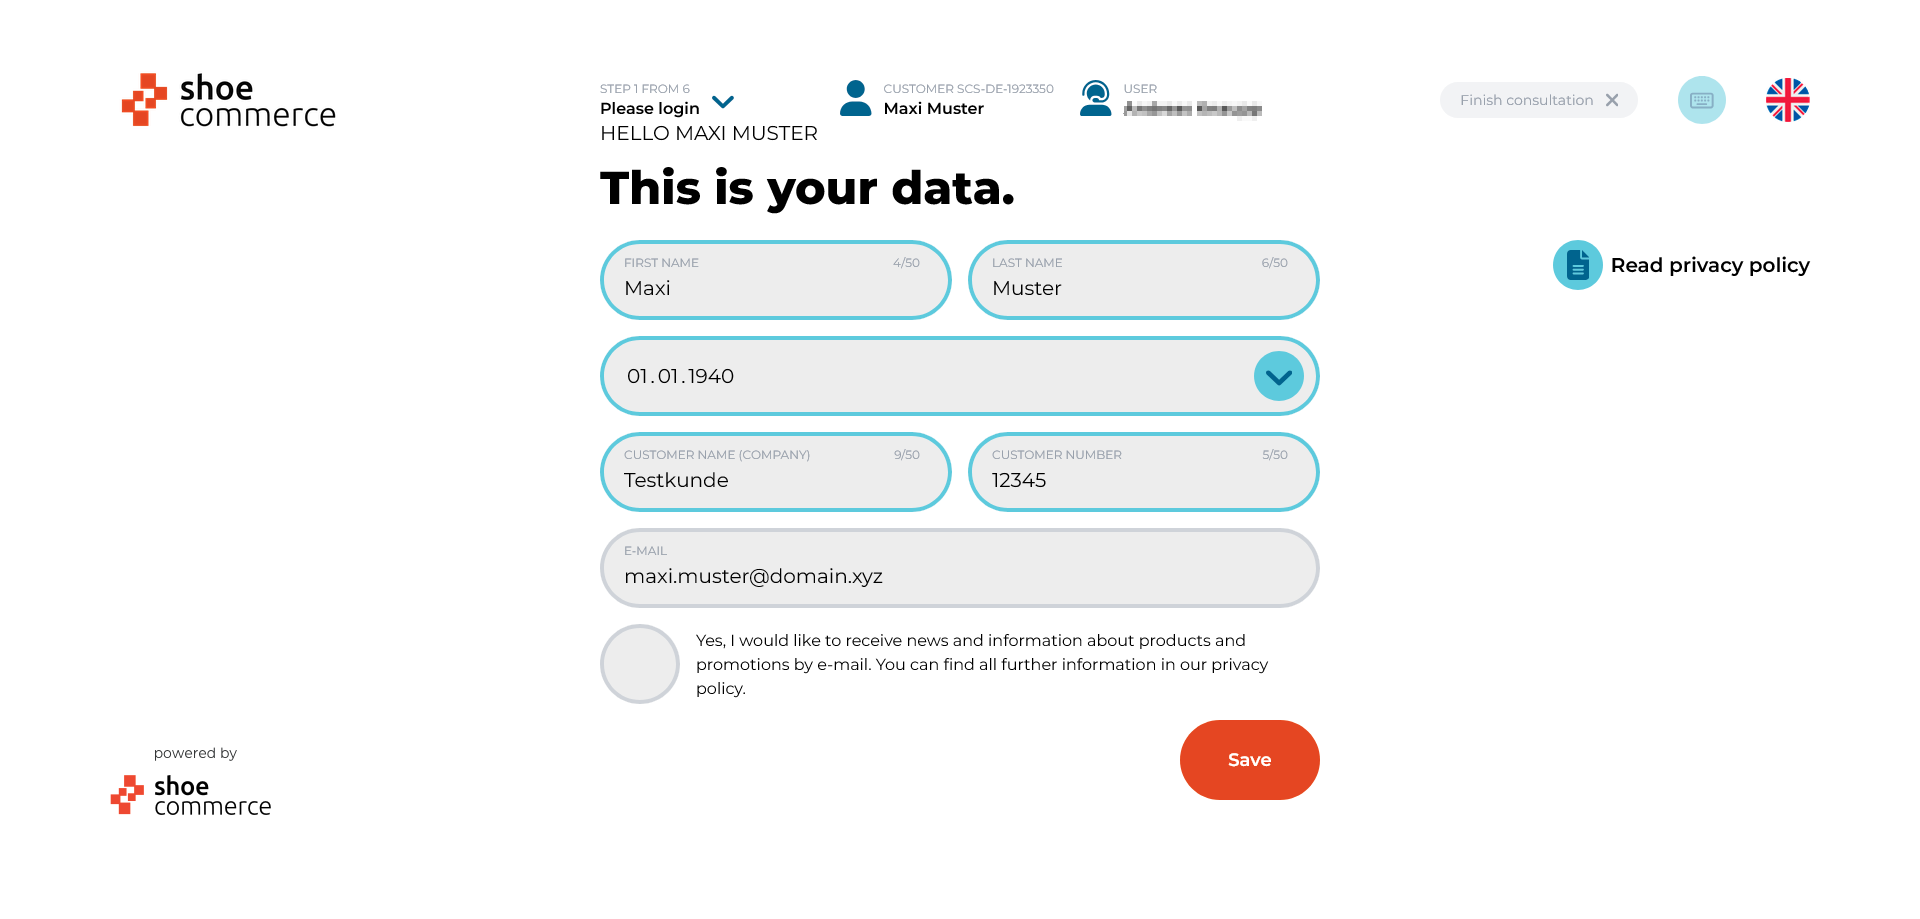
- Click "Save" to get to the foot analysis step and continue through the customer journey as usual.
Merge Duplicate Accounts
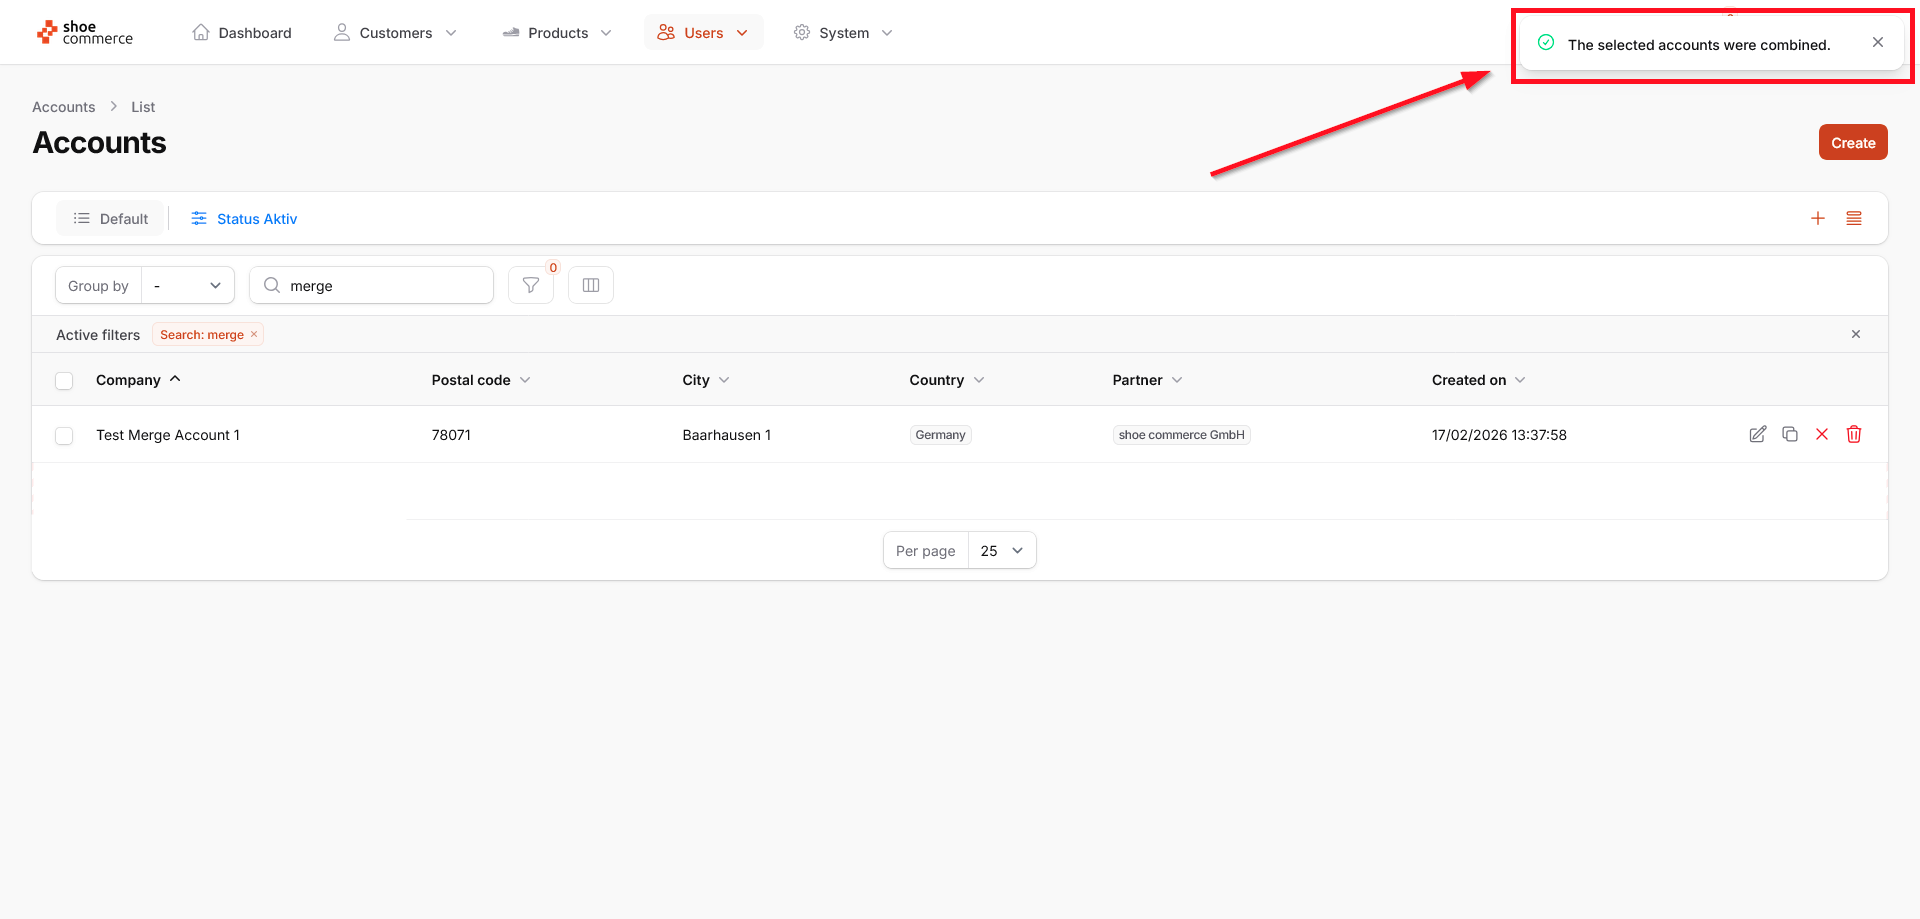
You can now easily merge duplicate accounts in the backend to keep your data clean and organized.
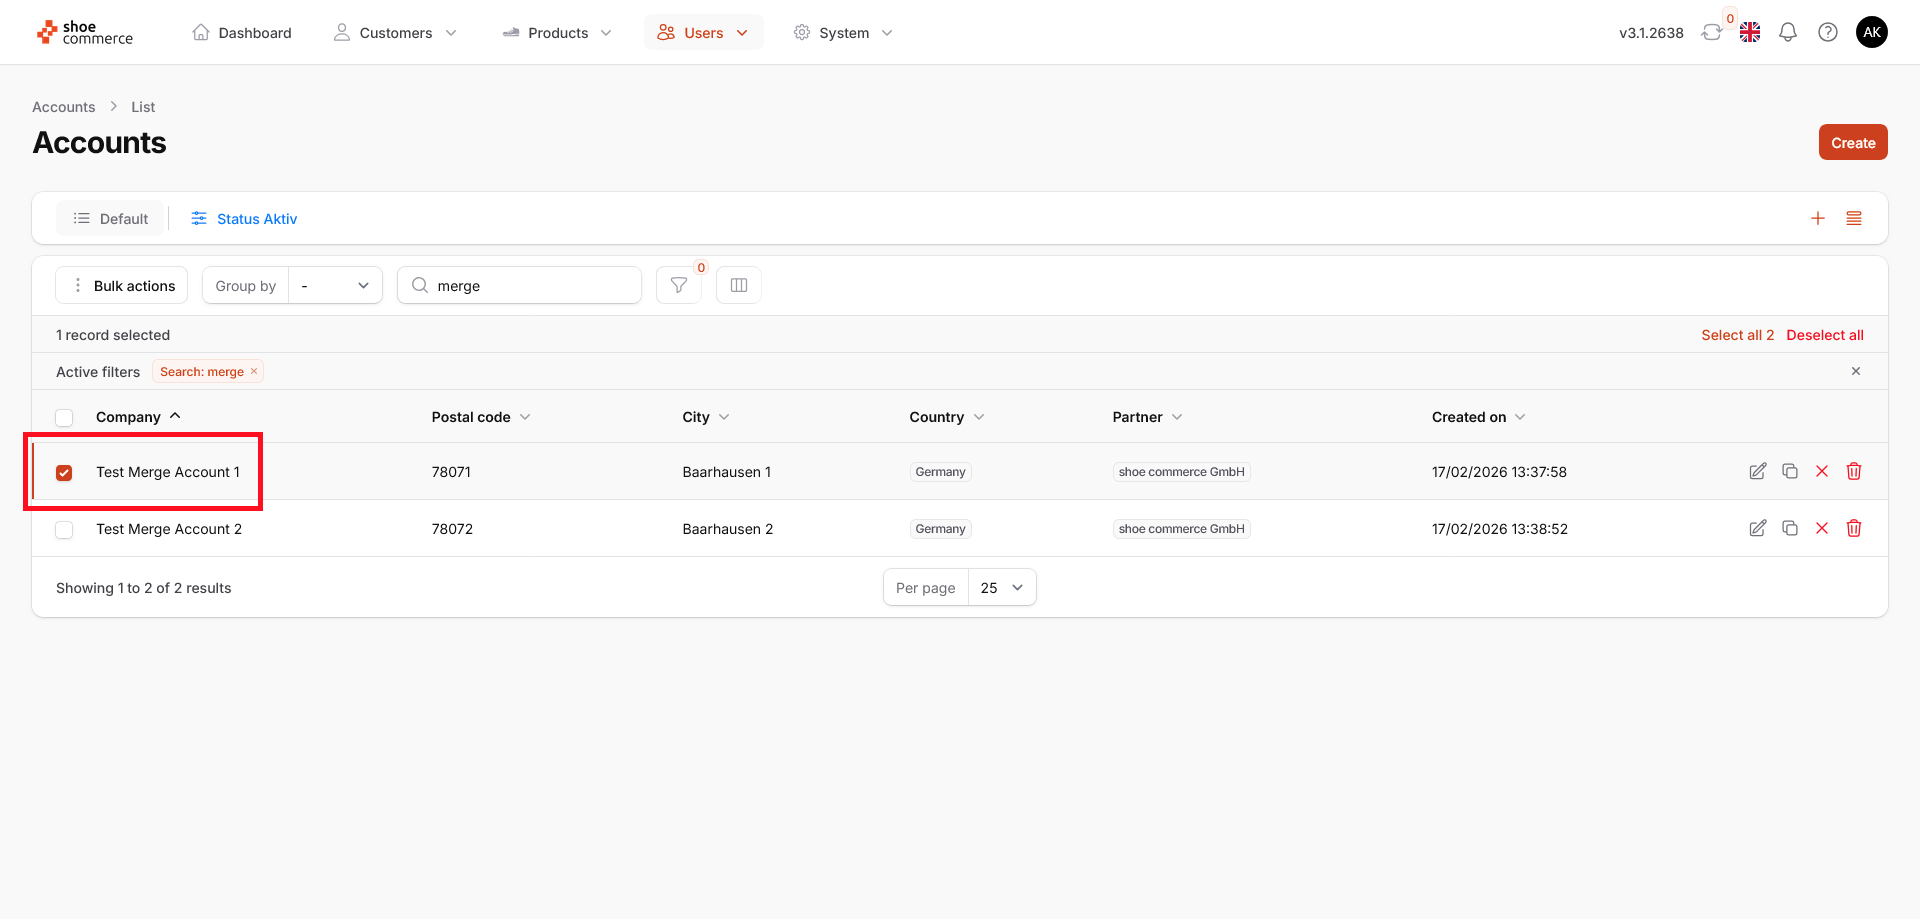
- First, find the first account you want to merge in the account overview and check the box next to it to select it.
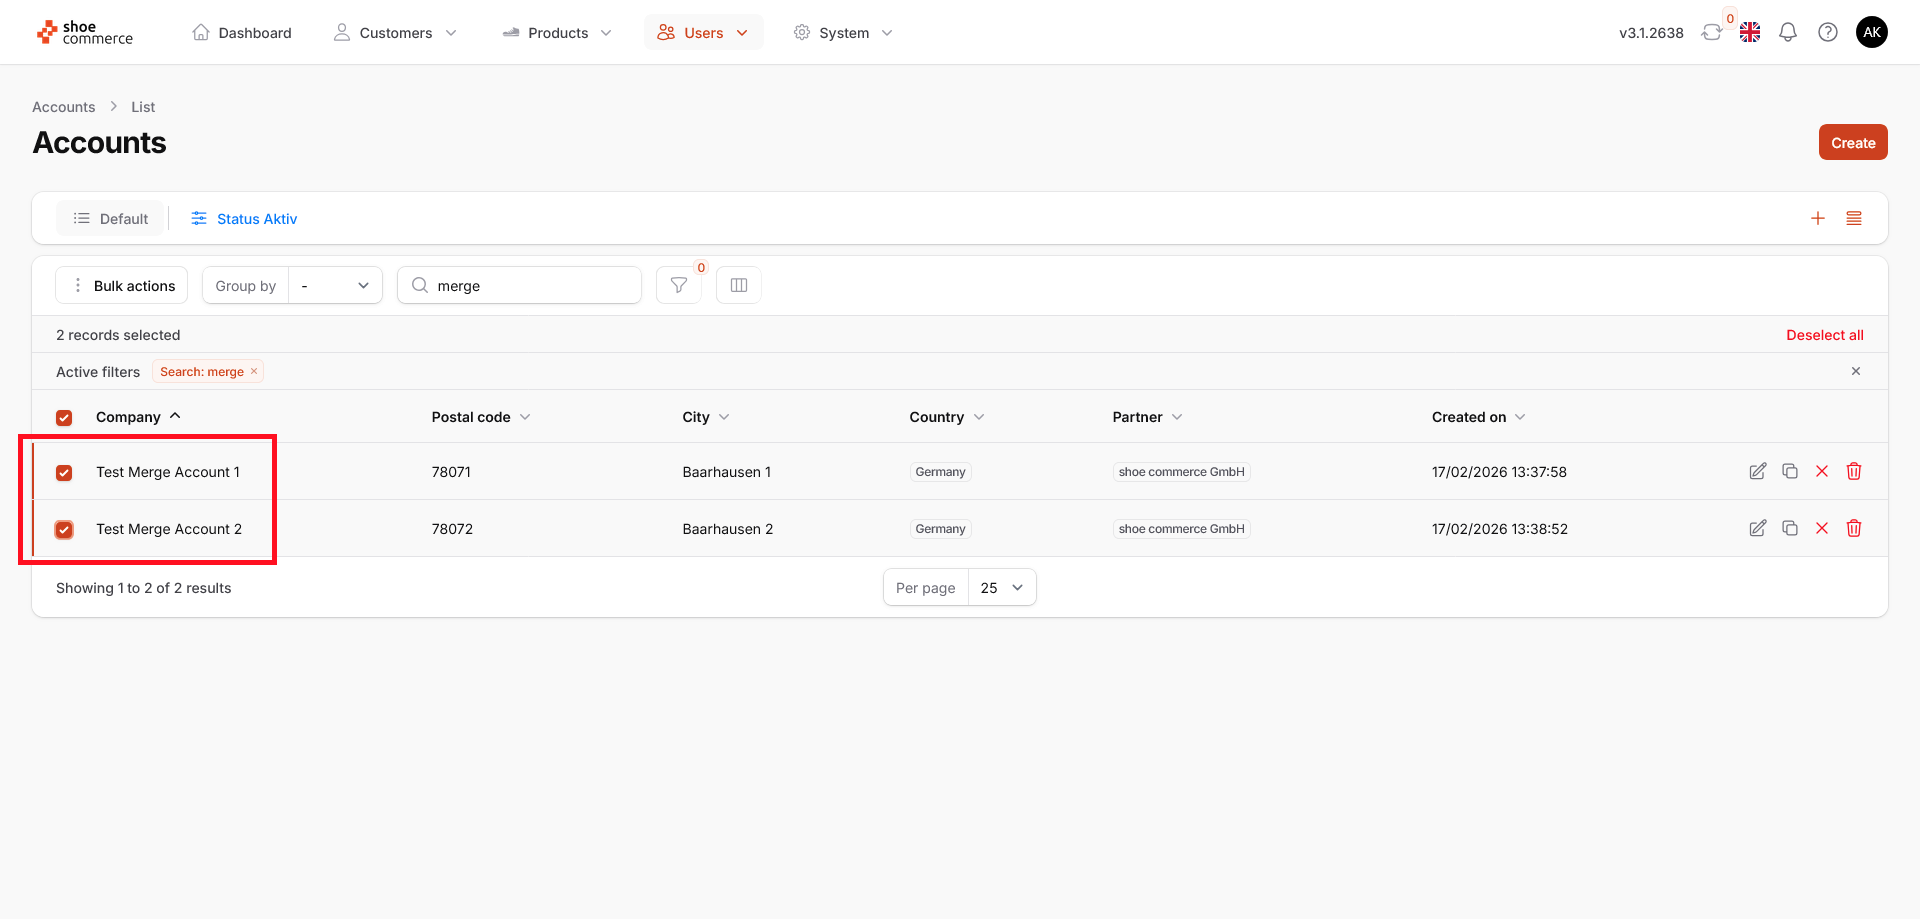
- Next, find the second account you want to merge and check its box as well, so both are selected.
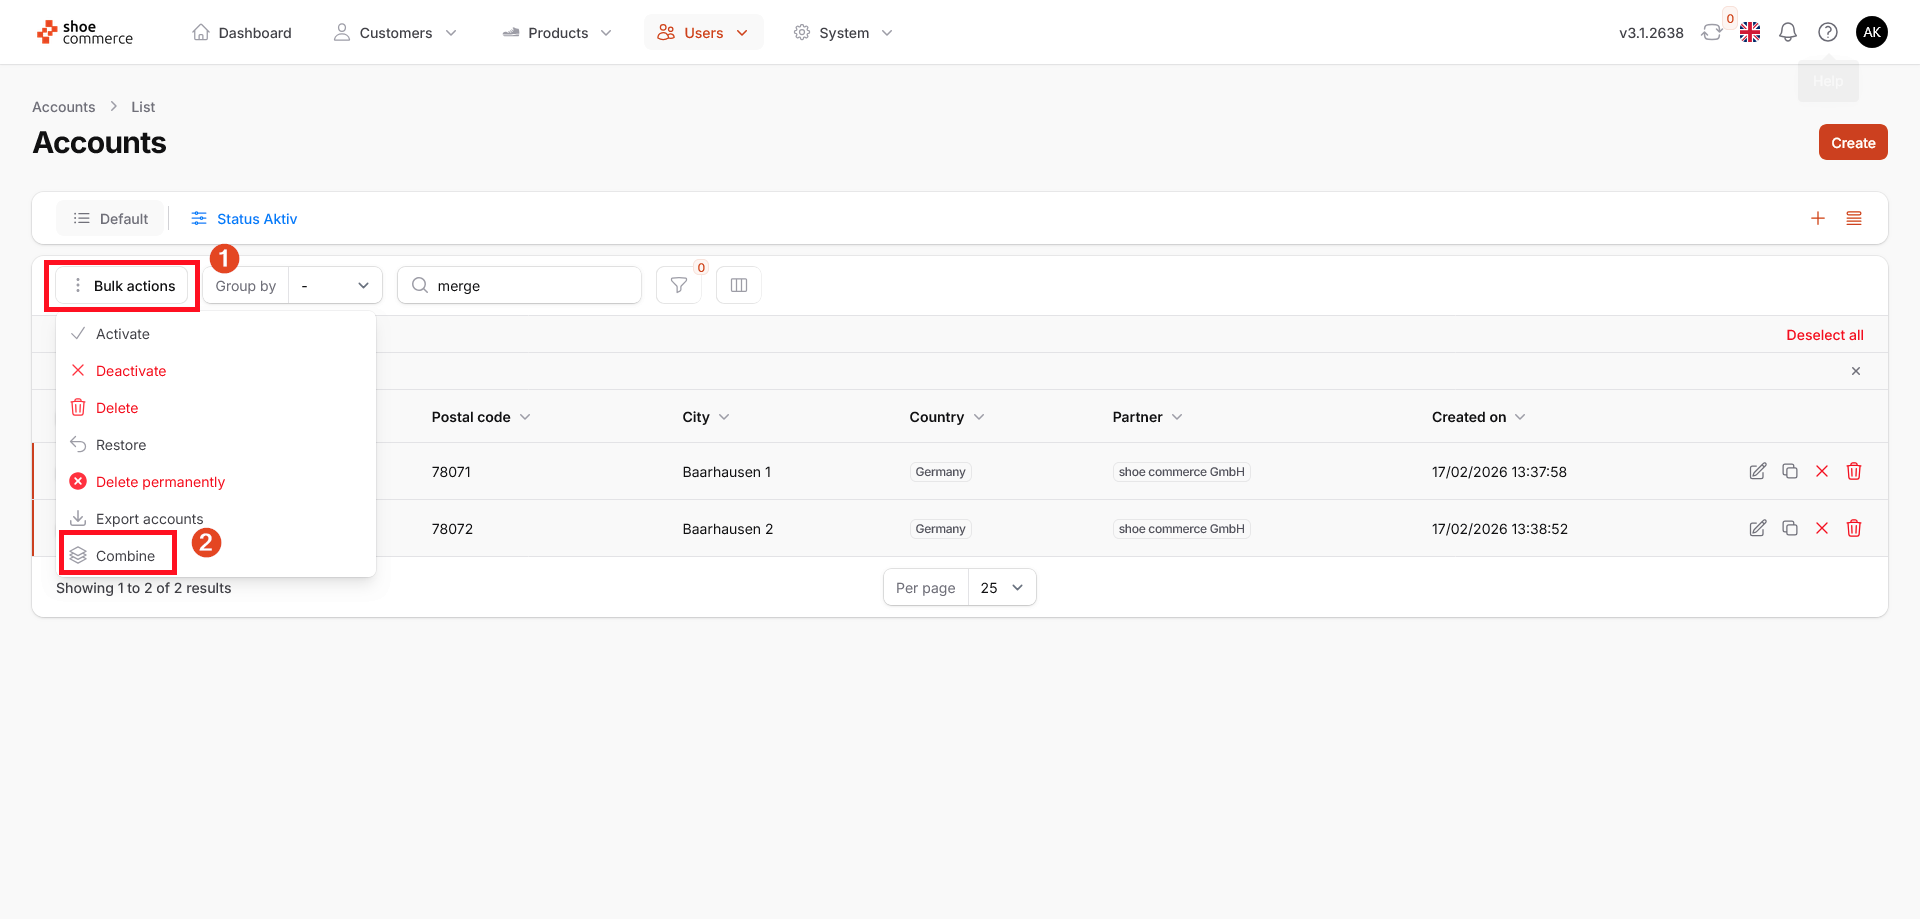
- Once both accounts are selected, go to the top menu and click "Bulk actions" to see the available options. From the drop-down menu, click "Combine" to start combining the accounts.
- Click "Select an option" to see your selected accounts in the drop-down list.
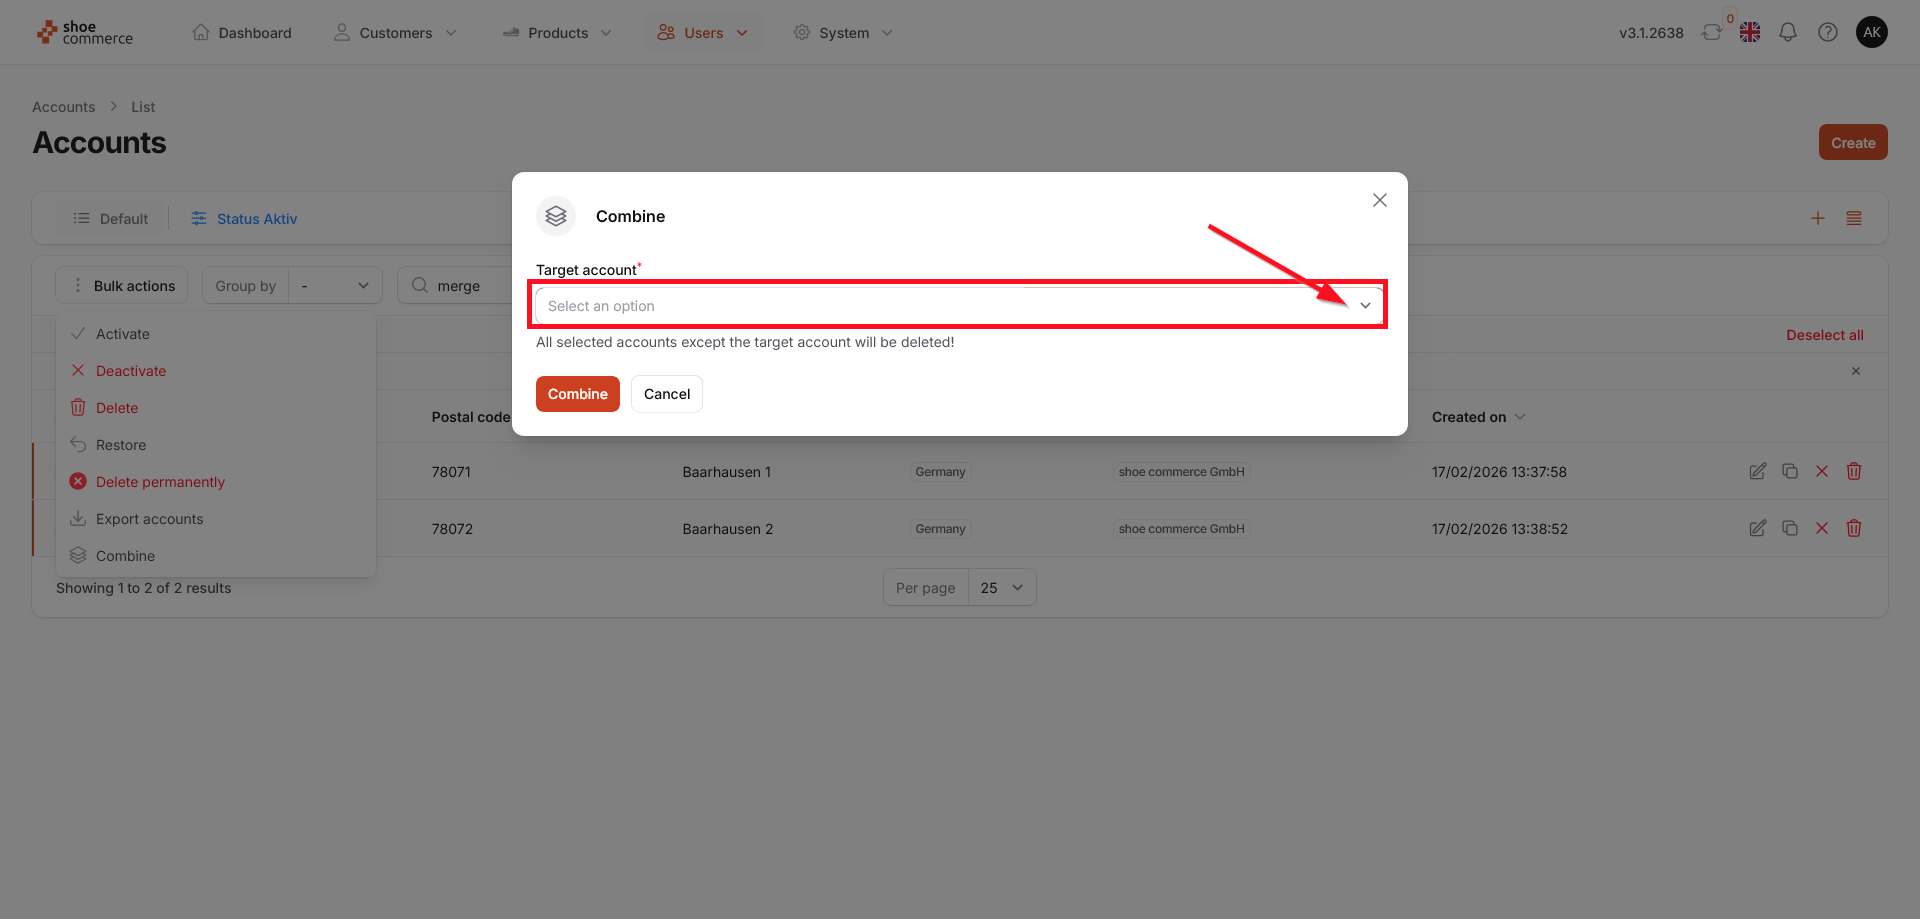
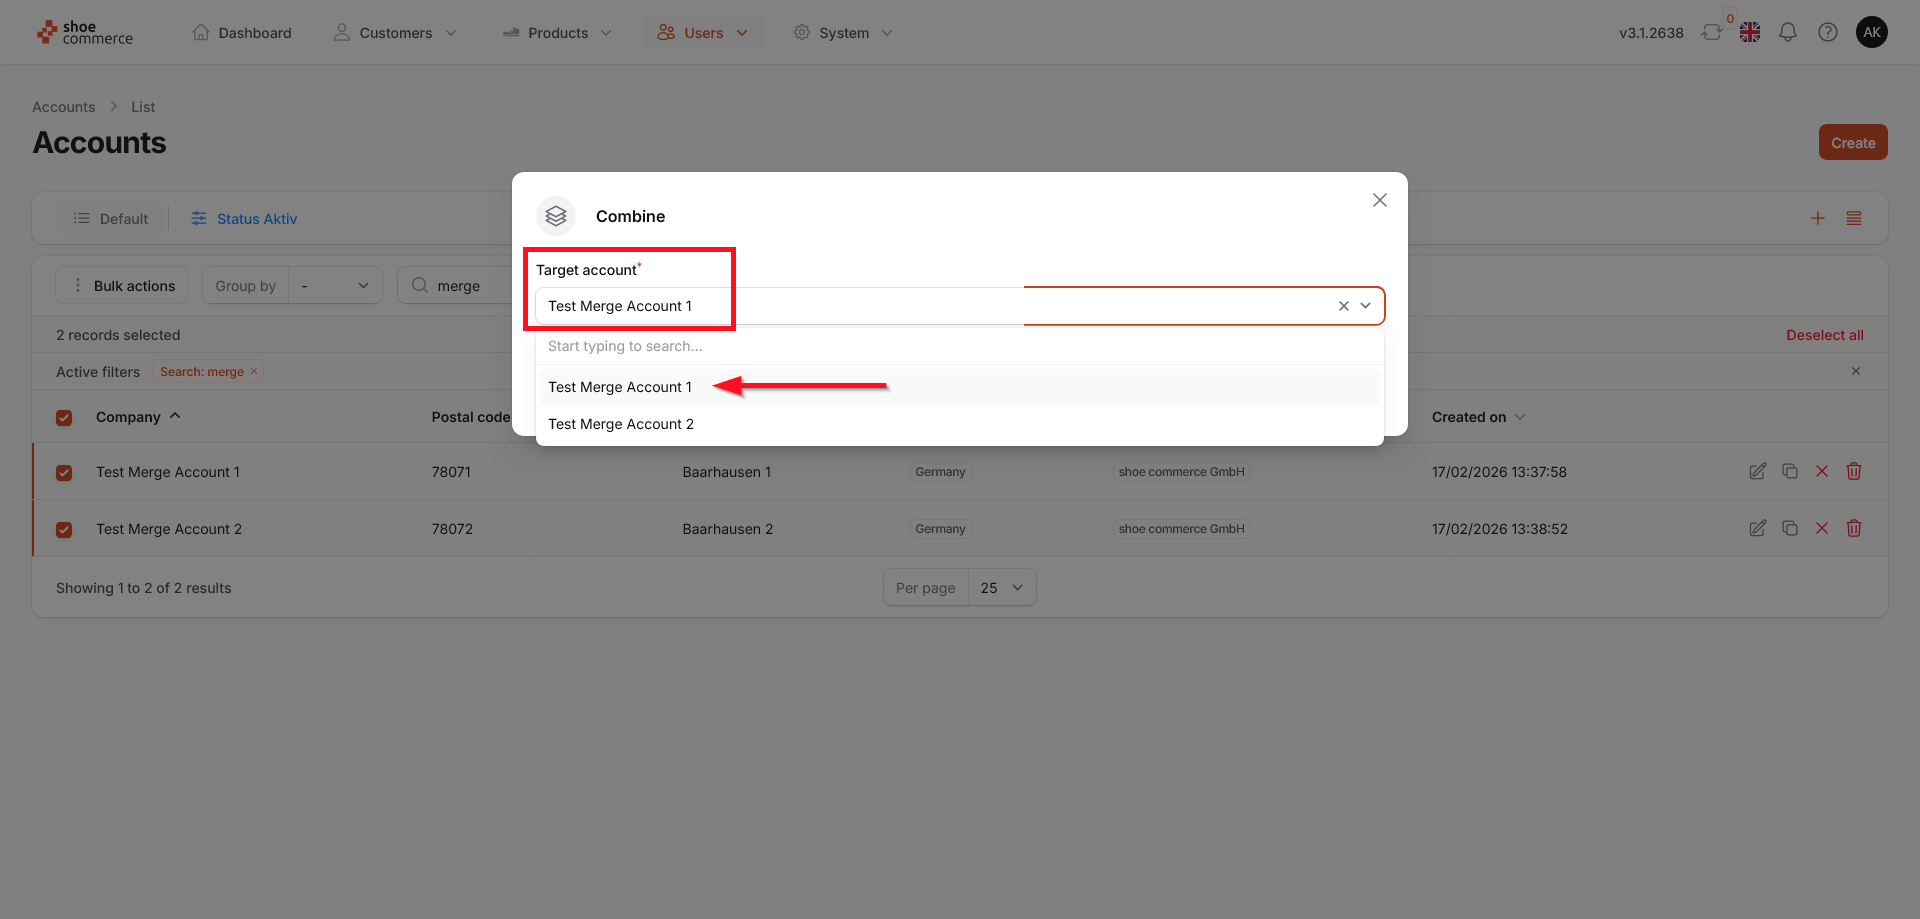
- Select the main account you want to keep as your primary record.Note: All selected accounts except the target account will be deleted.
- Click "Combine" to confirm and complete the merge.
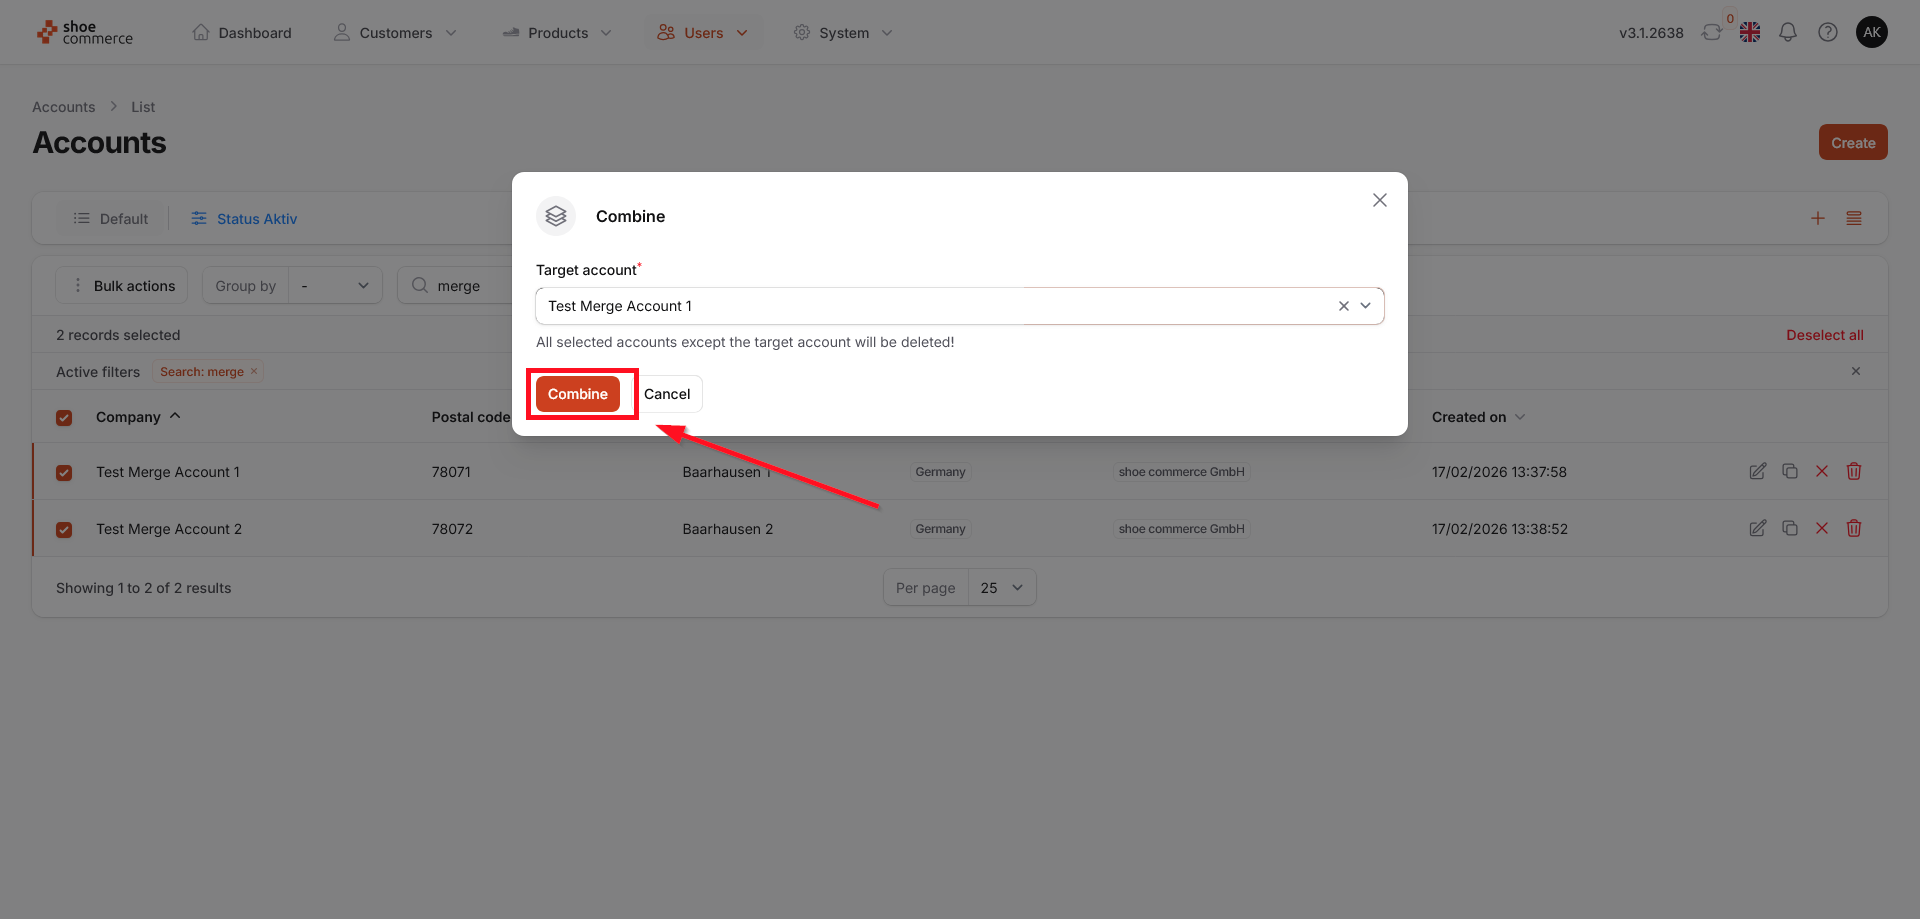
- Your duplicate accounts are now merged and up to date.