Table of Contents
Oders / Order details
 Updated
by Andreas Knaupp
Updated
by Andreas Knaupp
Filter orders
To initially display only the relevant orders of a specific account in a defined period, proceed as follows.
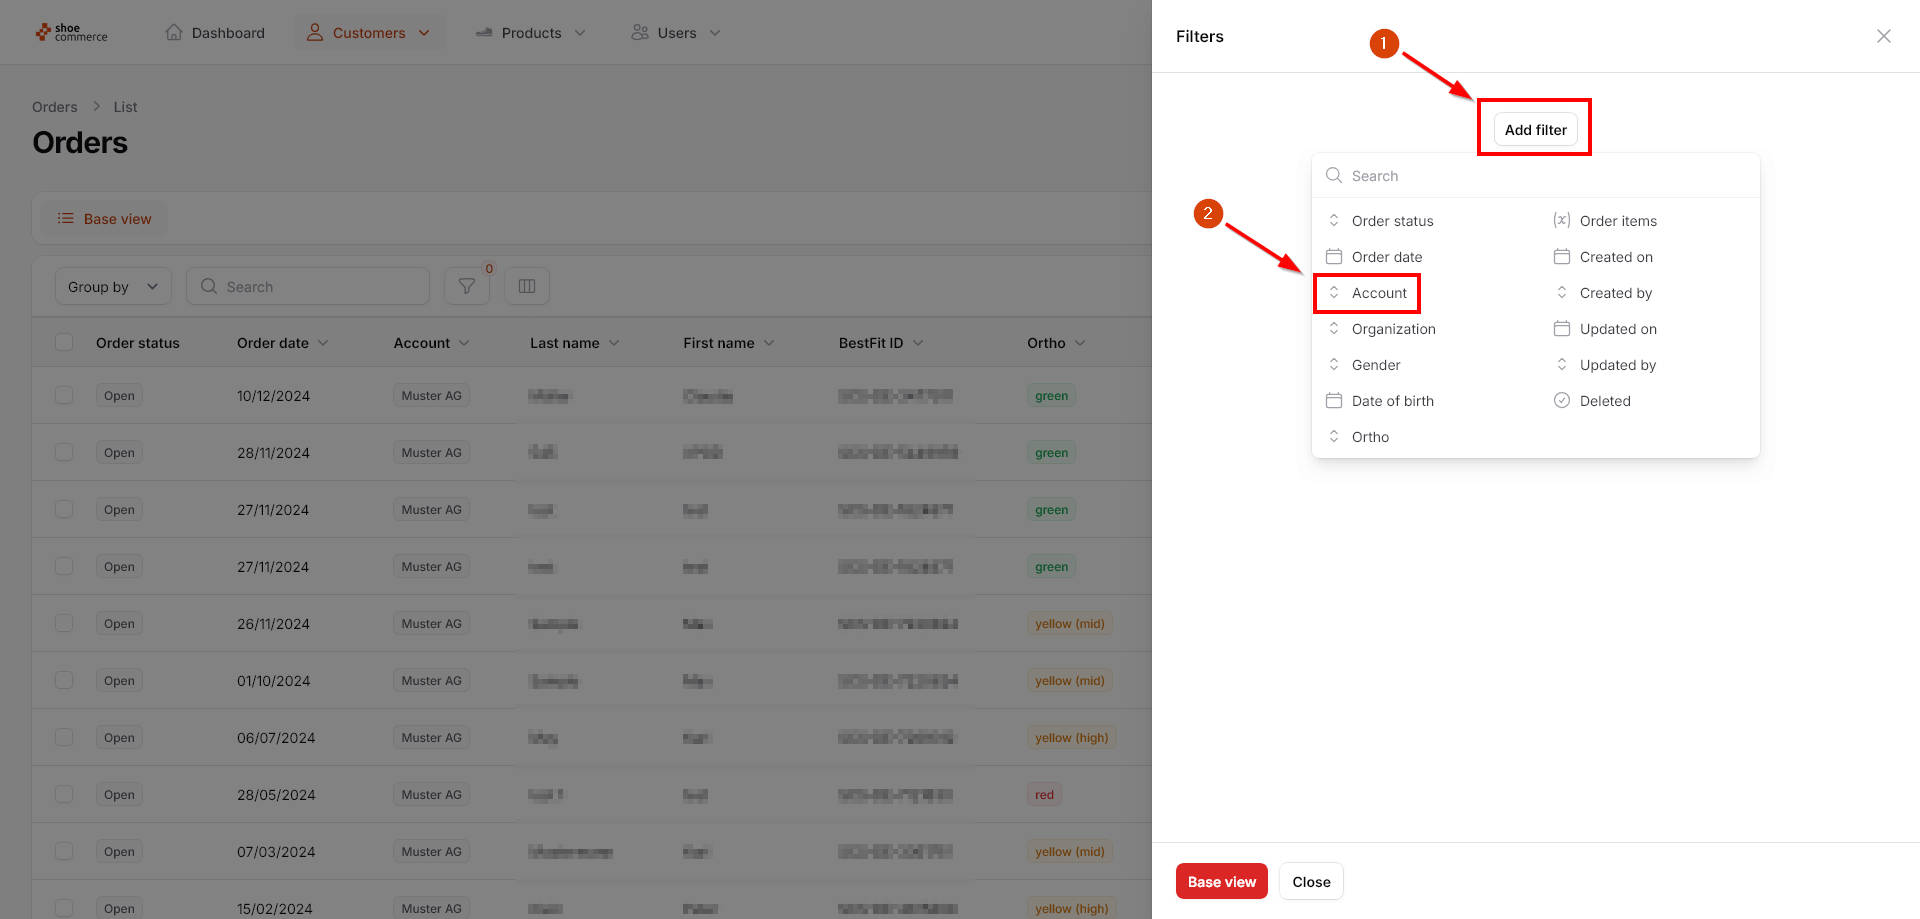
- Start by clicking on the filter function in the “Orders” menu section.

- Now click on “Add filter” in the newly opened menu and select “Account”.
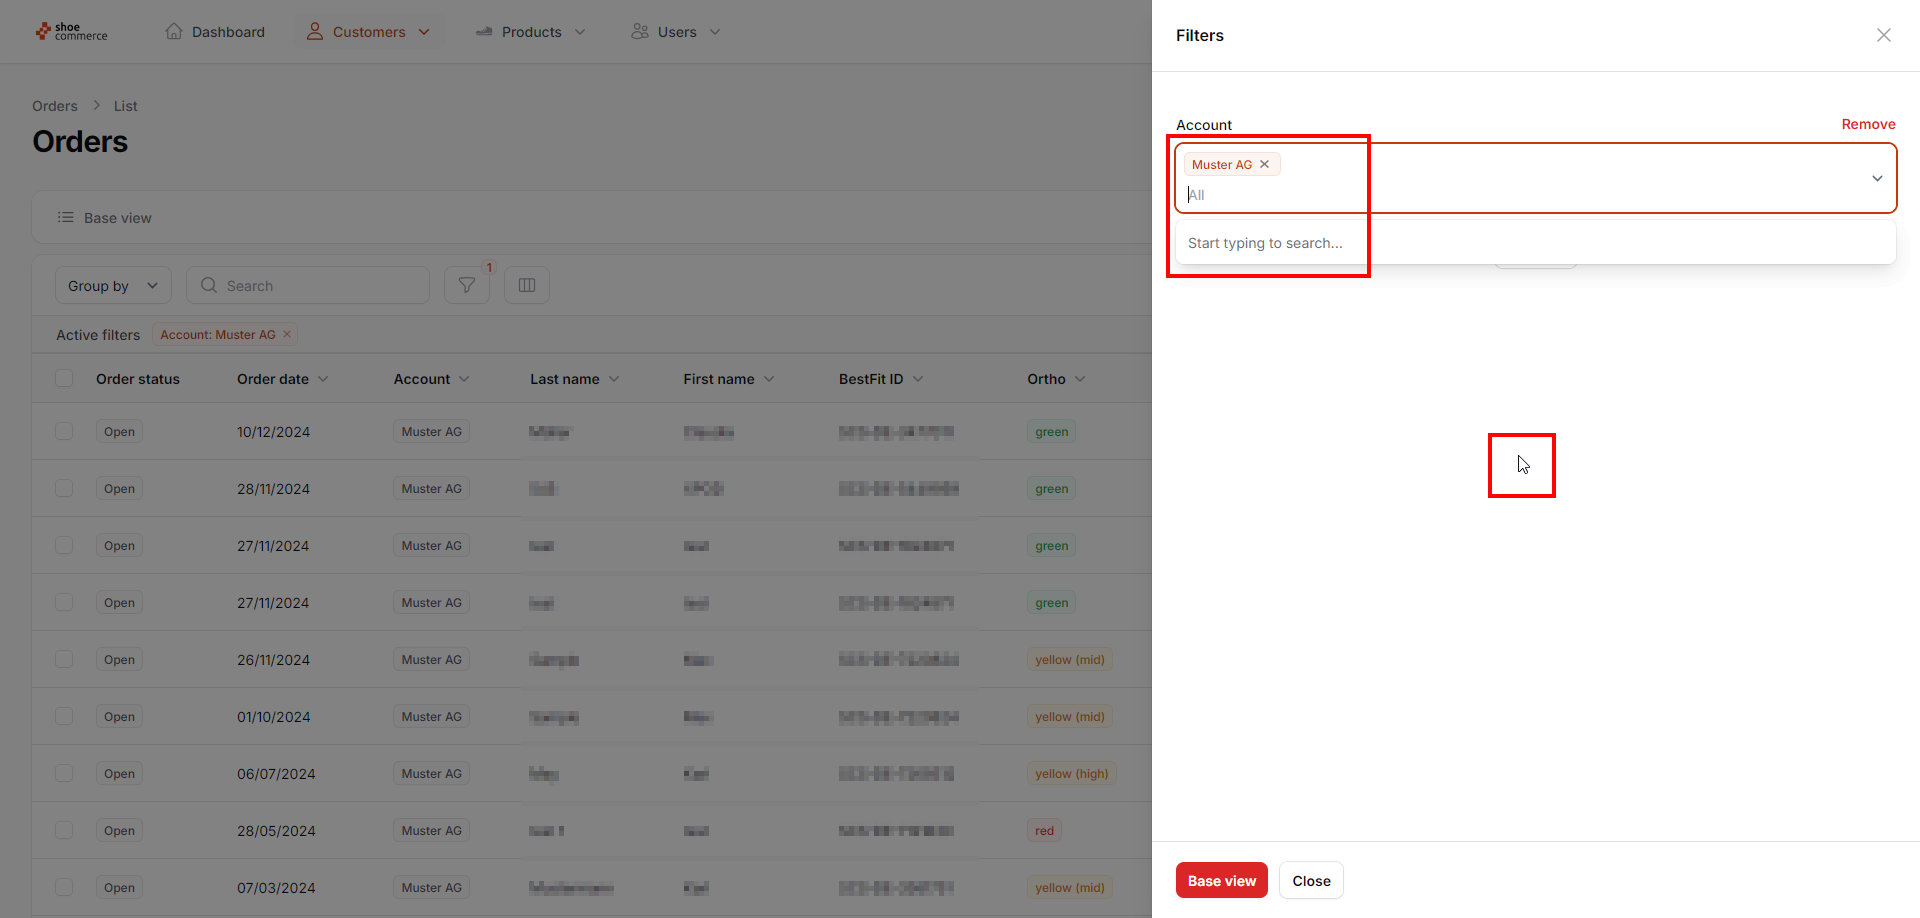
- First click on the drop-down menu to search for an account, in our case “Muster AG”. With a click on the corresponding name, the account you are looking for is selected as a filter criterion. Click on any white area in the filter menu to close the filter.

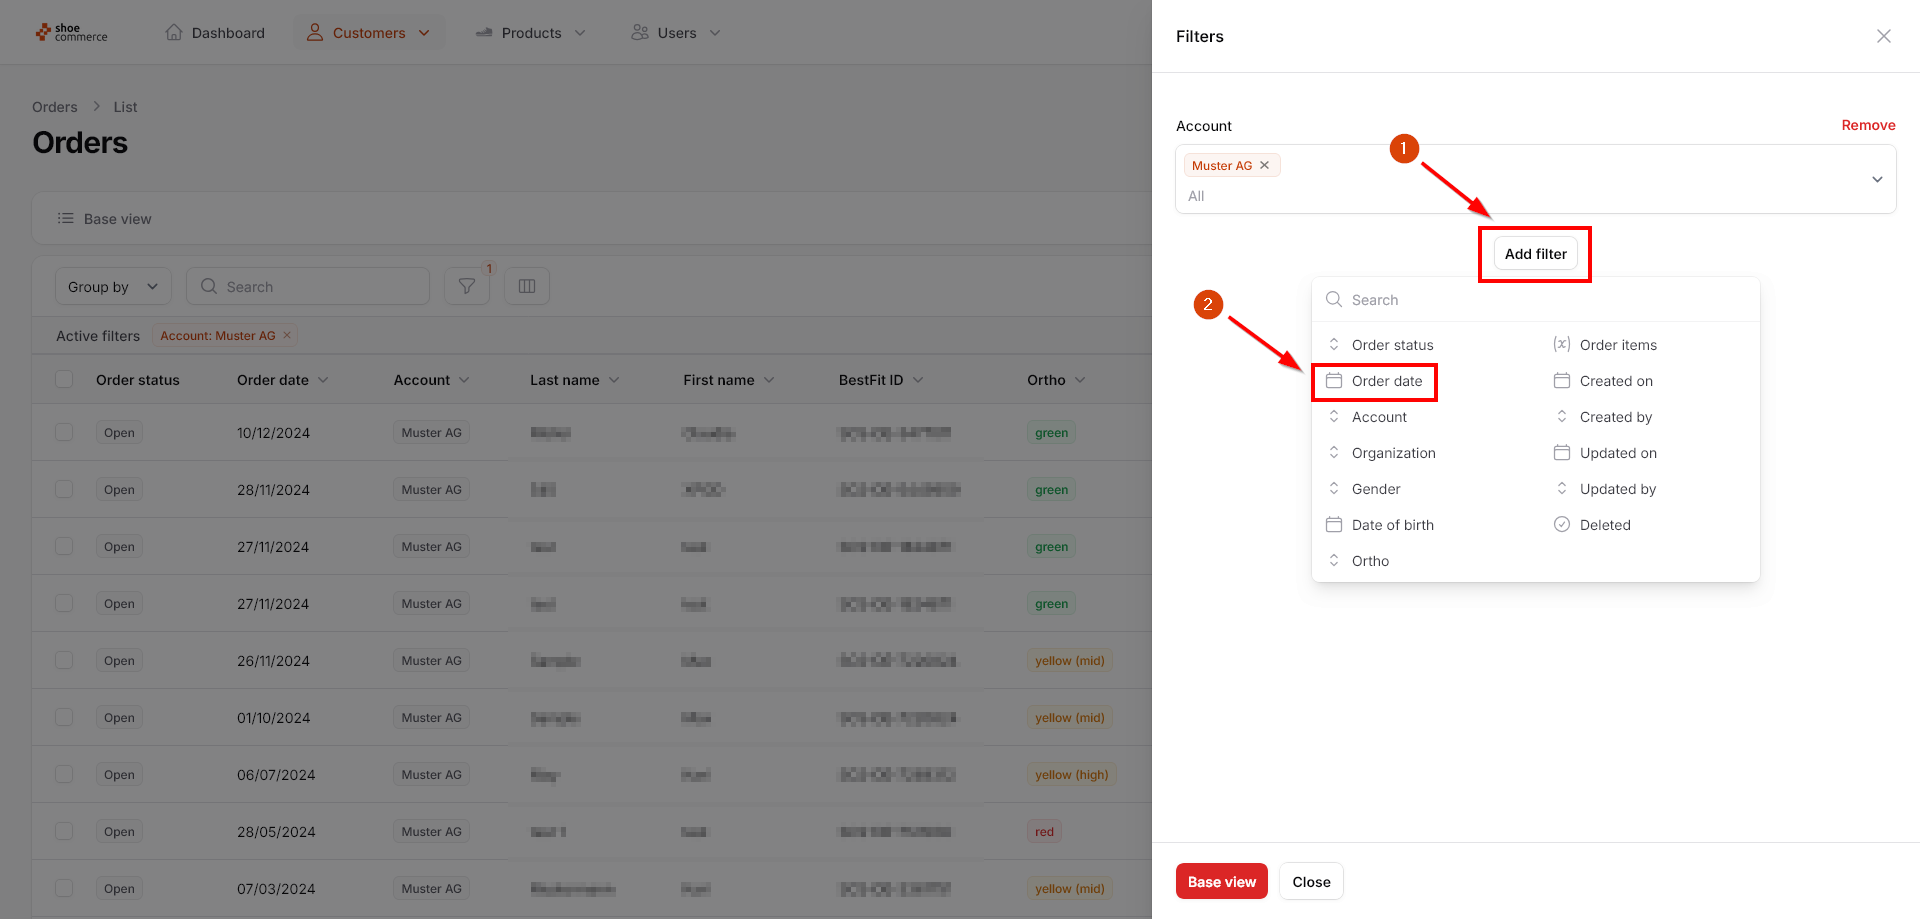
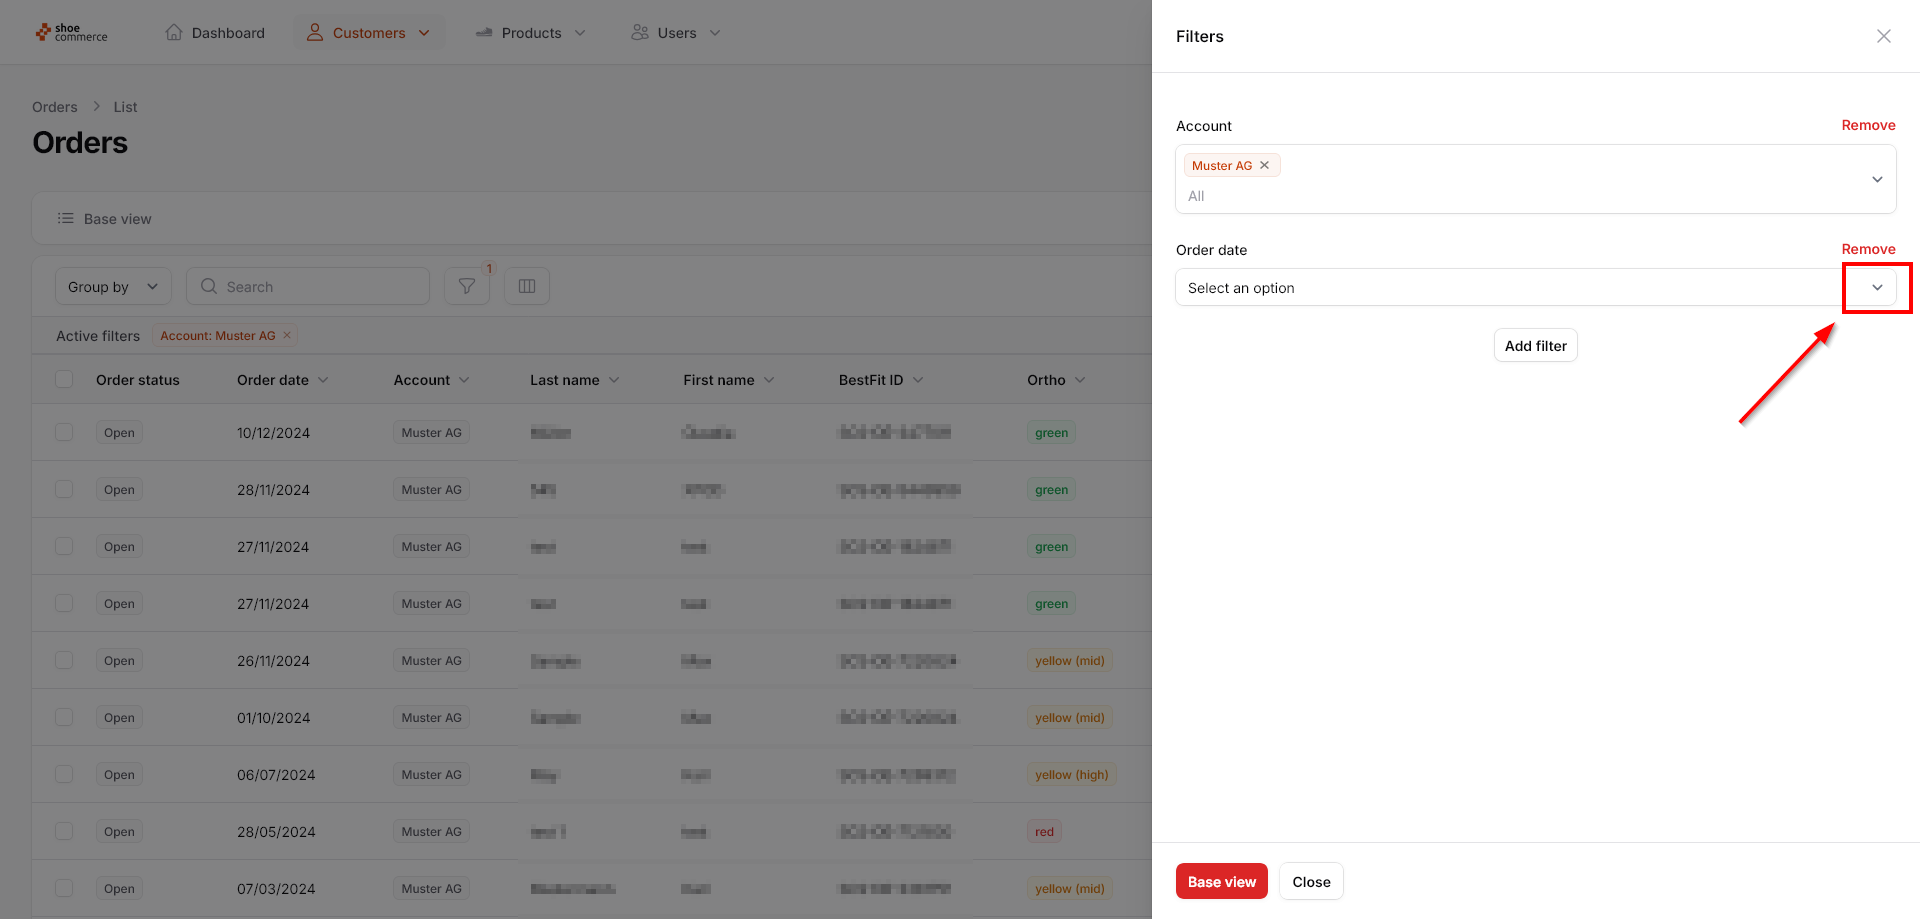
- In the next step, the order date for the selected account should be limited to a specific range. To do this, first click on “Add filter” again and then on “Order date”.
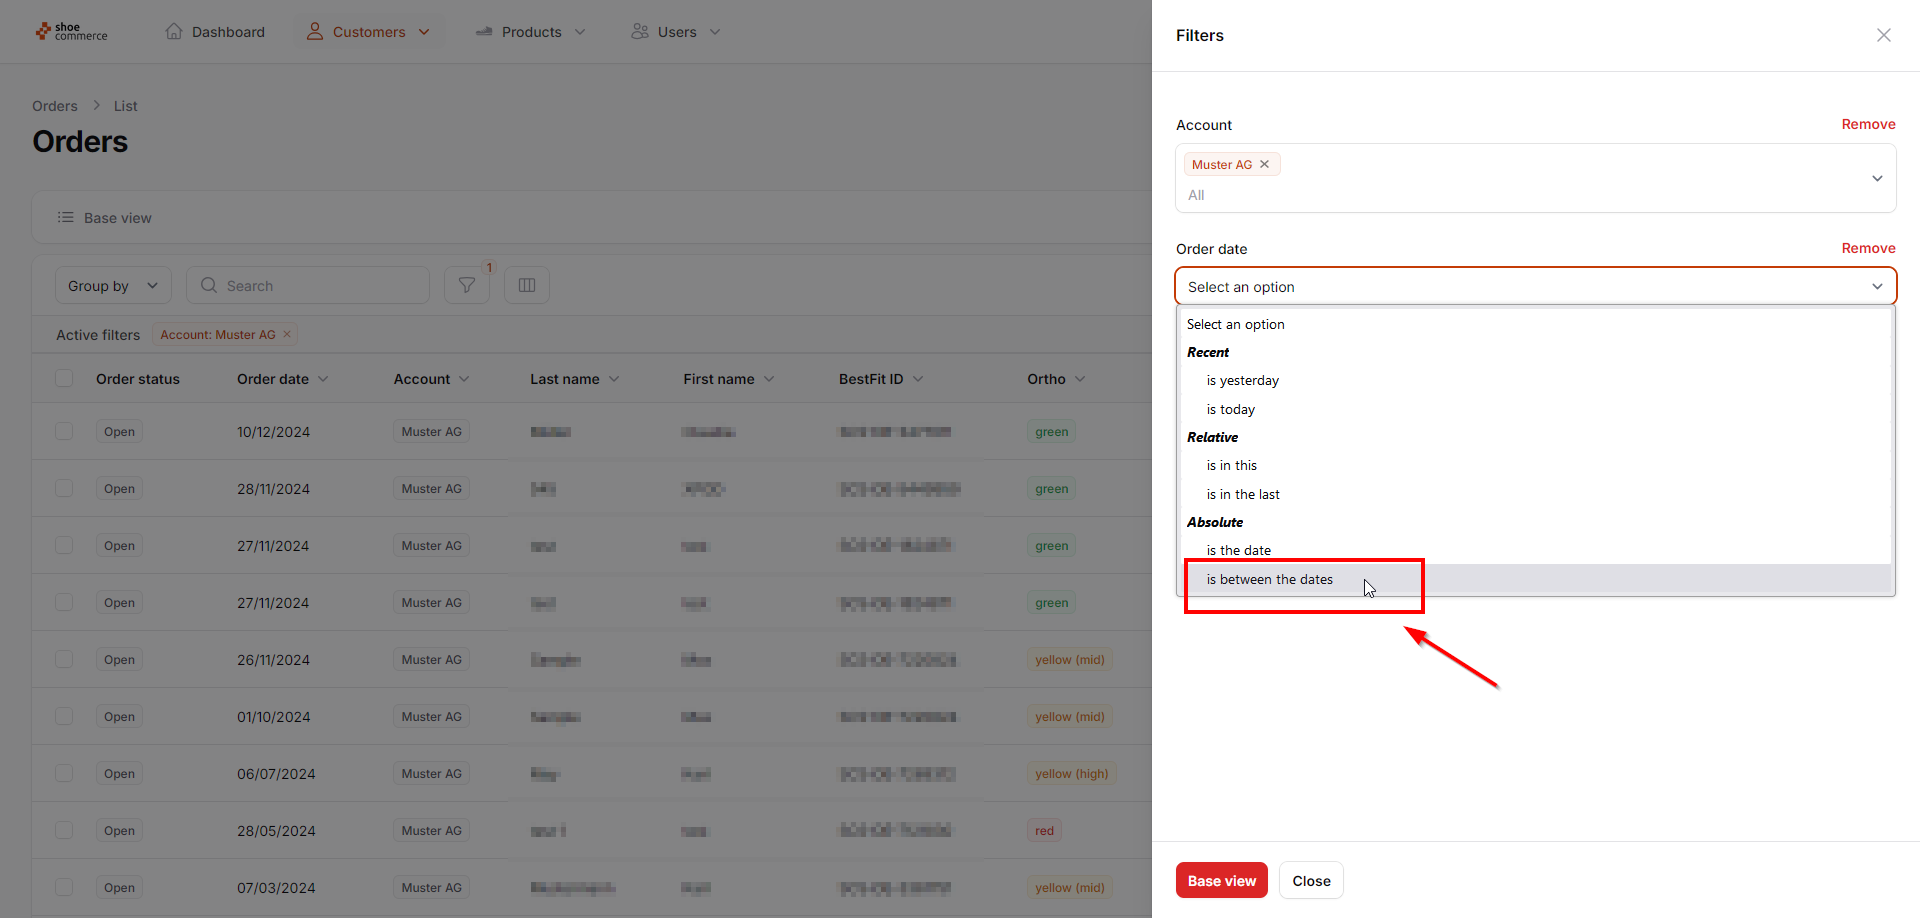
- Now click on the drop-down menu to call up further criteria for filtering the order date. Here you have the option of either specifying an exact date (is the date) or limiting a date range (is between the dates). In our case, we want to do the latter and therefore select this option. Other options, such as quick filtering of yesterday's or today's data only, are also available.
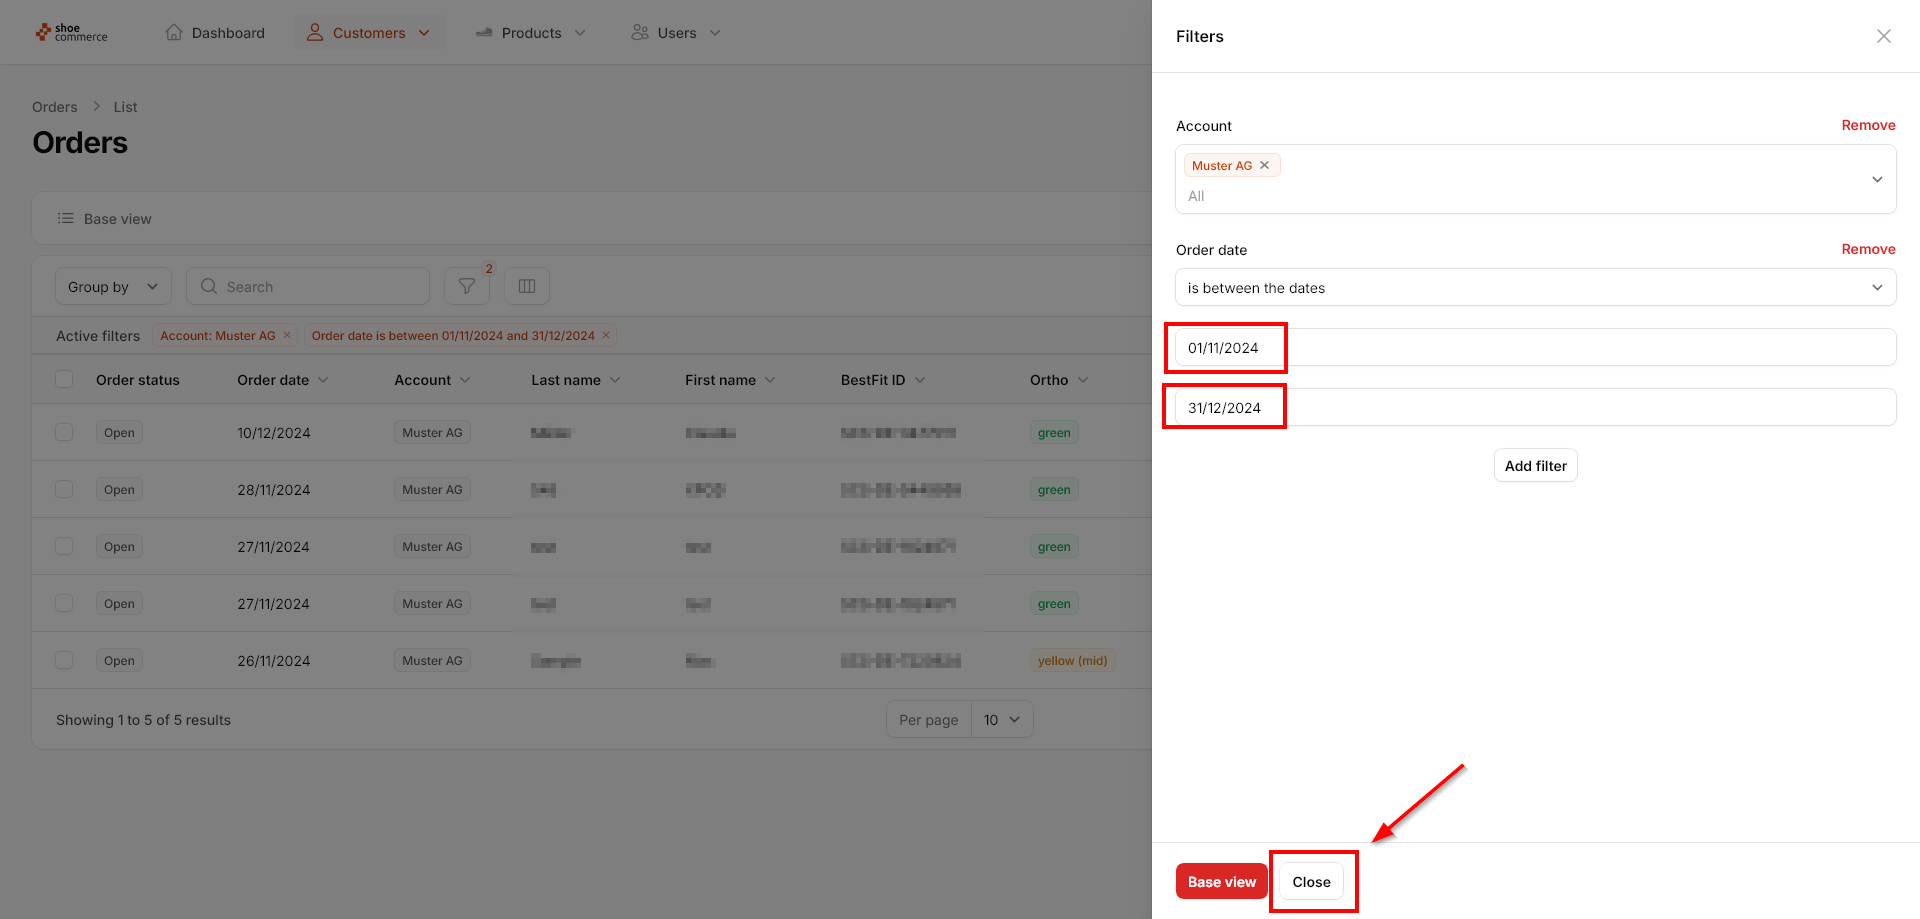
- In this example, we only want to display all orders in the backend with a date between 01.11.2024 and 31.12.2024. Please note that the date format used system-wide is always DD/MM/YYYY. If desired, further filters can be set according to the same pattern by clicking on “Add filter”. Once you have defined all filters accordingly, end the process by clicking on “Close”.
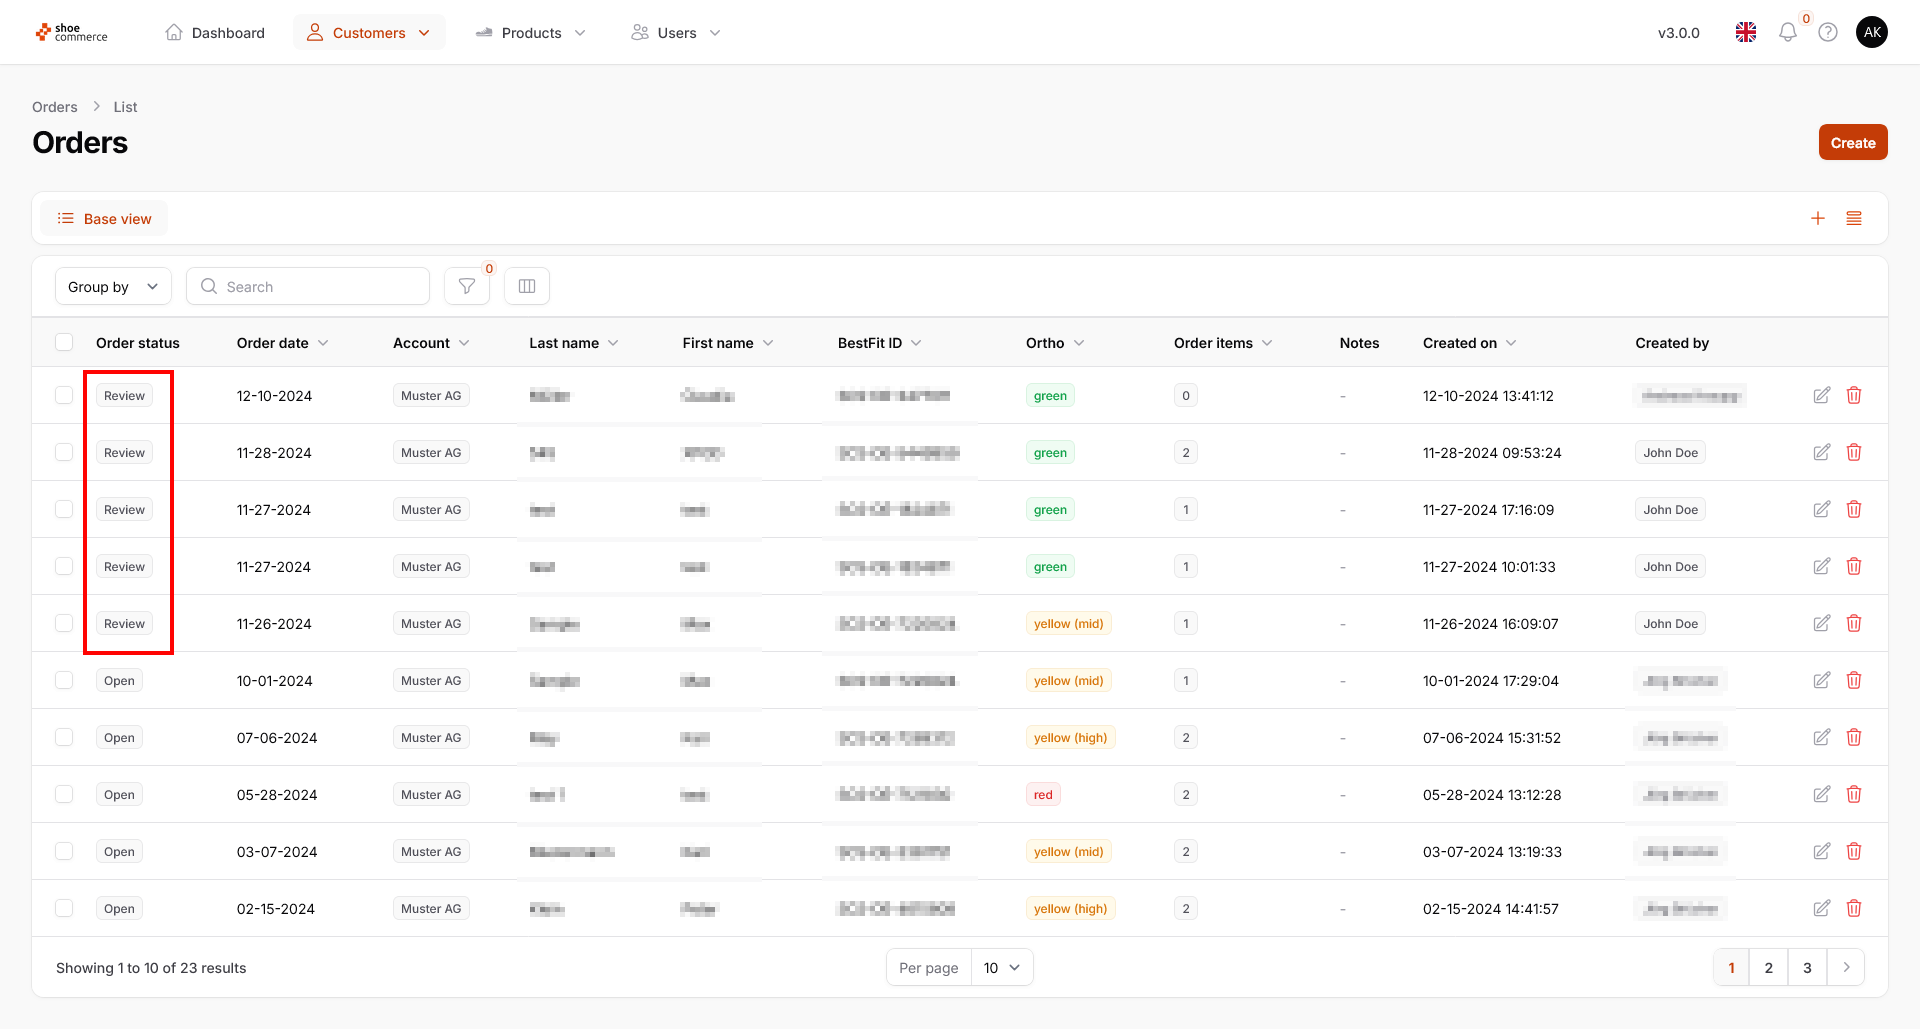
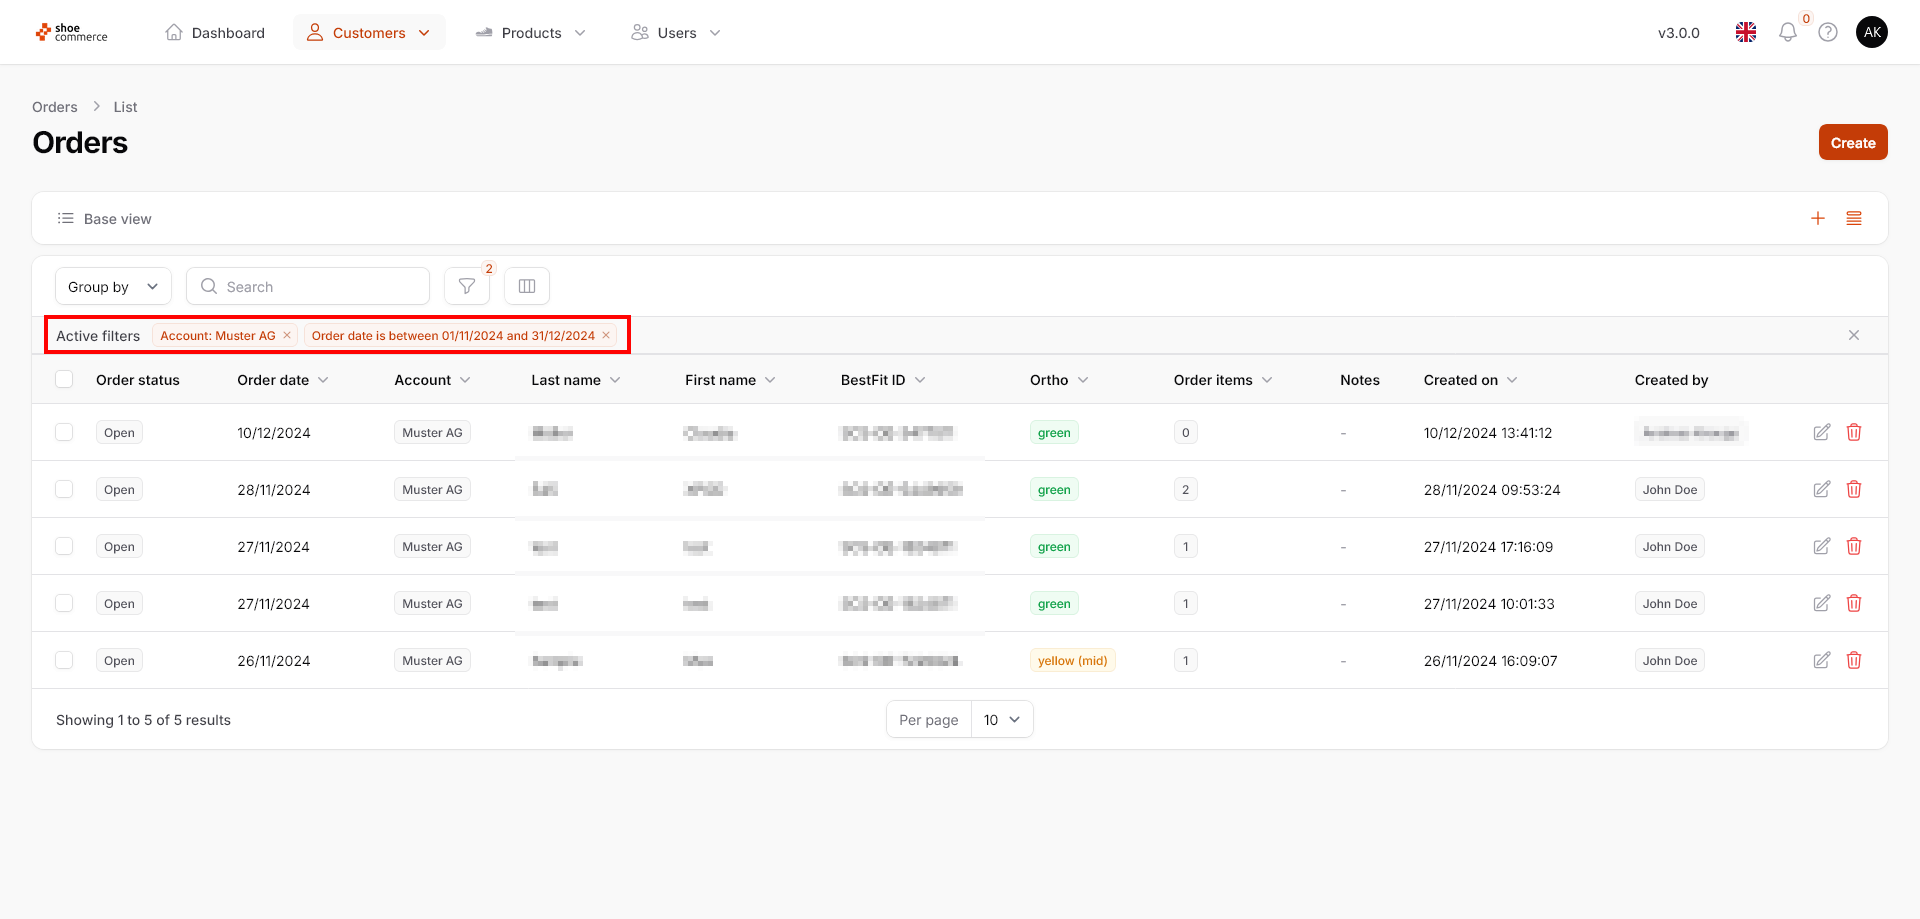
- Due to the selected filters, only a total of 5 entries are now displayed in the list view in the backend. The filter criteria are also displayed additionally in the “Active filters” area.
Edit your order
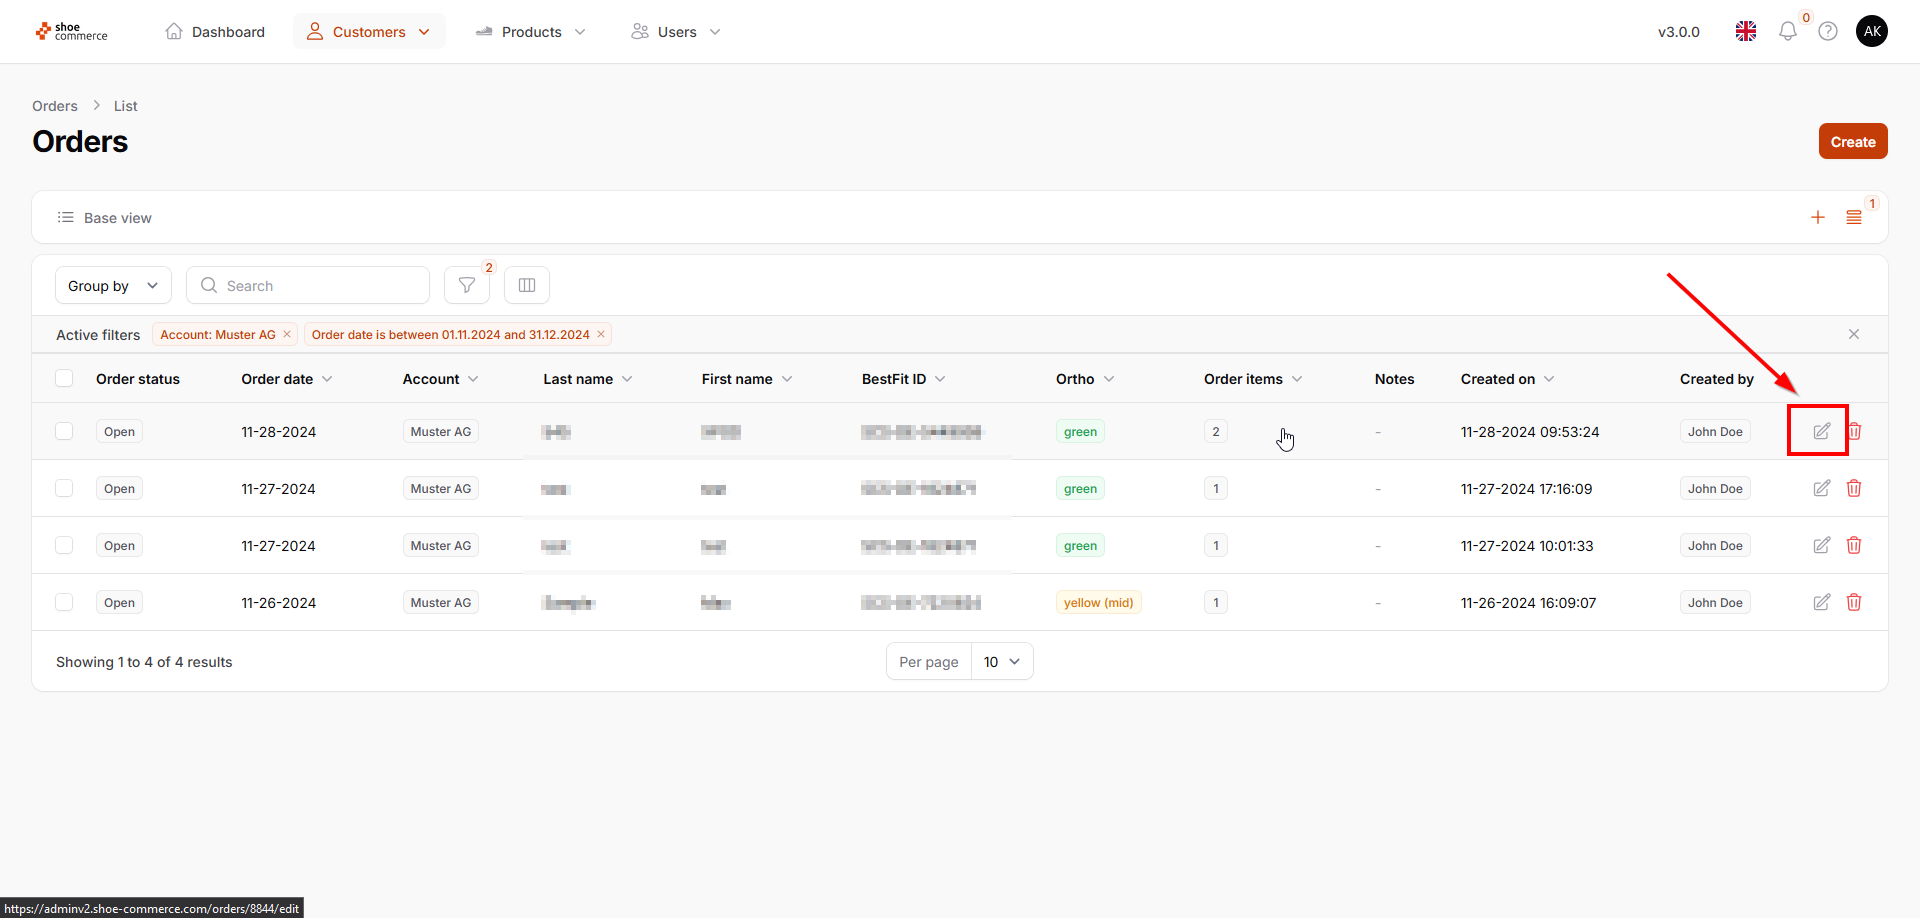
To access the details of an order, including order items, or to edit them, you have the following two options:
- Click anywhere in the area of the data record that you want to access (hand symbol of the mouse pointer) or
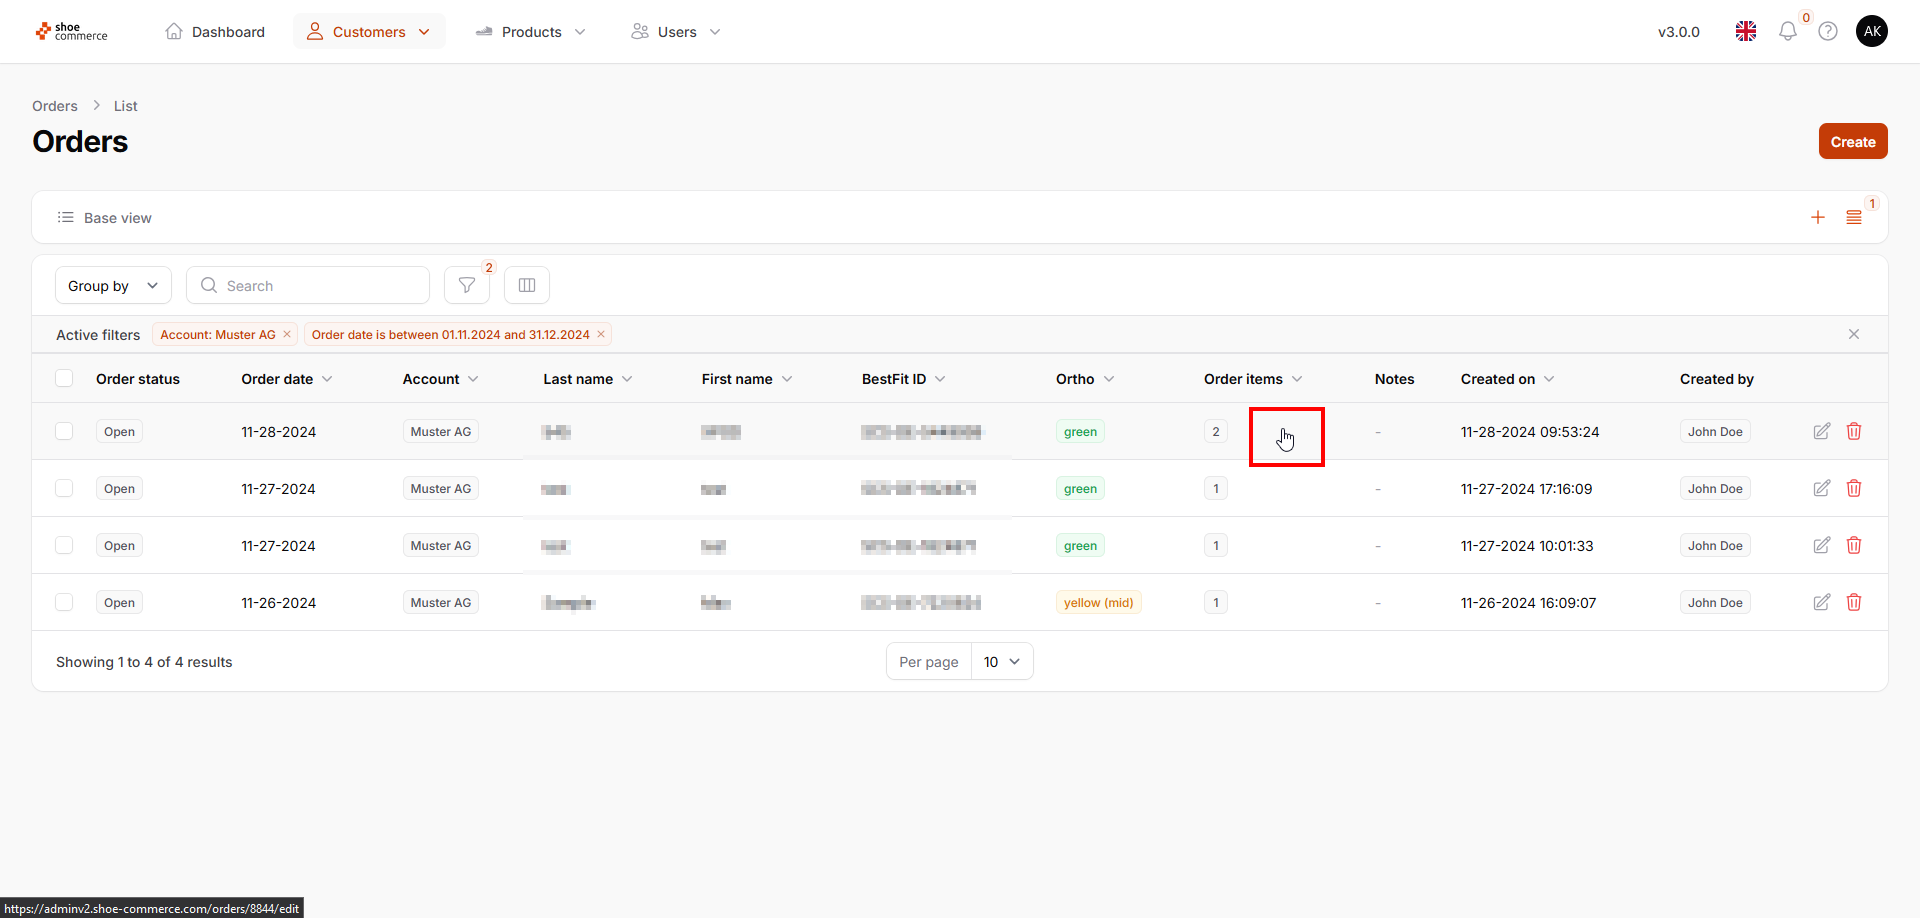
- click on the “Edit” icon on the far right of the corresponding data record.
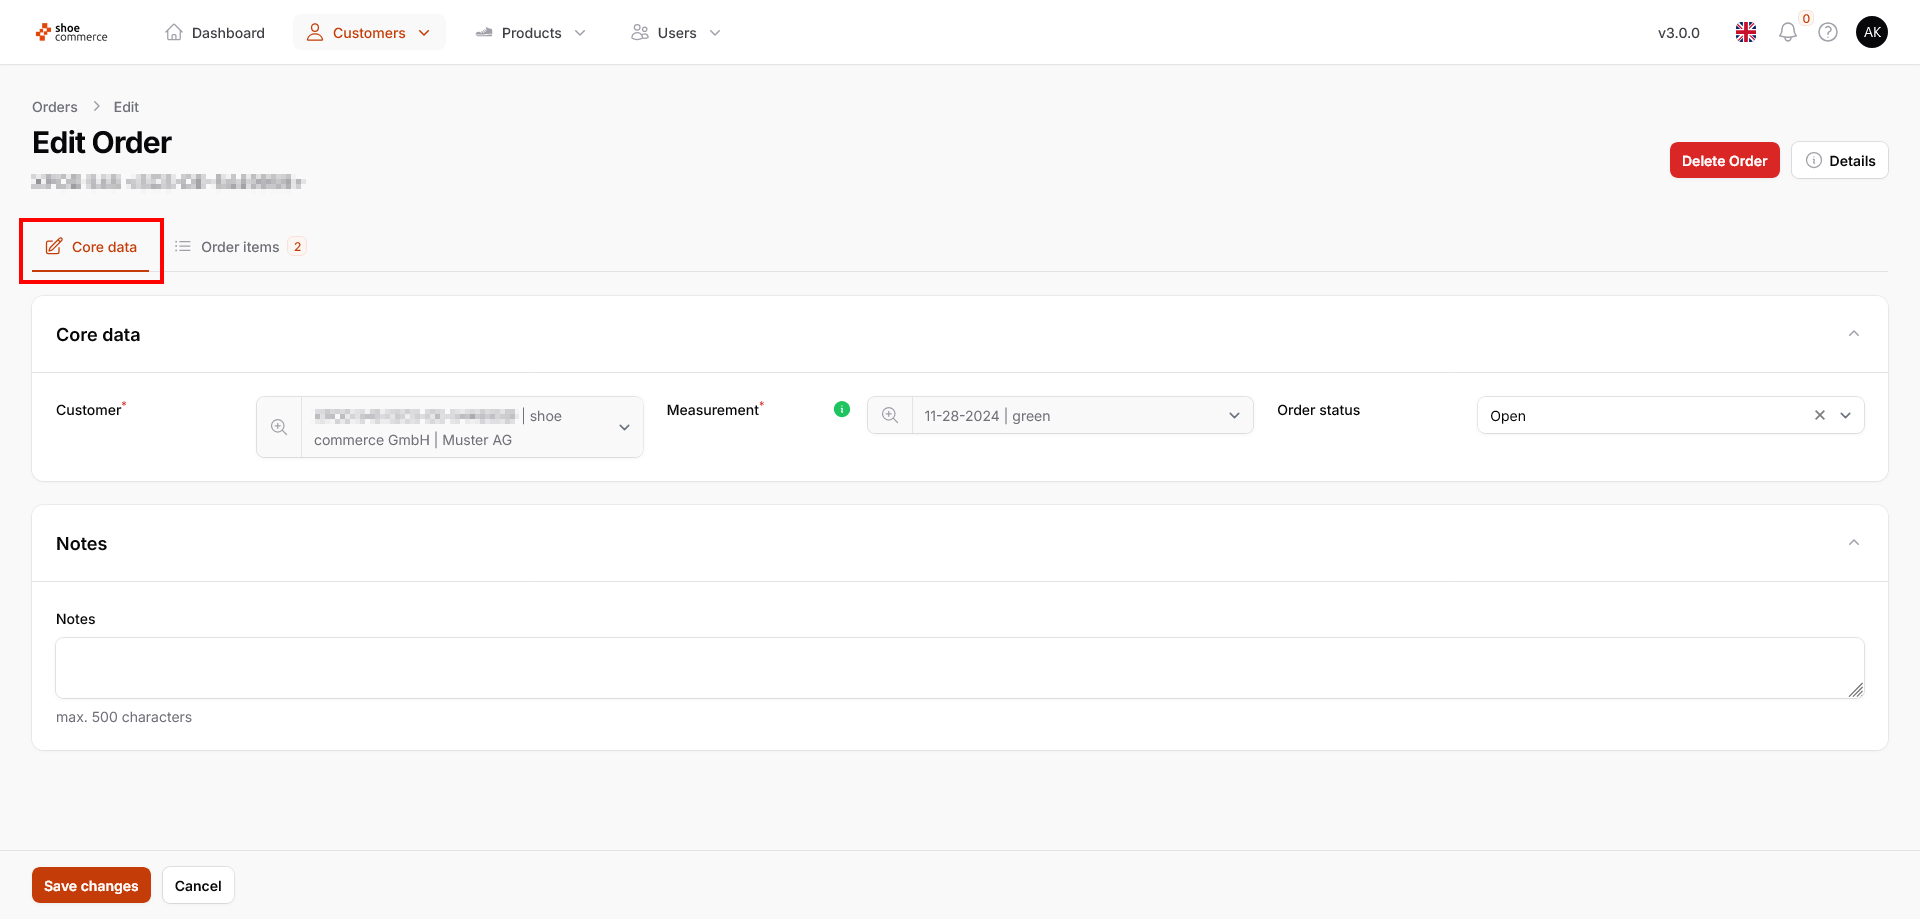
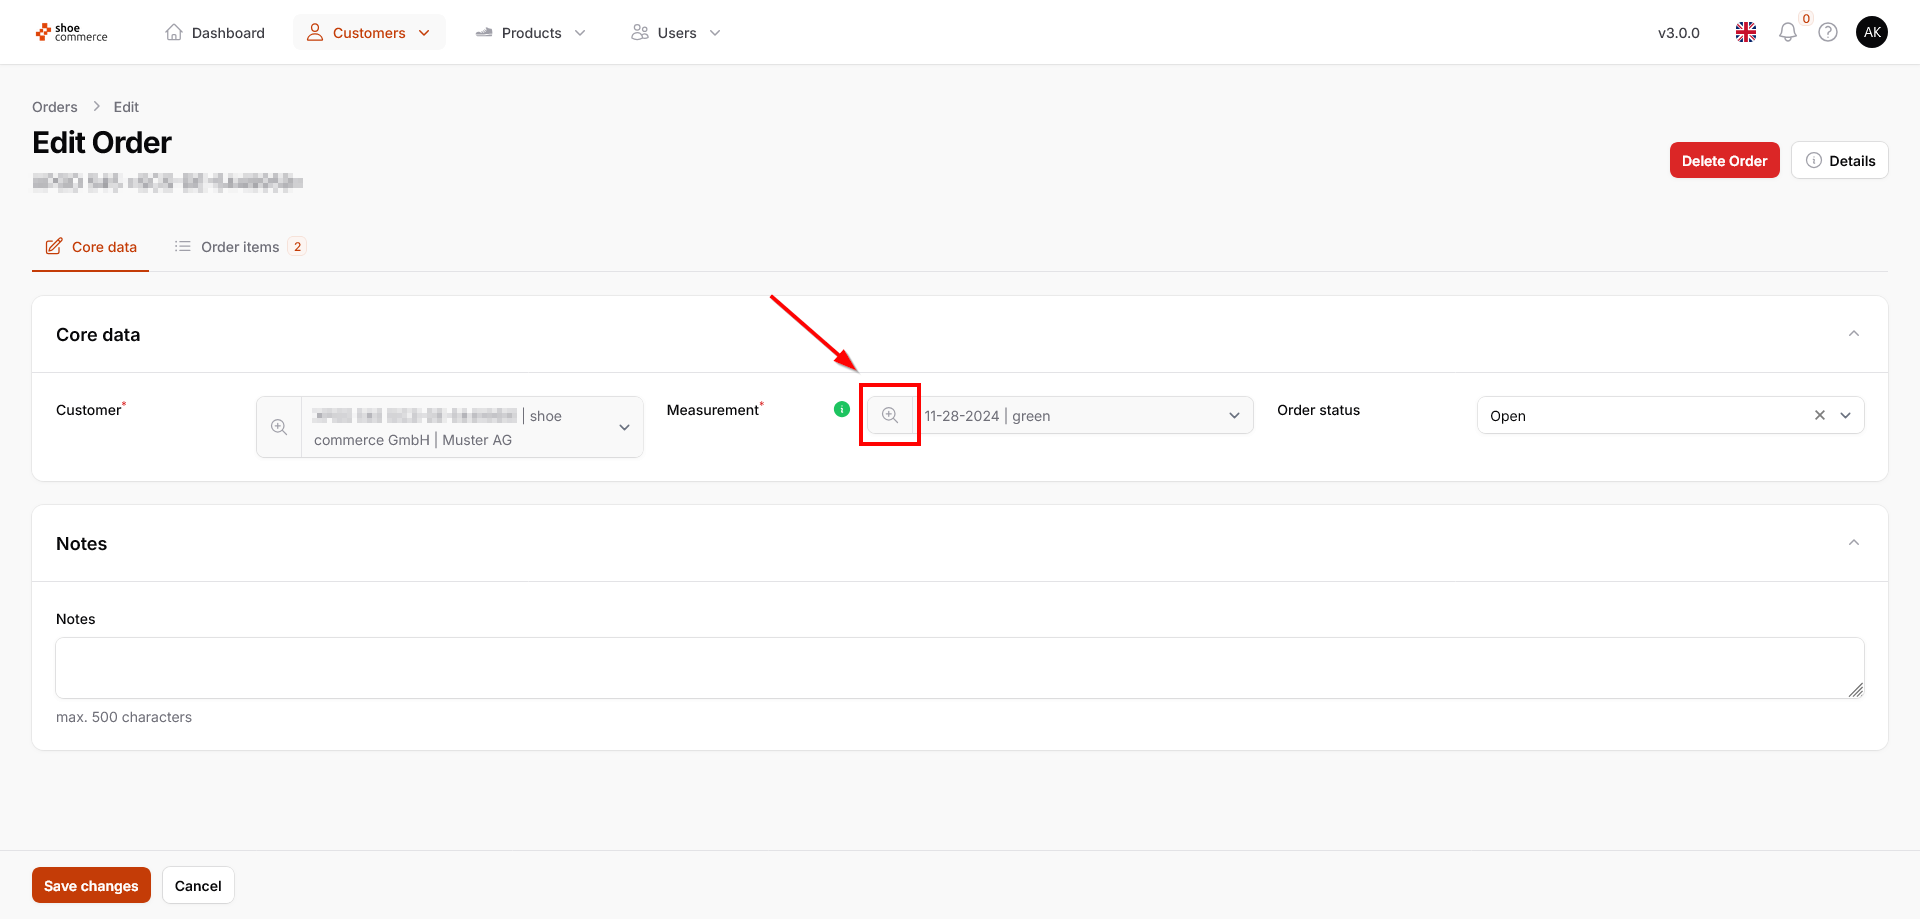
- You are now on the editing page of the data record (“Edit Order”), whereby the “Core data” is the first thing displayed by default.
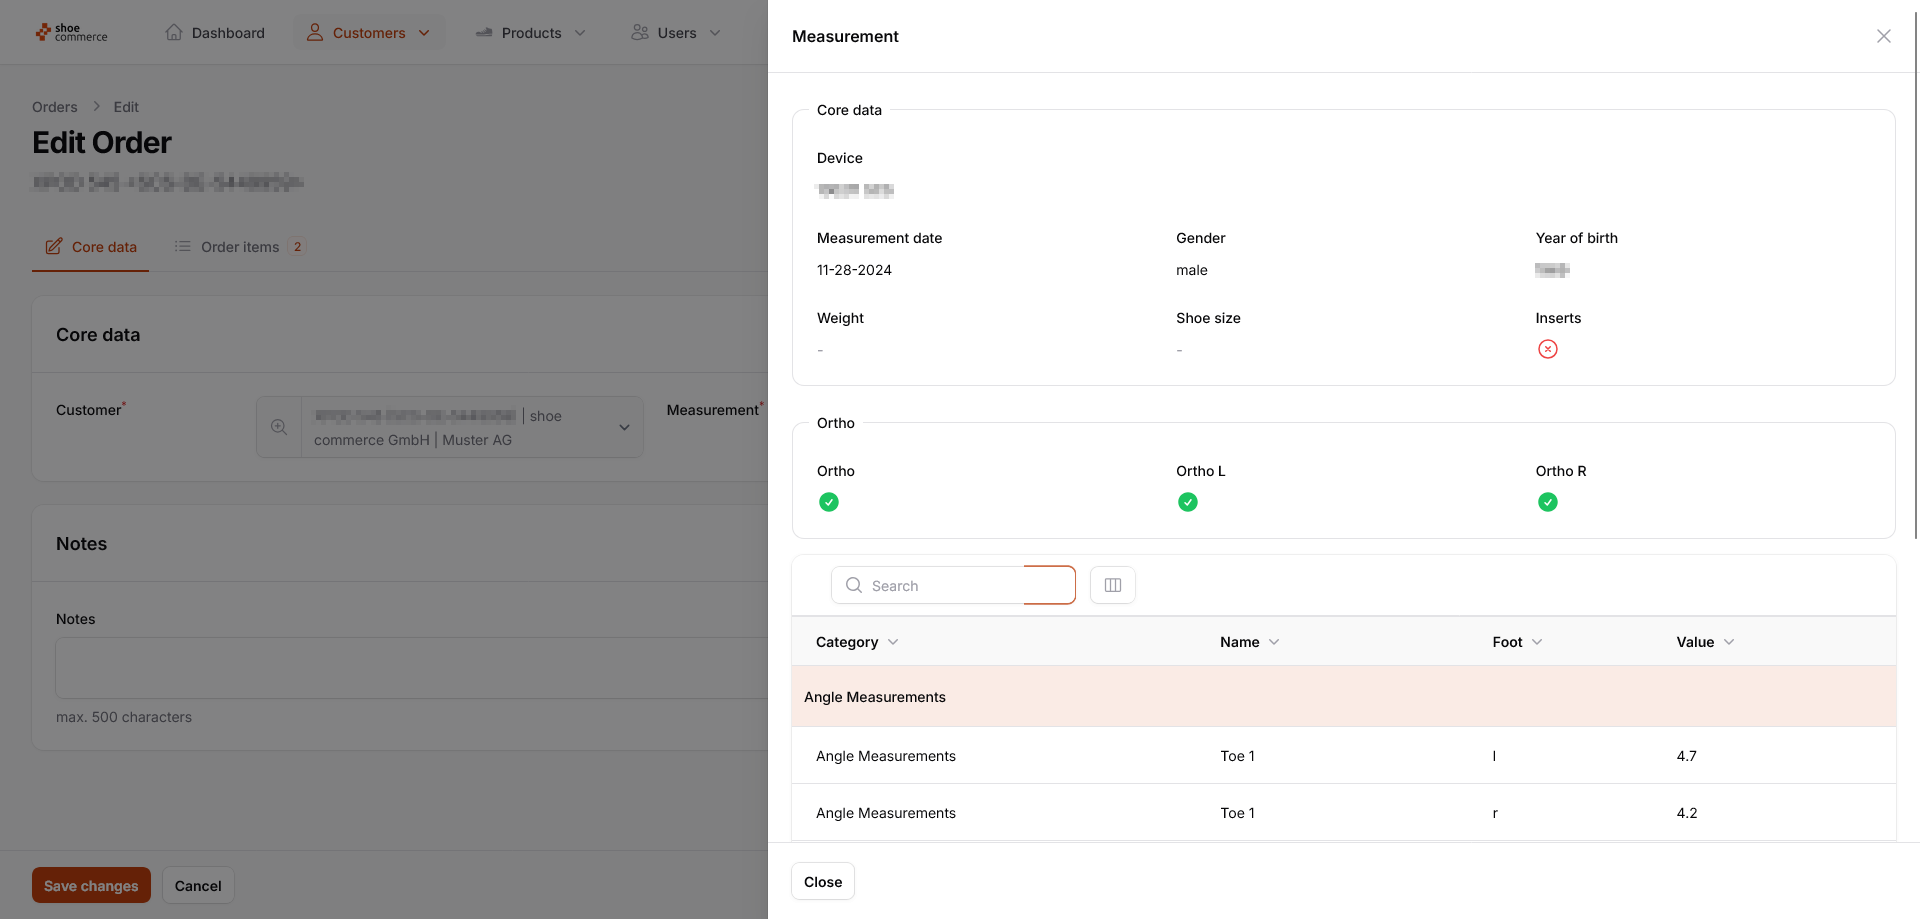
- In the “Measurement” section of the menu, the result of the Ortho is displayed in color (here green) while clicking on the magnifying glass symbol allows you to open additional details of the measurement (e.g. separate Ortho results for the left and right foot).
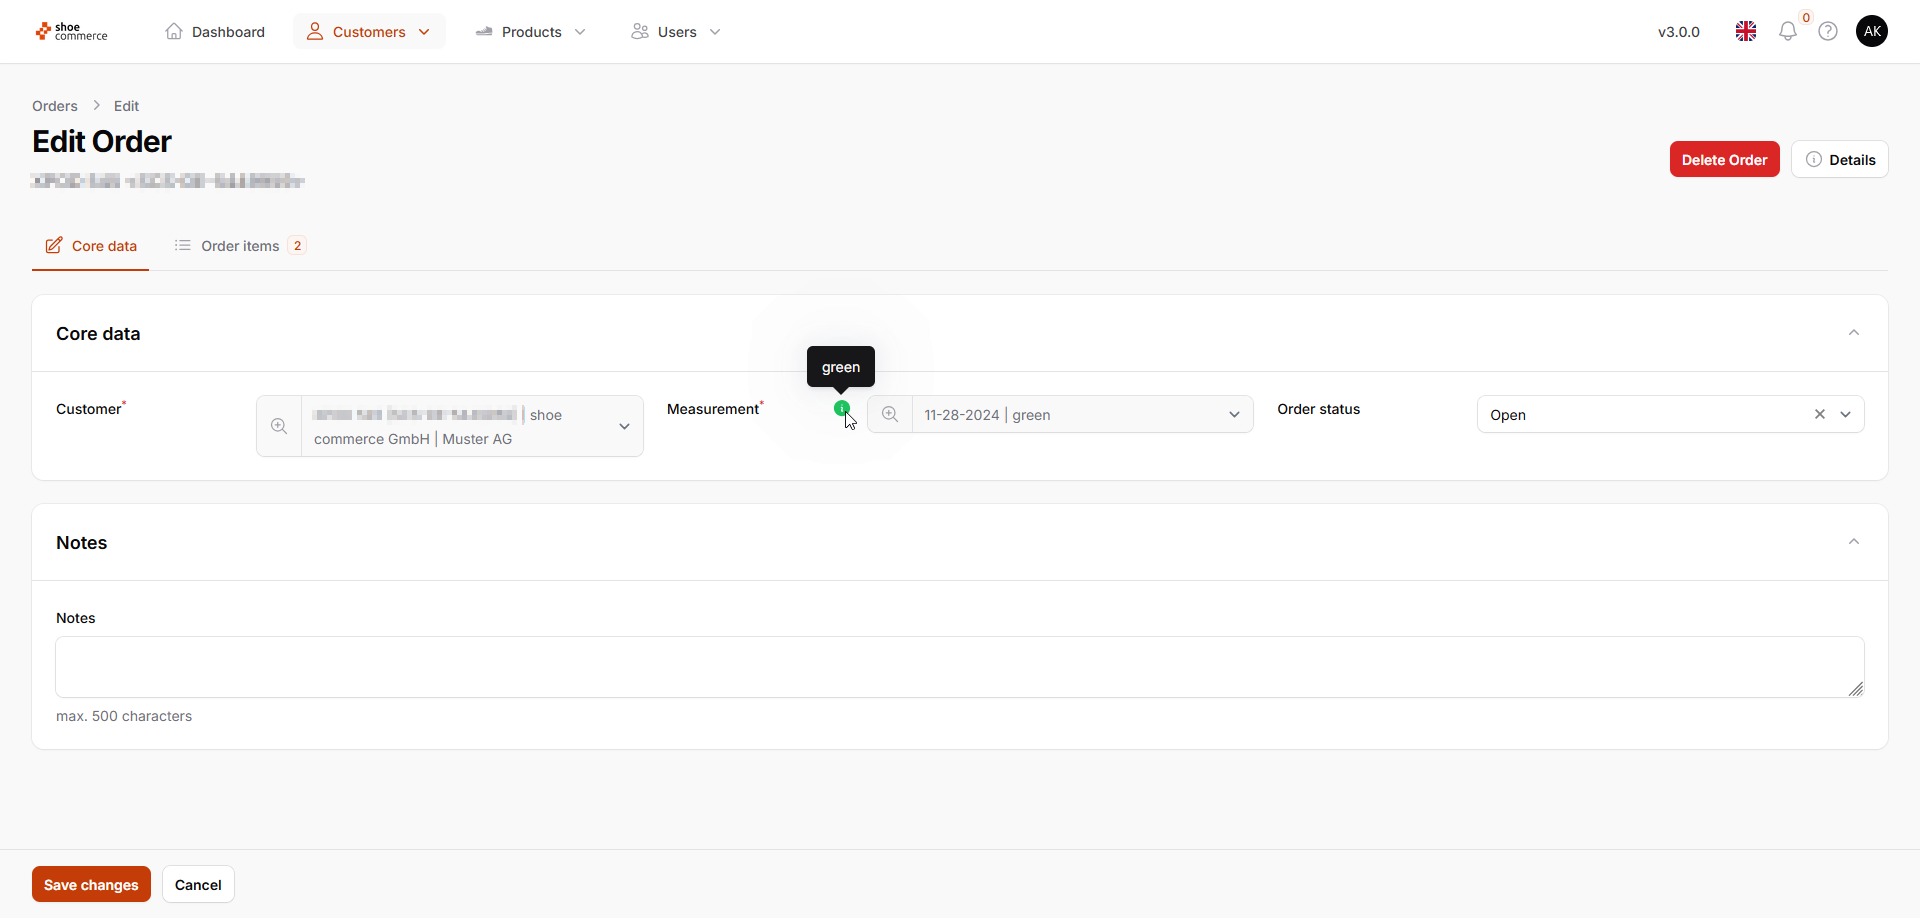
- In the menu item “Order status” you can change the status of the order as required and confirm it by clicking on “Save changes”.
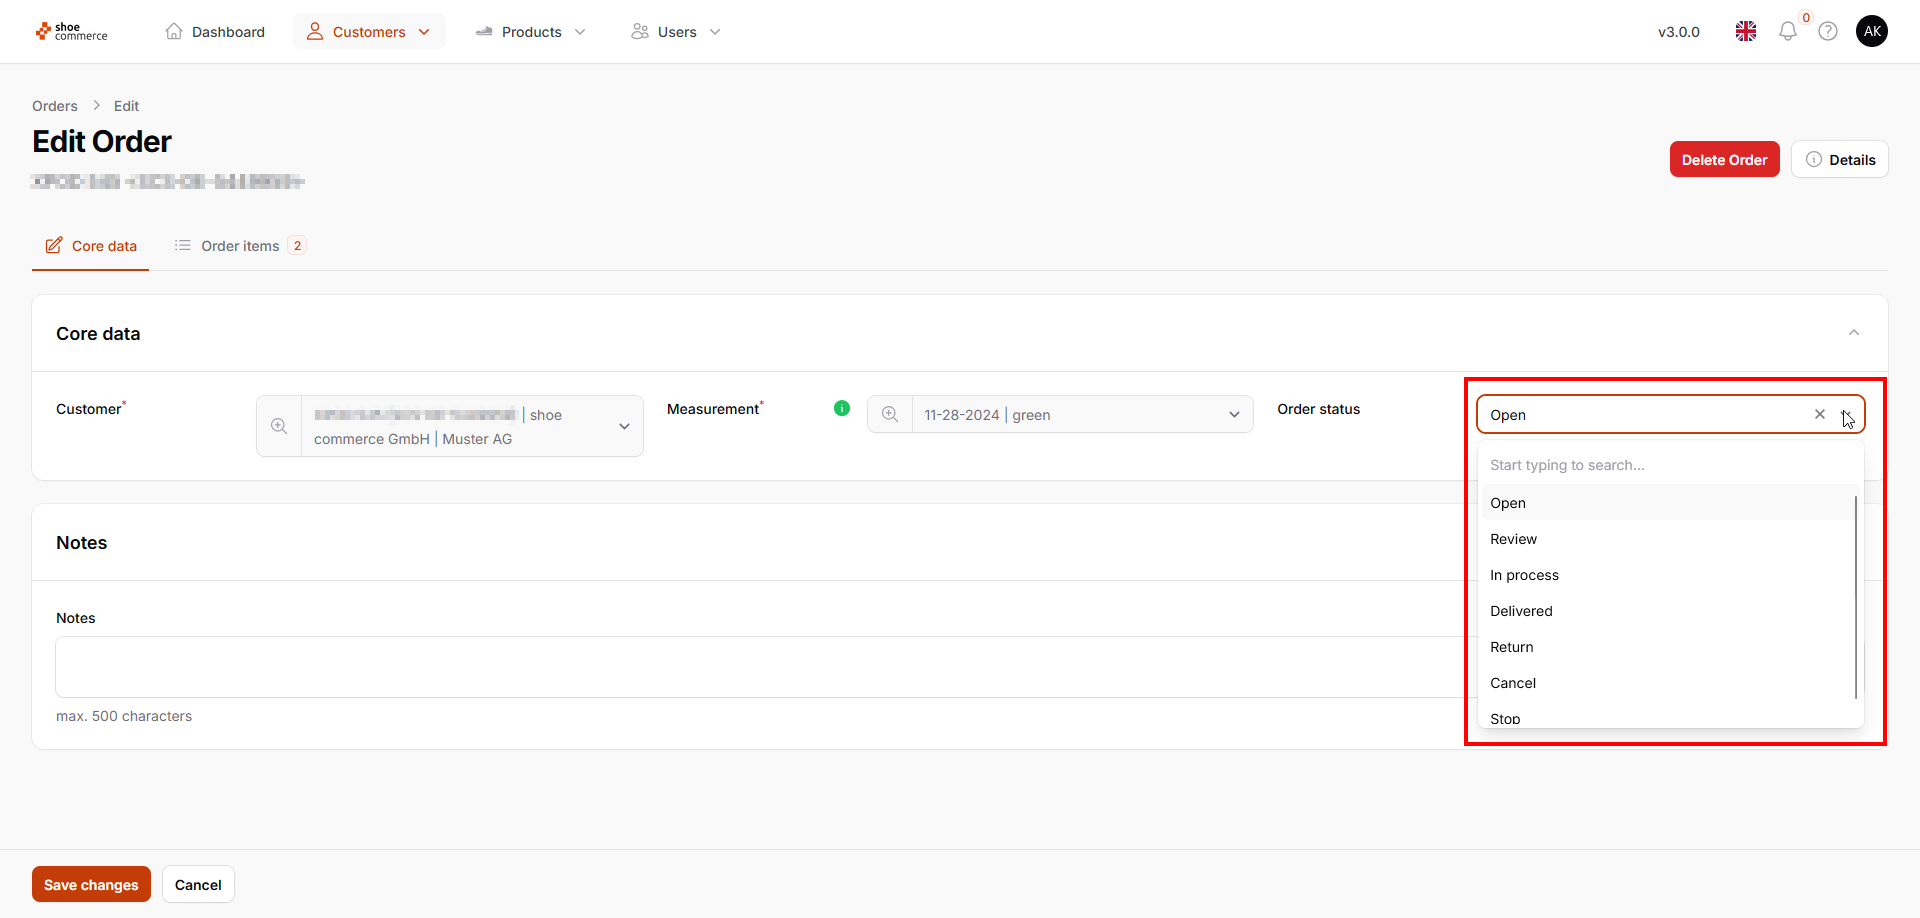
The following options are available:
Status of the order | Meaning |
open | Order generated but not processed. |
Review | Consultation with customer or in-house necessary |
In Process | The order is triggered. |
Delivered | Item(s) handed over to customer. |
Return | Item(s) was/were returned by the customer. |
Cancel | Customer canceled order. |
Stop | Order will not be processed any further. |
View and edit order items
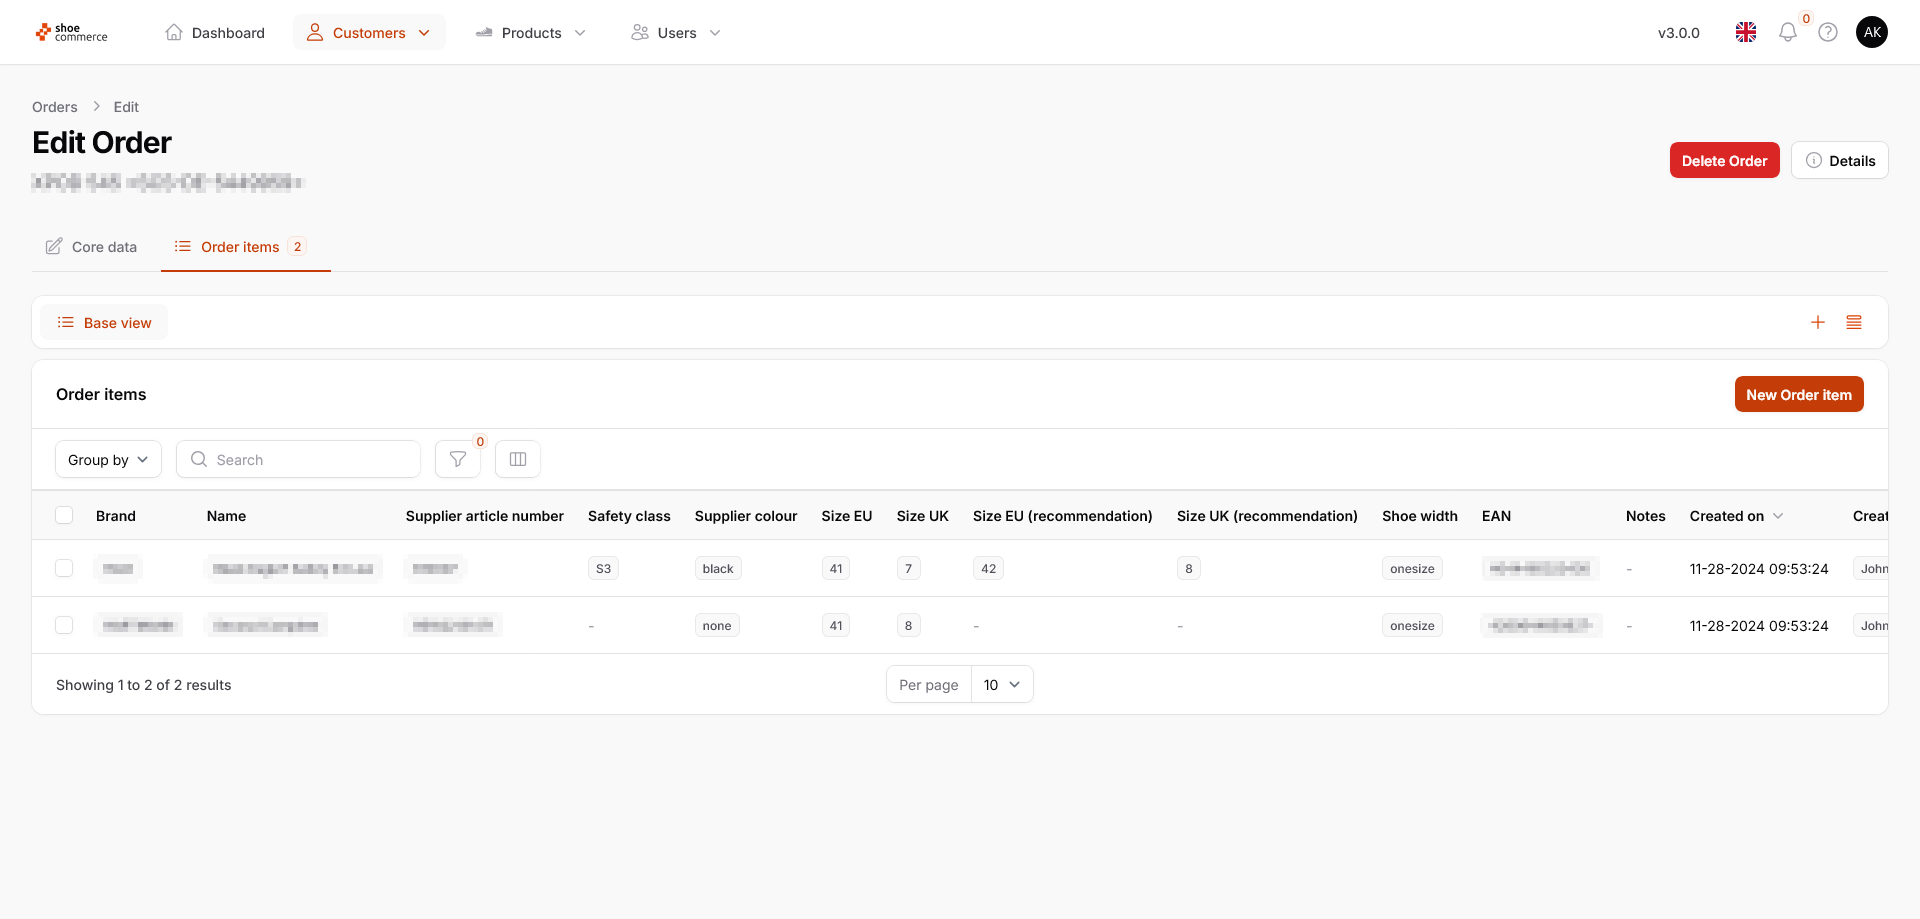
- To view all the items included in an order, first click on “Order items” in the top menu bar. The number shown corresponds to the total quantity of the items included (here a total of two).

- The system will now display all the items included in the order. The general filter and column functions of the system are also available to you in this view.
- In order to make a subsequent change to an item (e.g. changing the size of a shoe), it first needs to be opened.
- Either click anywhere in the area of the data record that you want to open (hand symbol of the mouse pointer) or
- click on the “Edit” icon on the far right of the corresponding data record
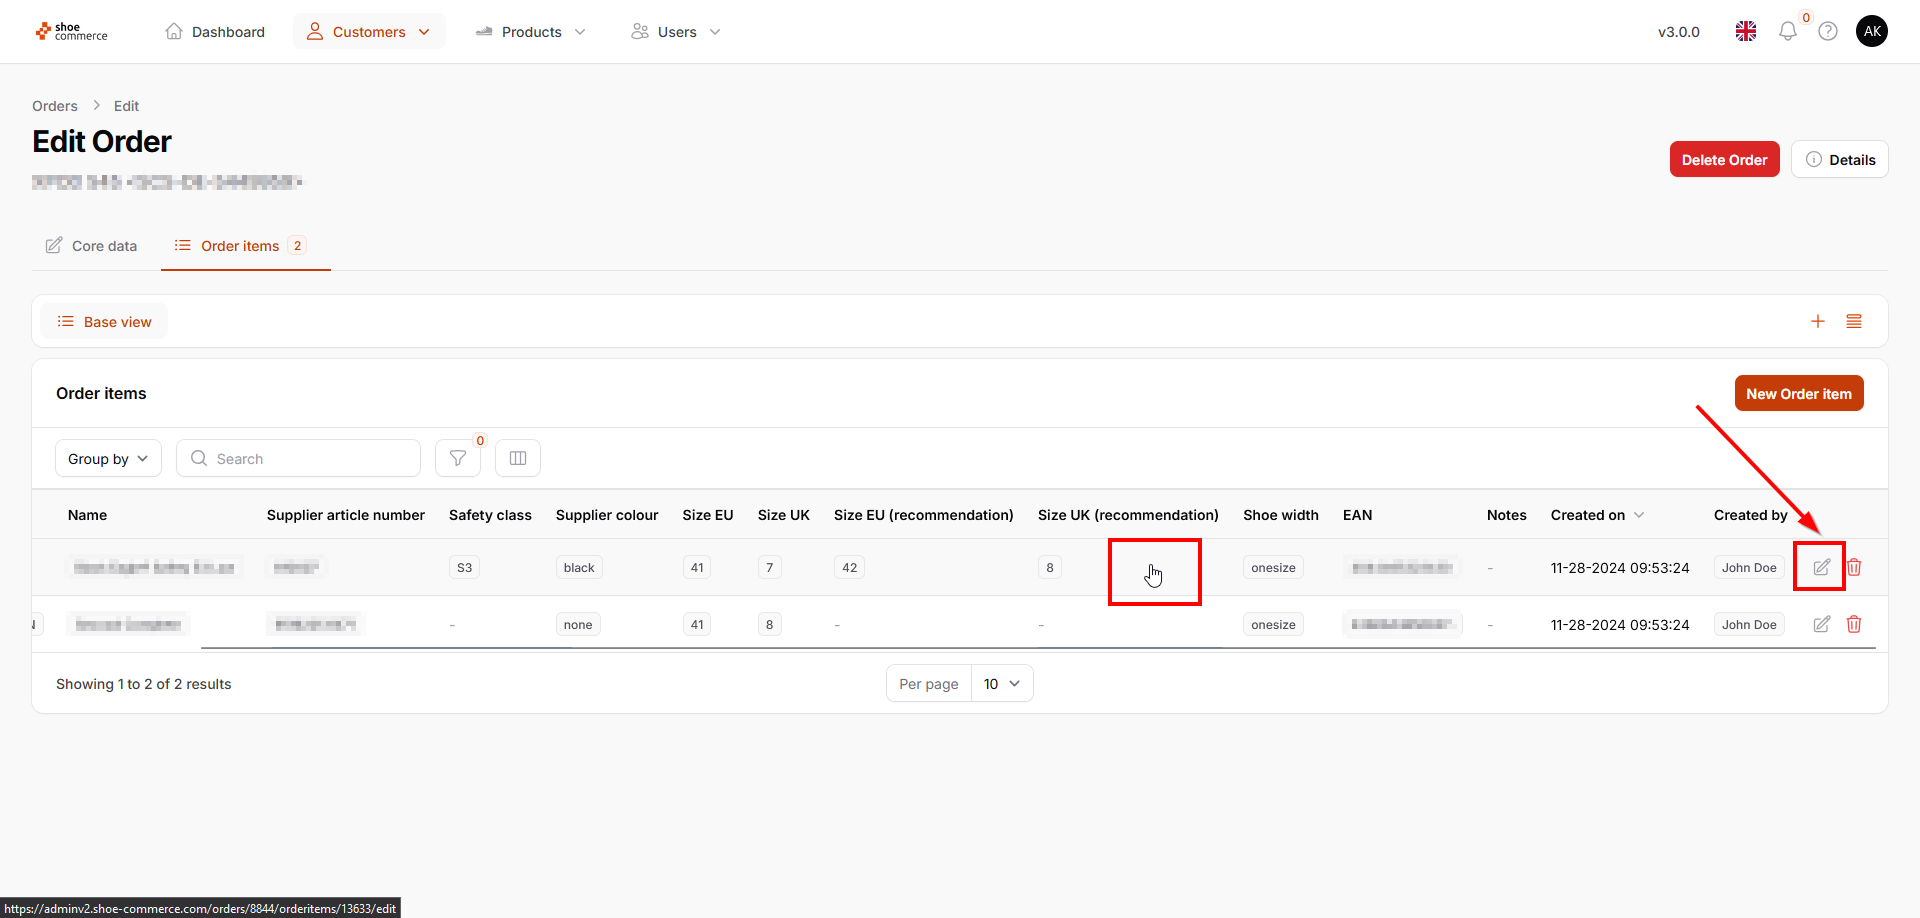
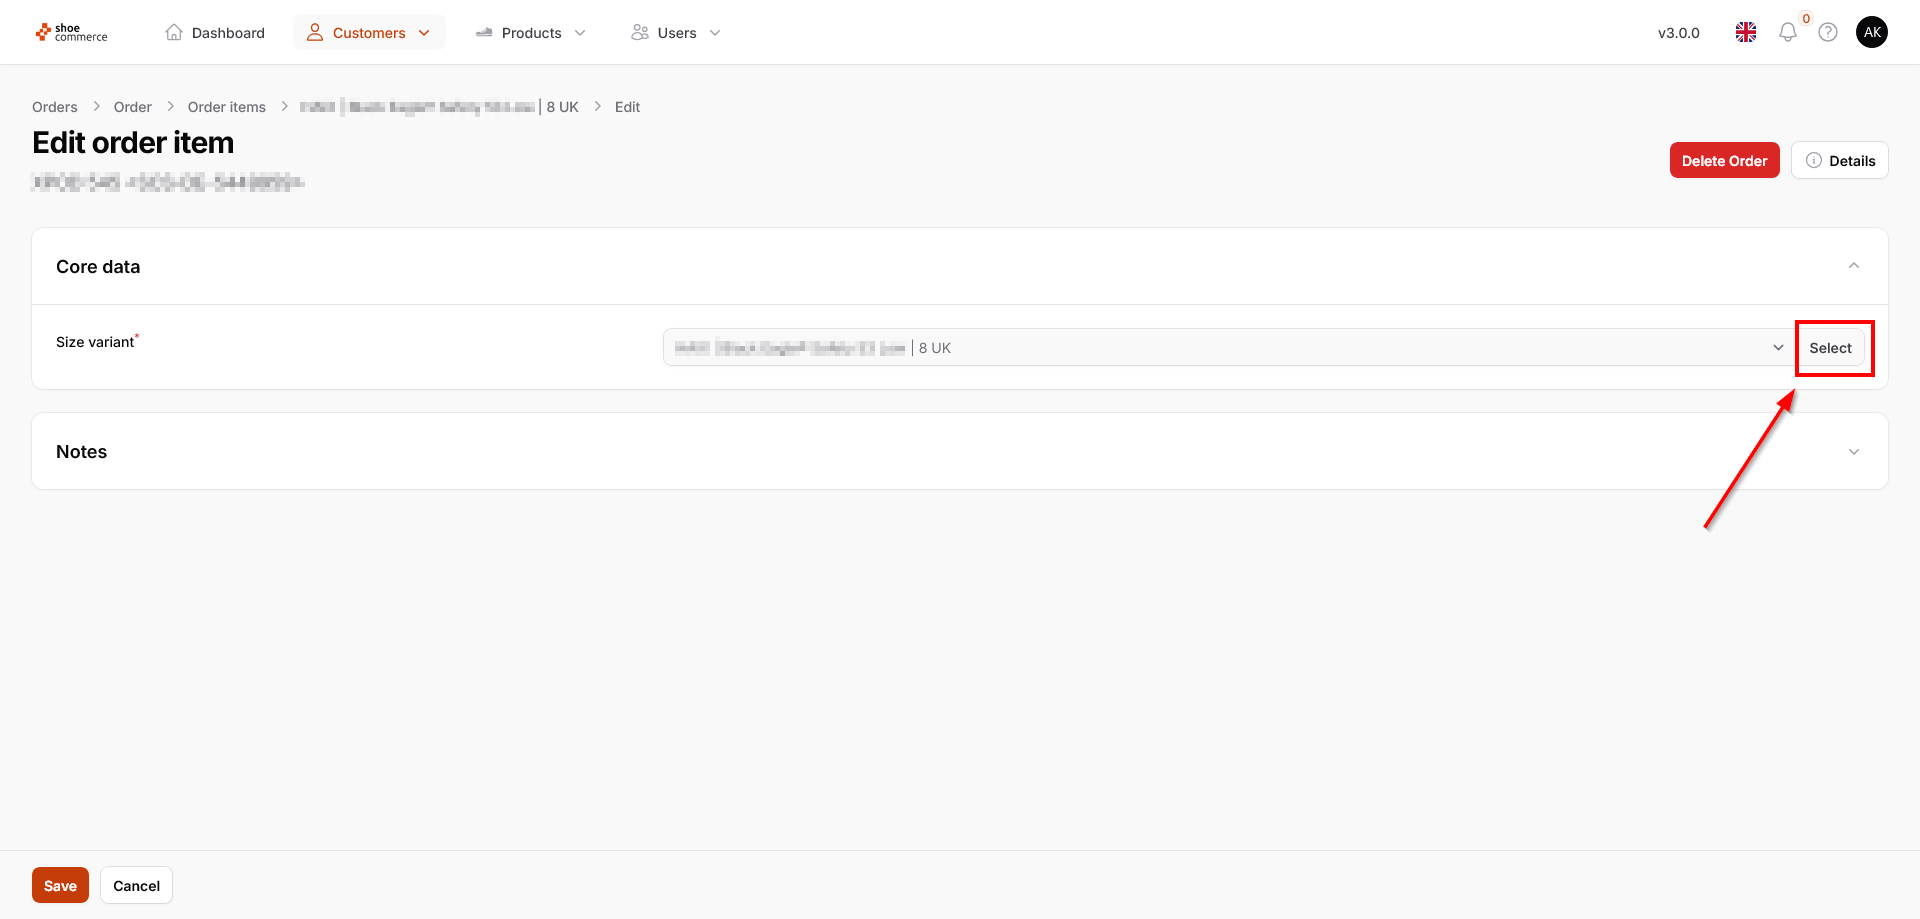
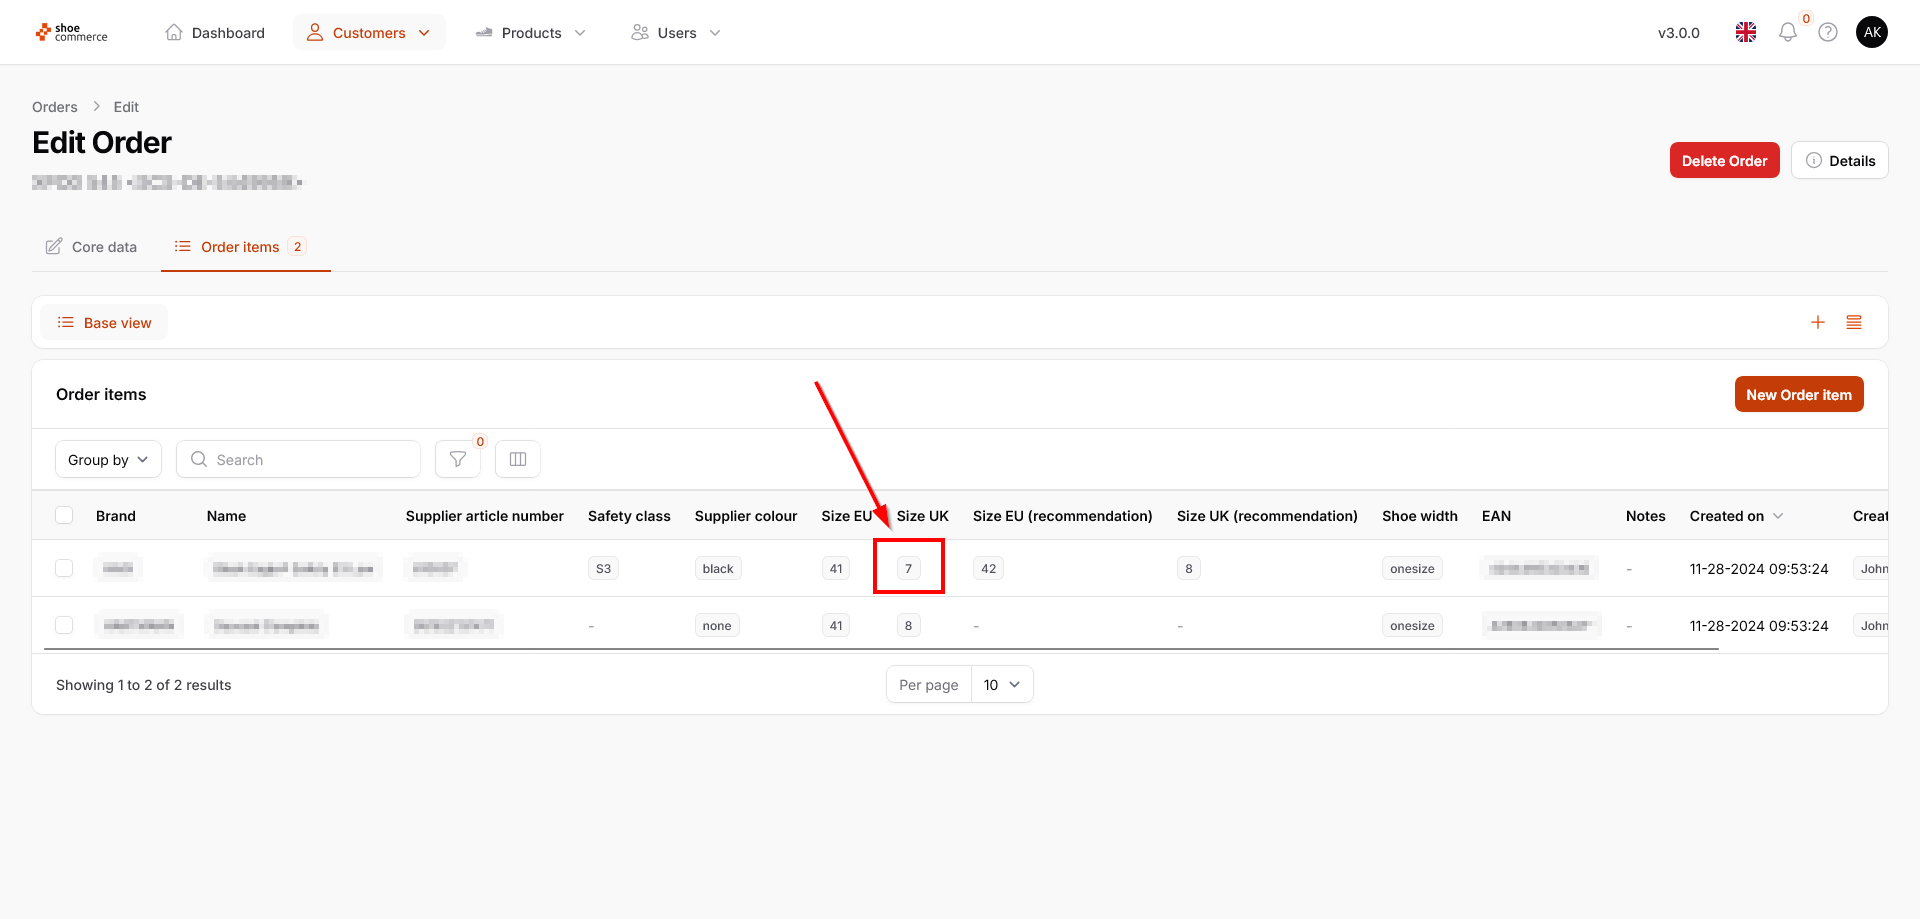
- This opens the “Edit order item” menu, in which the size that has already been selected (in this case 8 UK) is displayed. To change this, click on “Select”.
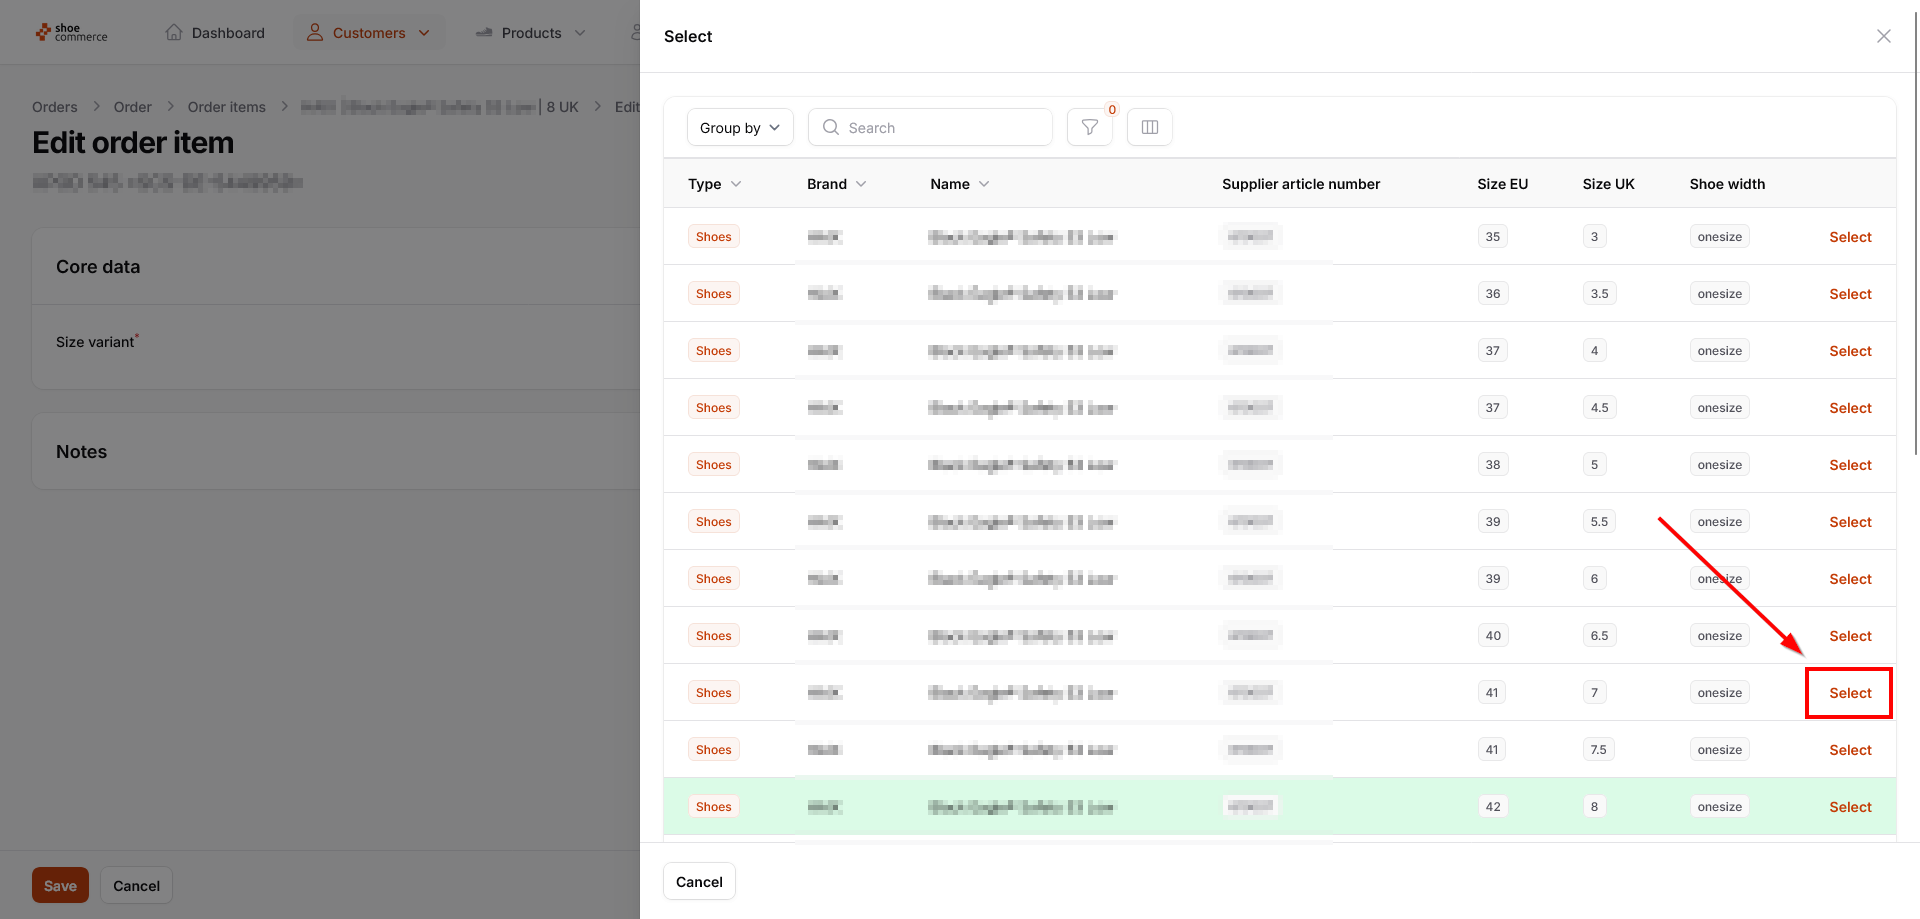
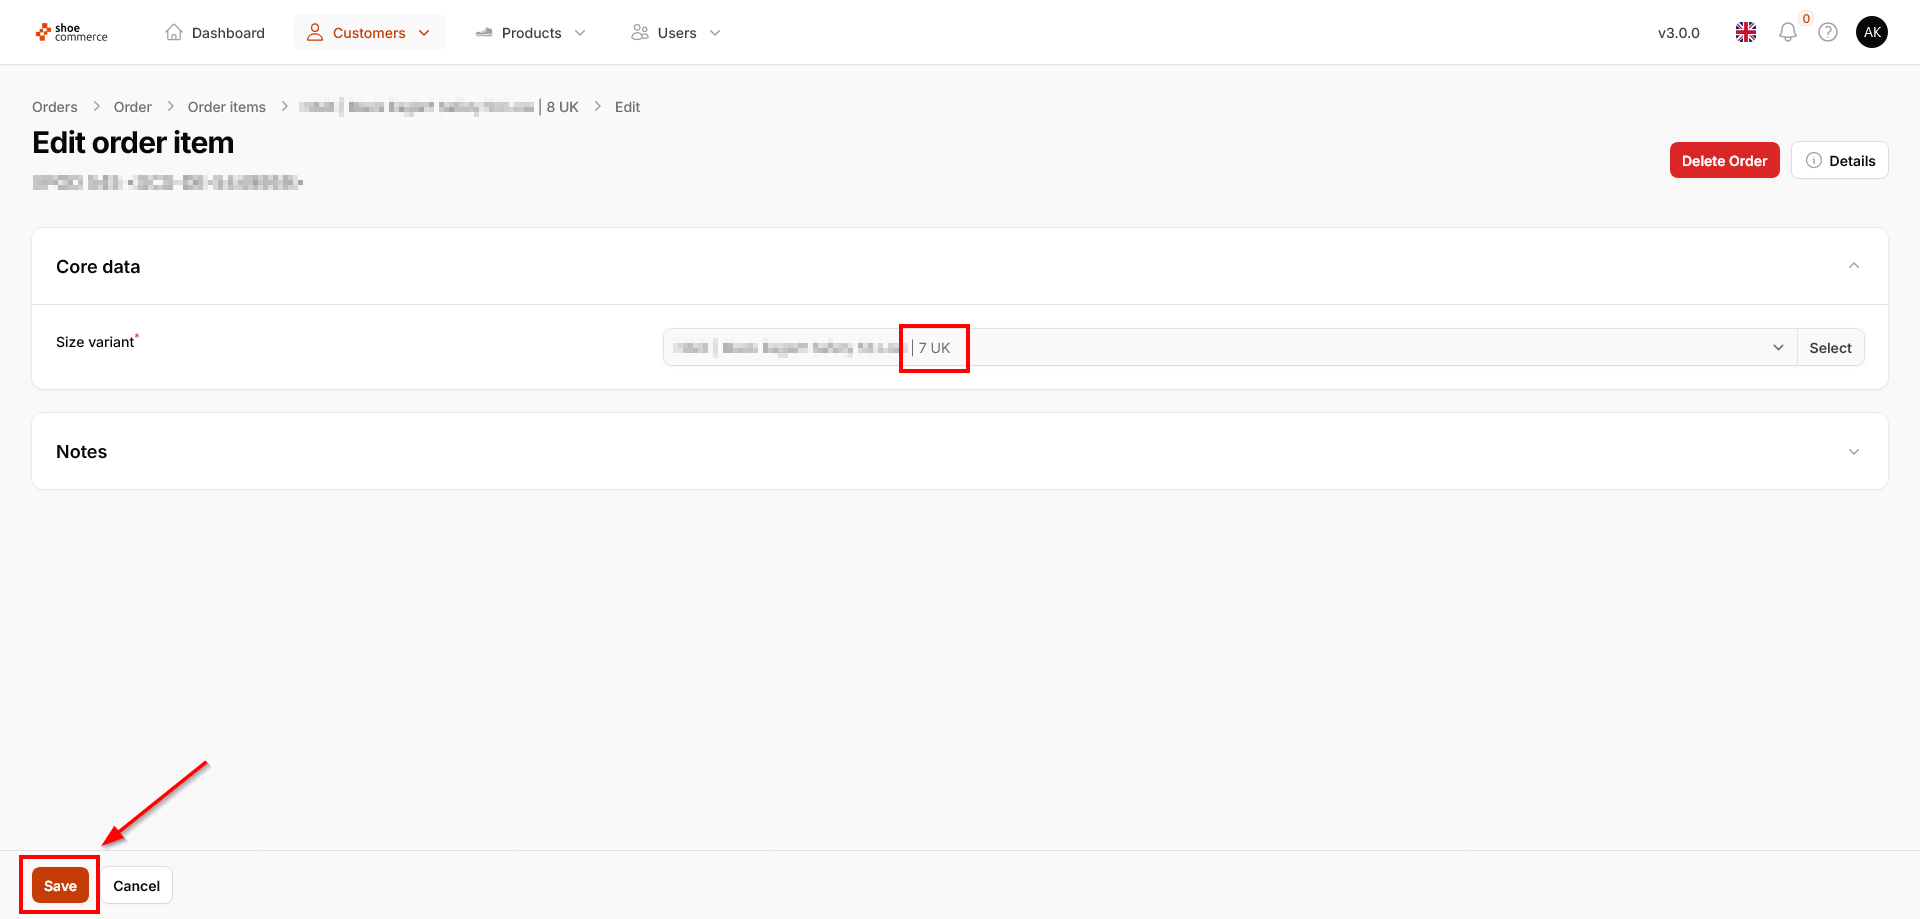
- The usual backend list view now opens, in which all regular functions for showing and hiding columns, grouping and filter functions can still be used. By clicking on “Select” for the shoe model with the requested size, this will be updated in the editing screen. In the example shown, we change the shoe size from UK 8 (the system's recommendation) to UK 7. Finally, click on “Save” to complete the process.
Create order items manually
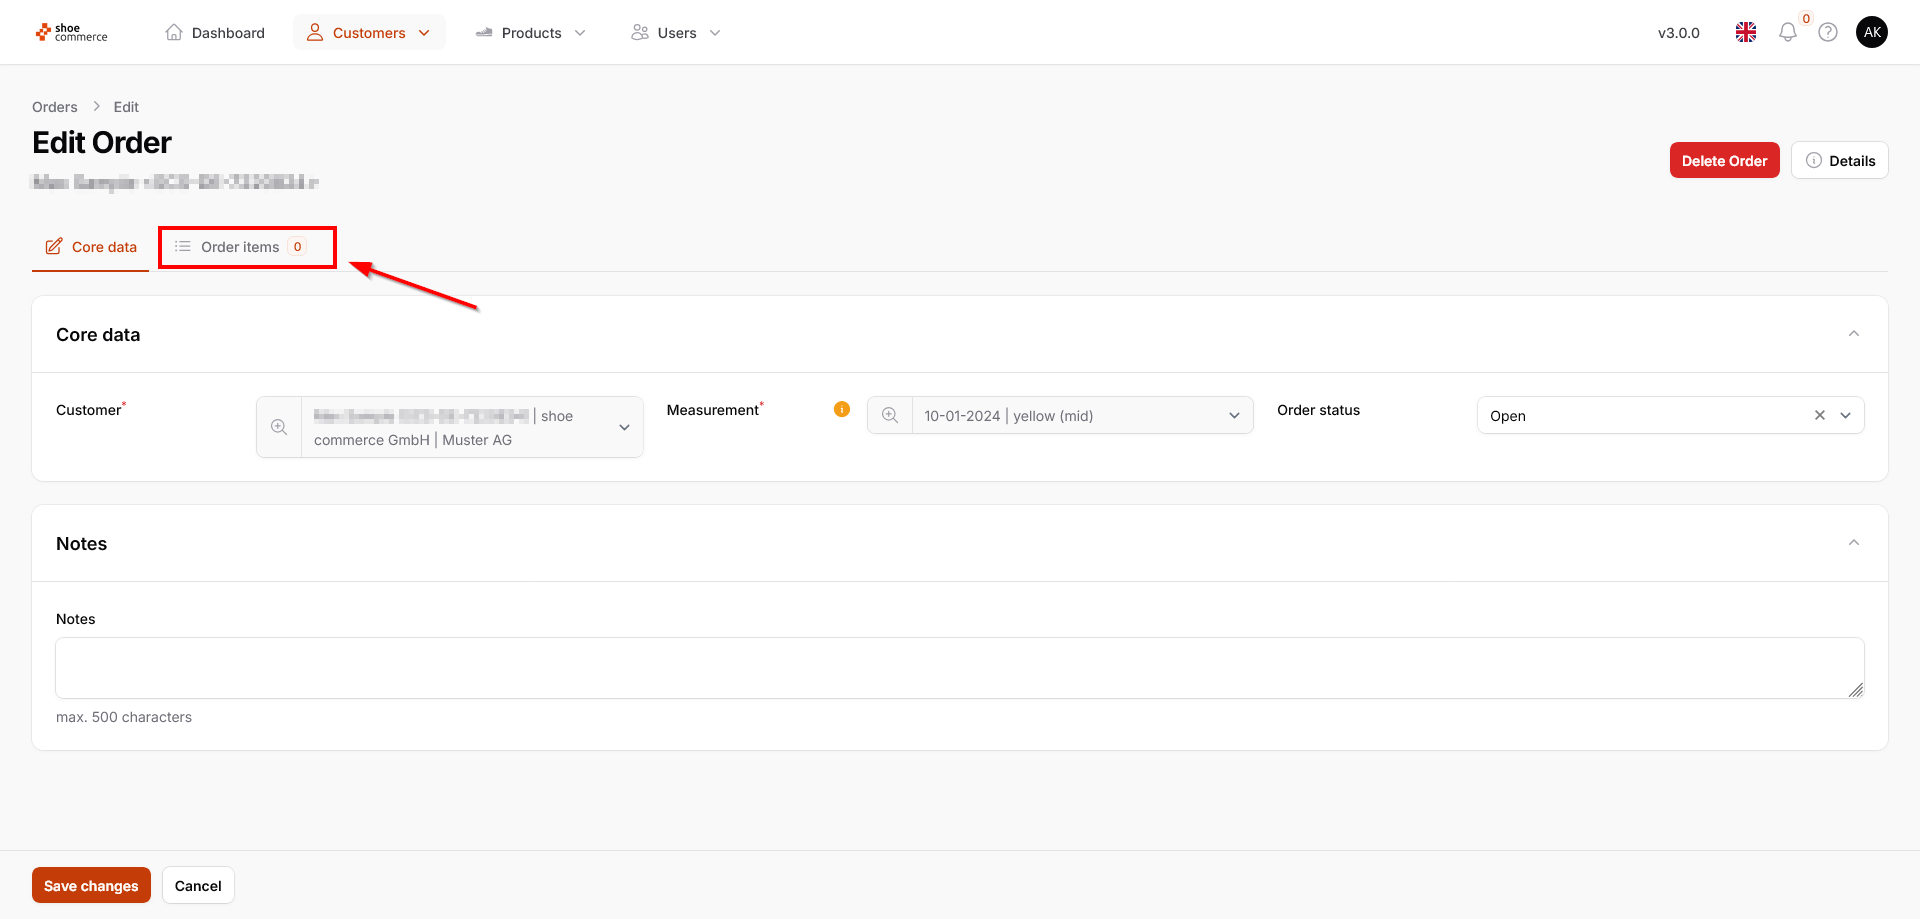
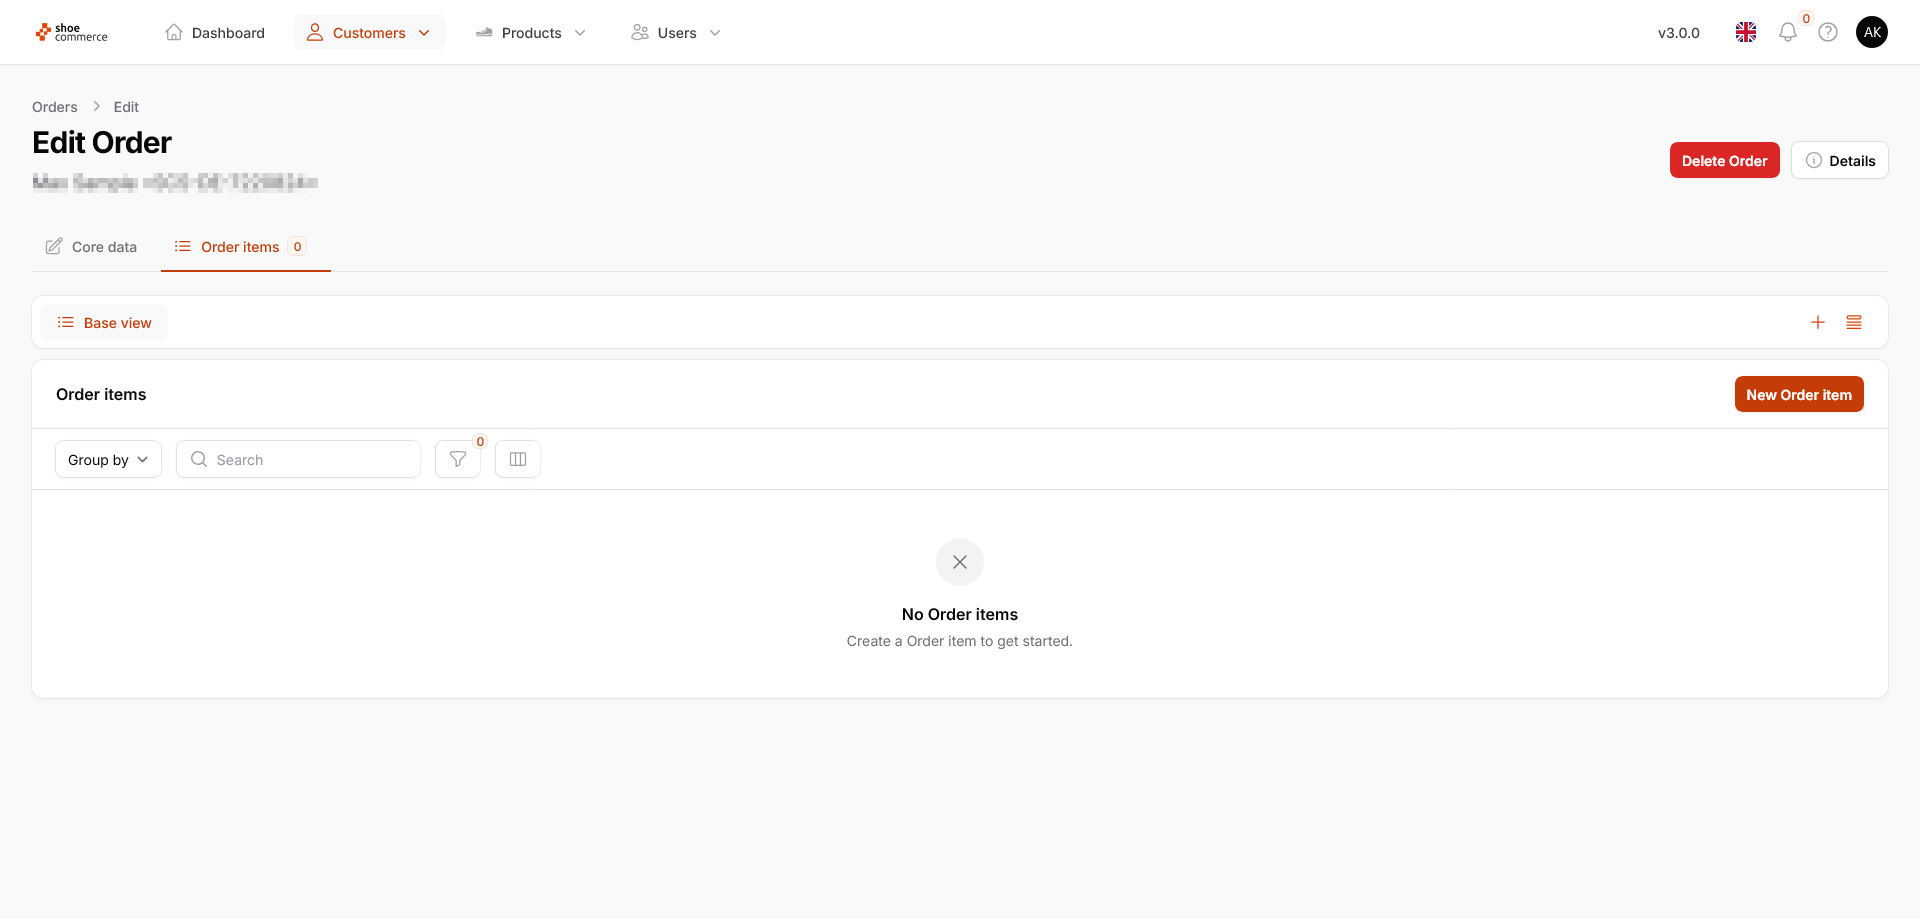
- To add items to an order (whether an already existing or manually created order), click on “Order items” in the “Edit order” section, whereupon the corresponding page opens. In our case, you will be informed that there are no order items yet.
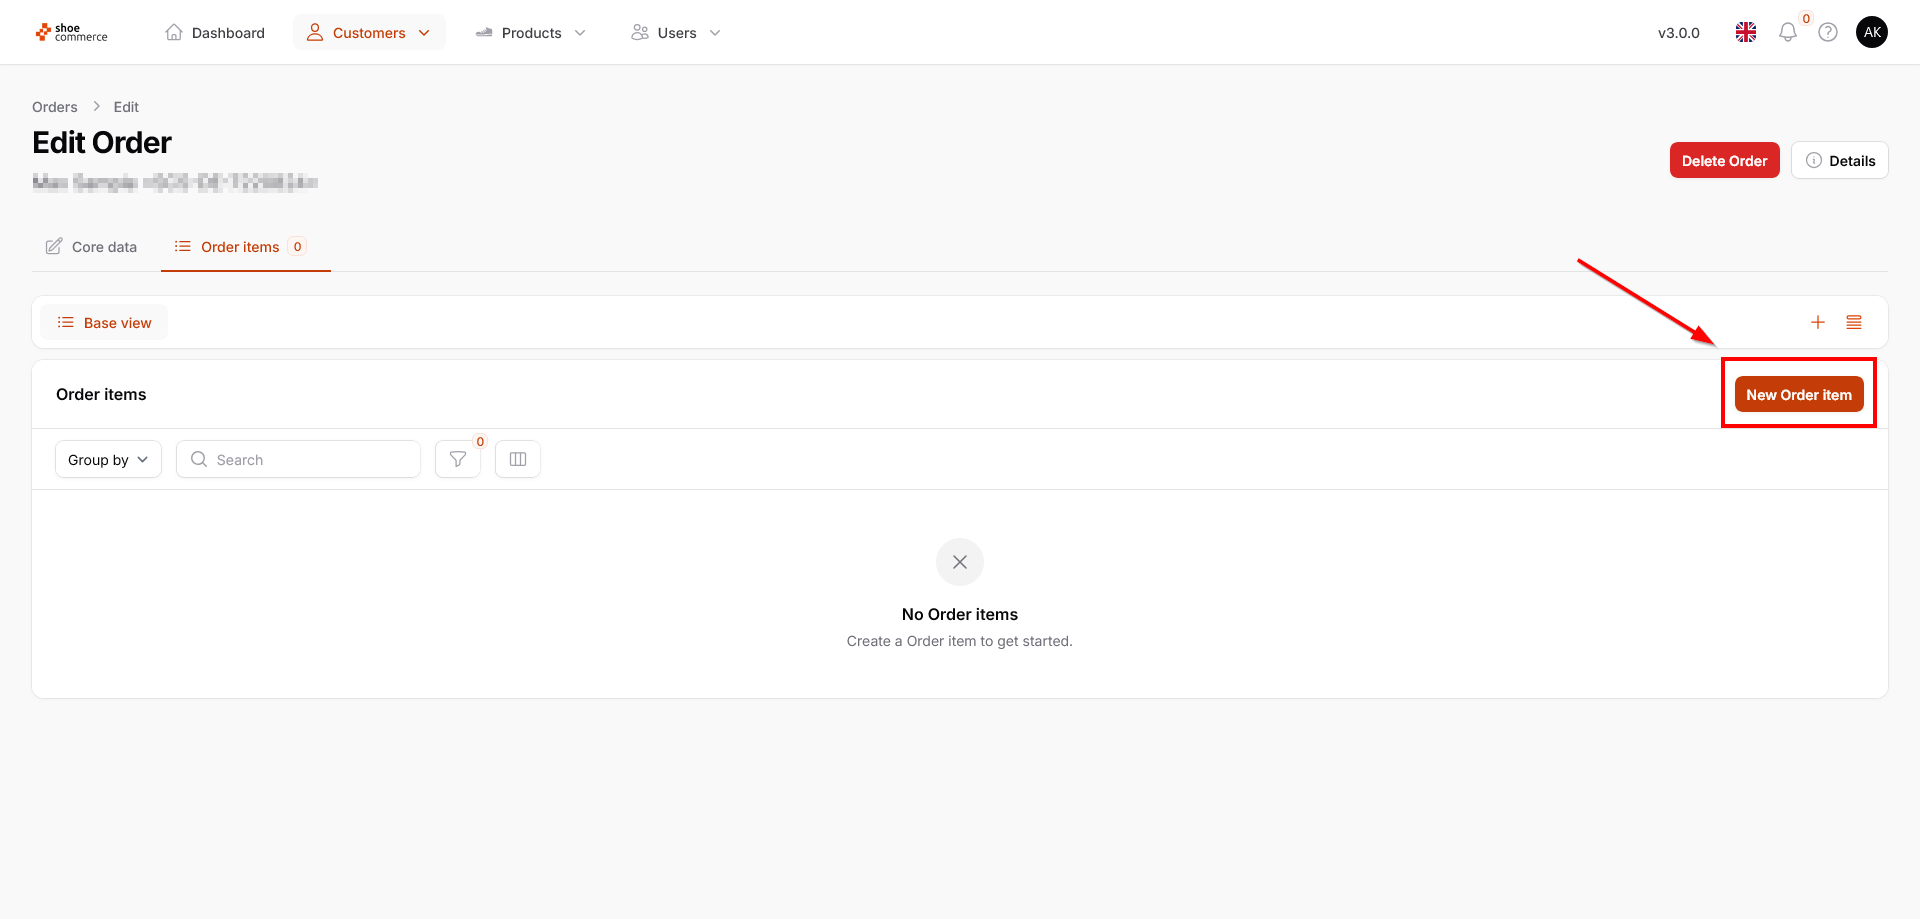
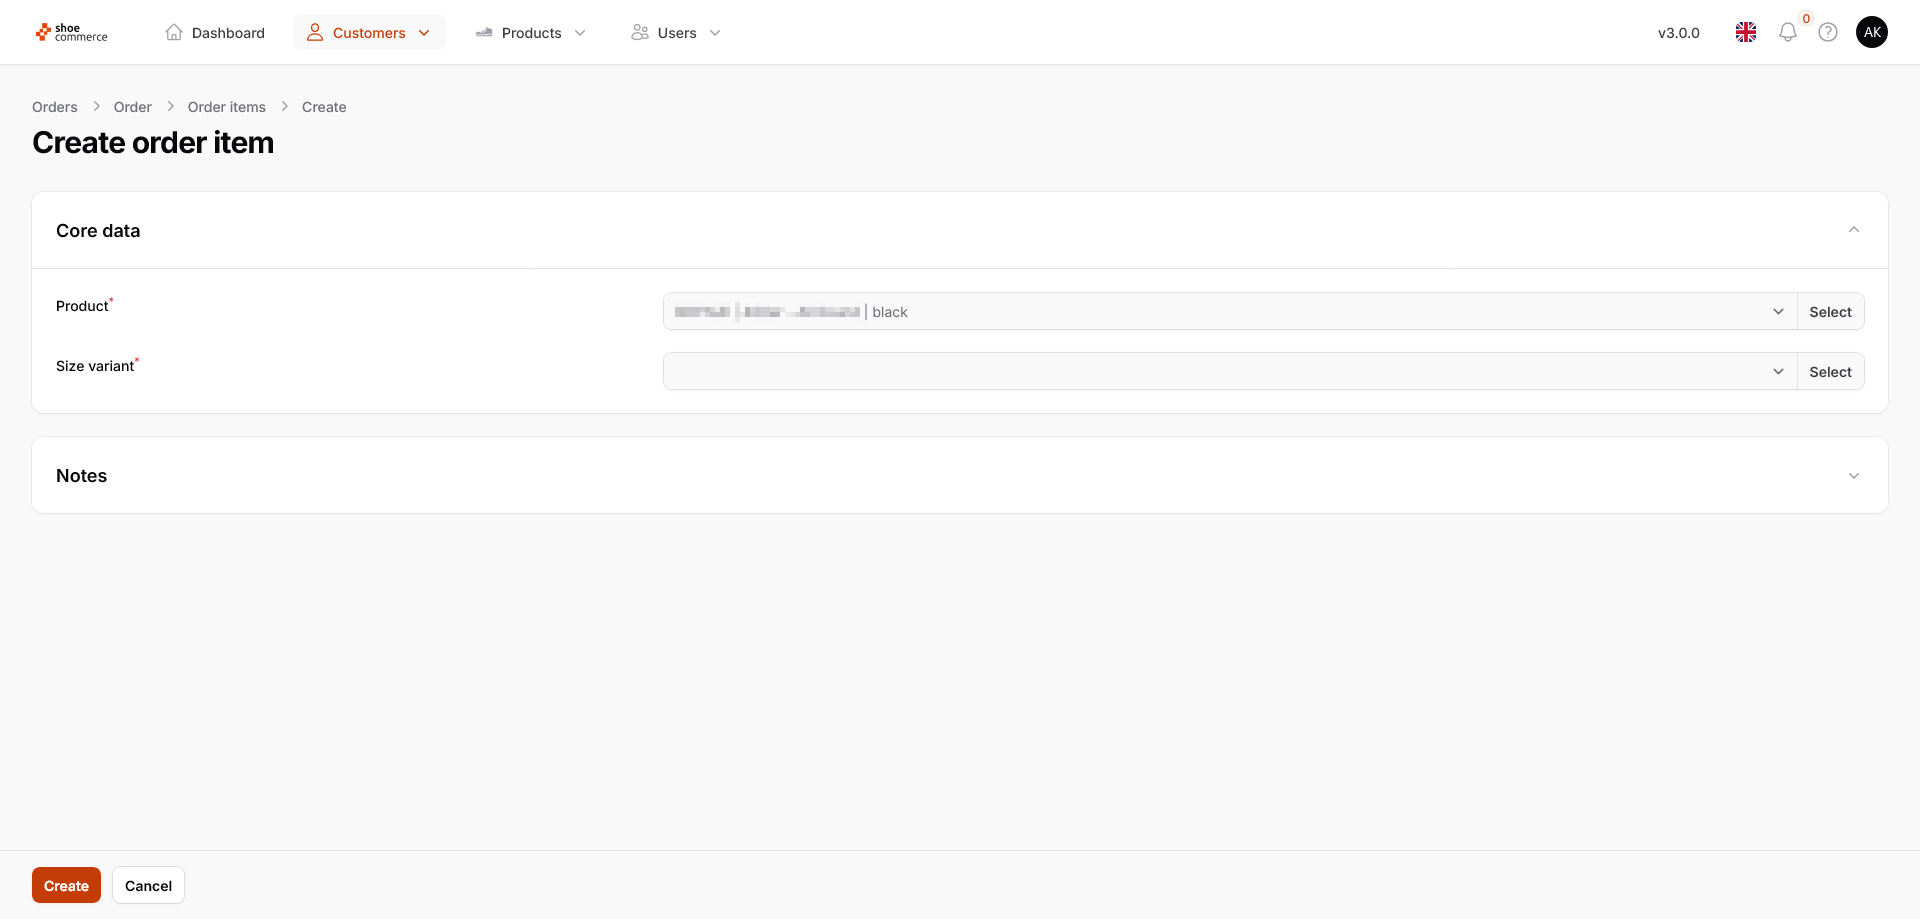
- Now click on “New Order item” to access the entry screen where you can select the product and size variant (“Create order item”).
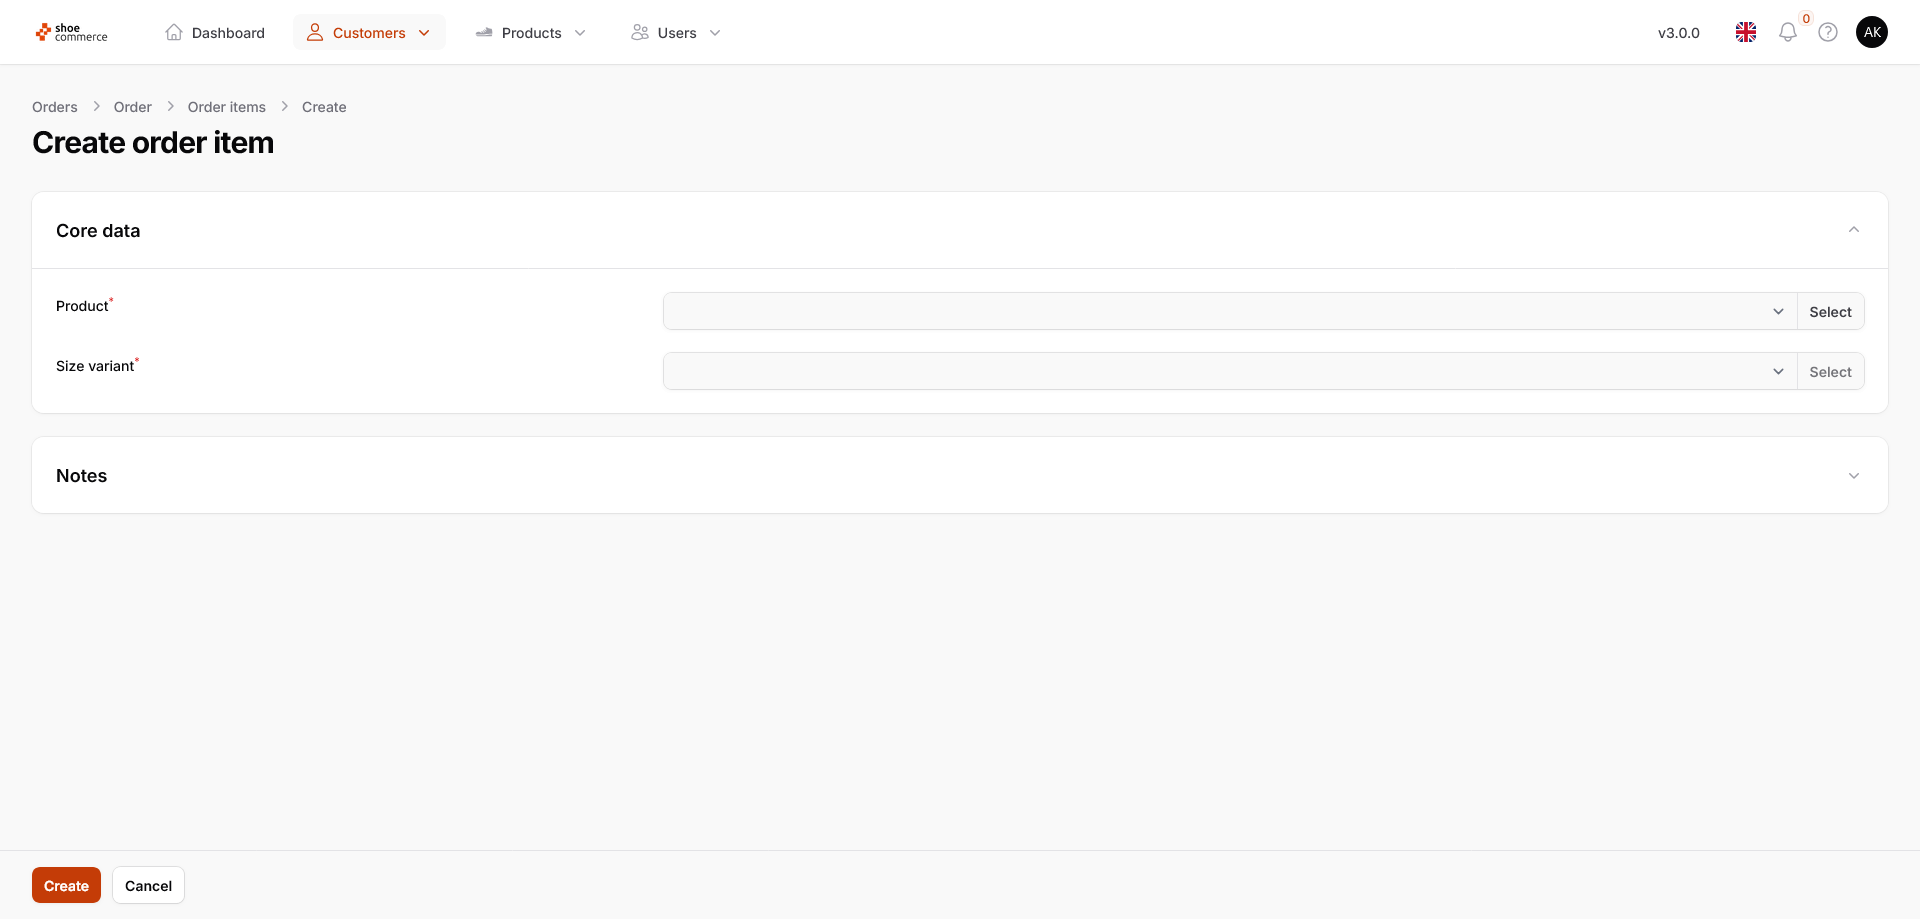
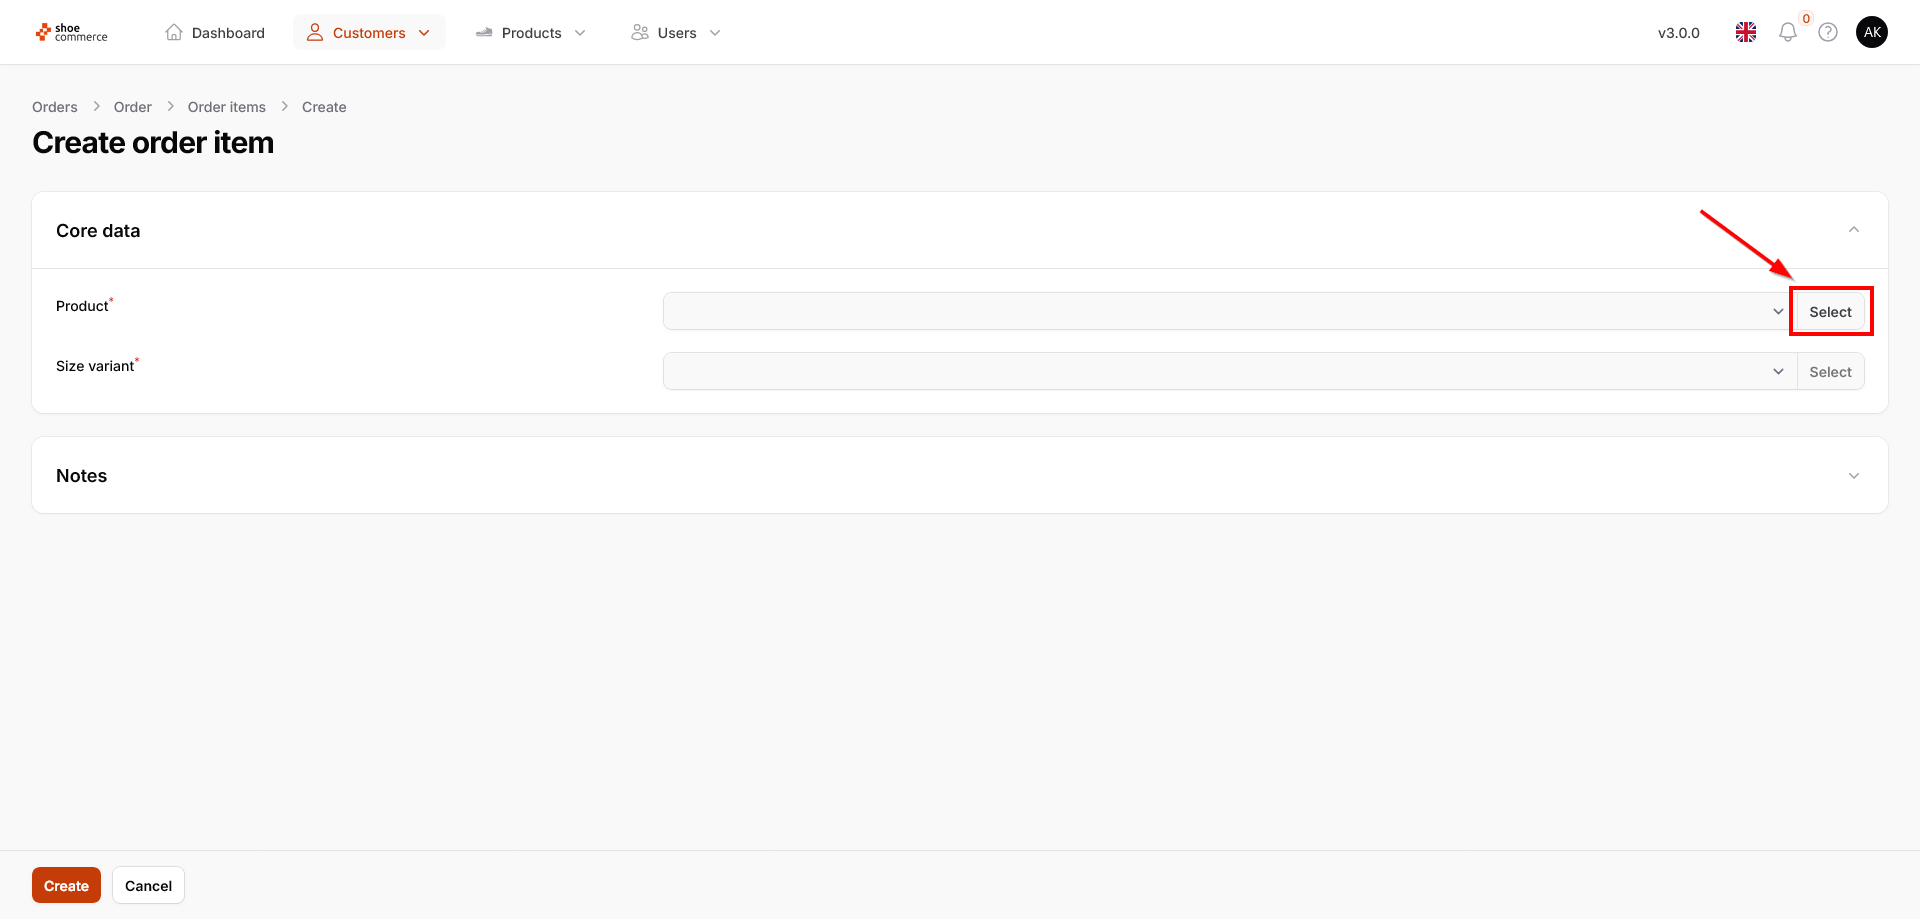
- Click on “Select” to first specify a product.
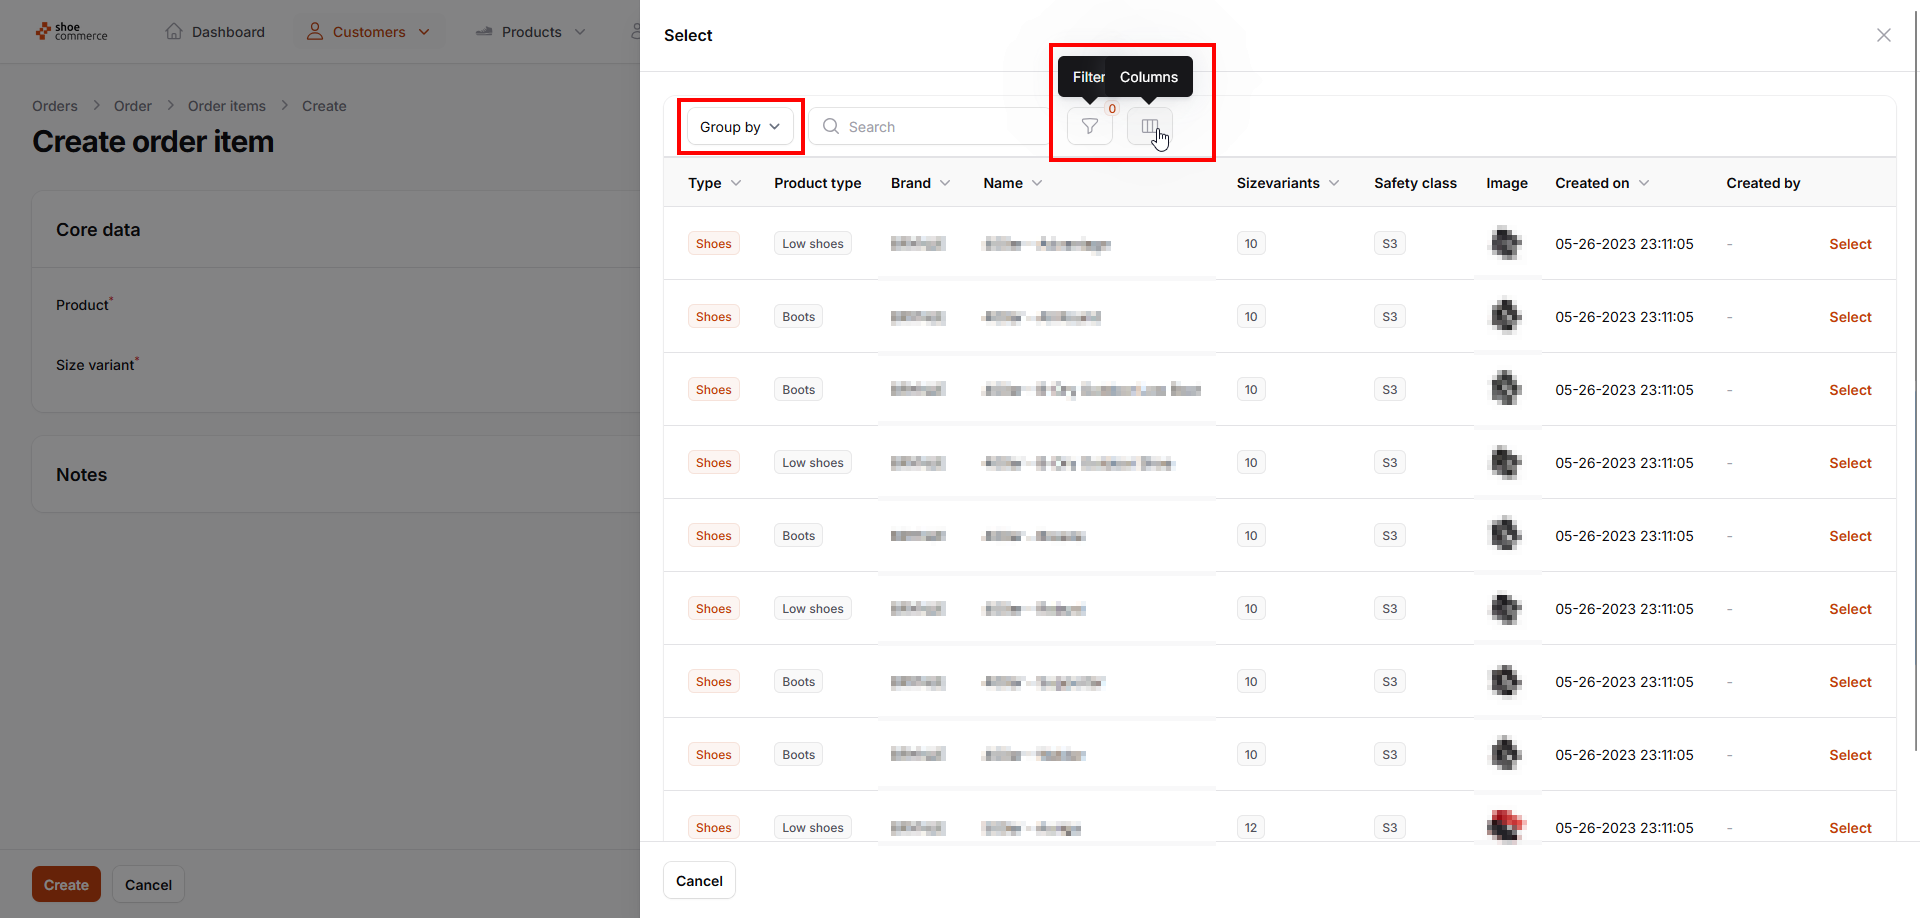
- The familiar backend list view then opens, in which all regular functions for showing and hiding columns, grouping and filter functions can also be used.
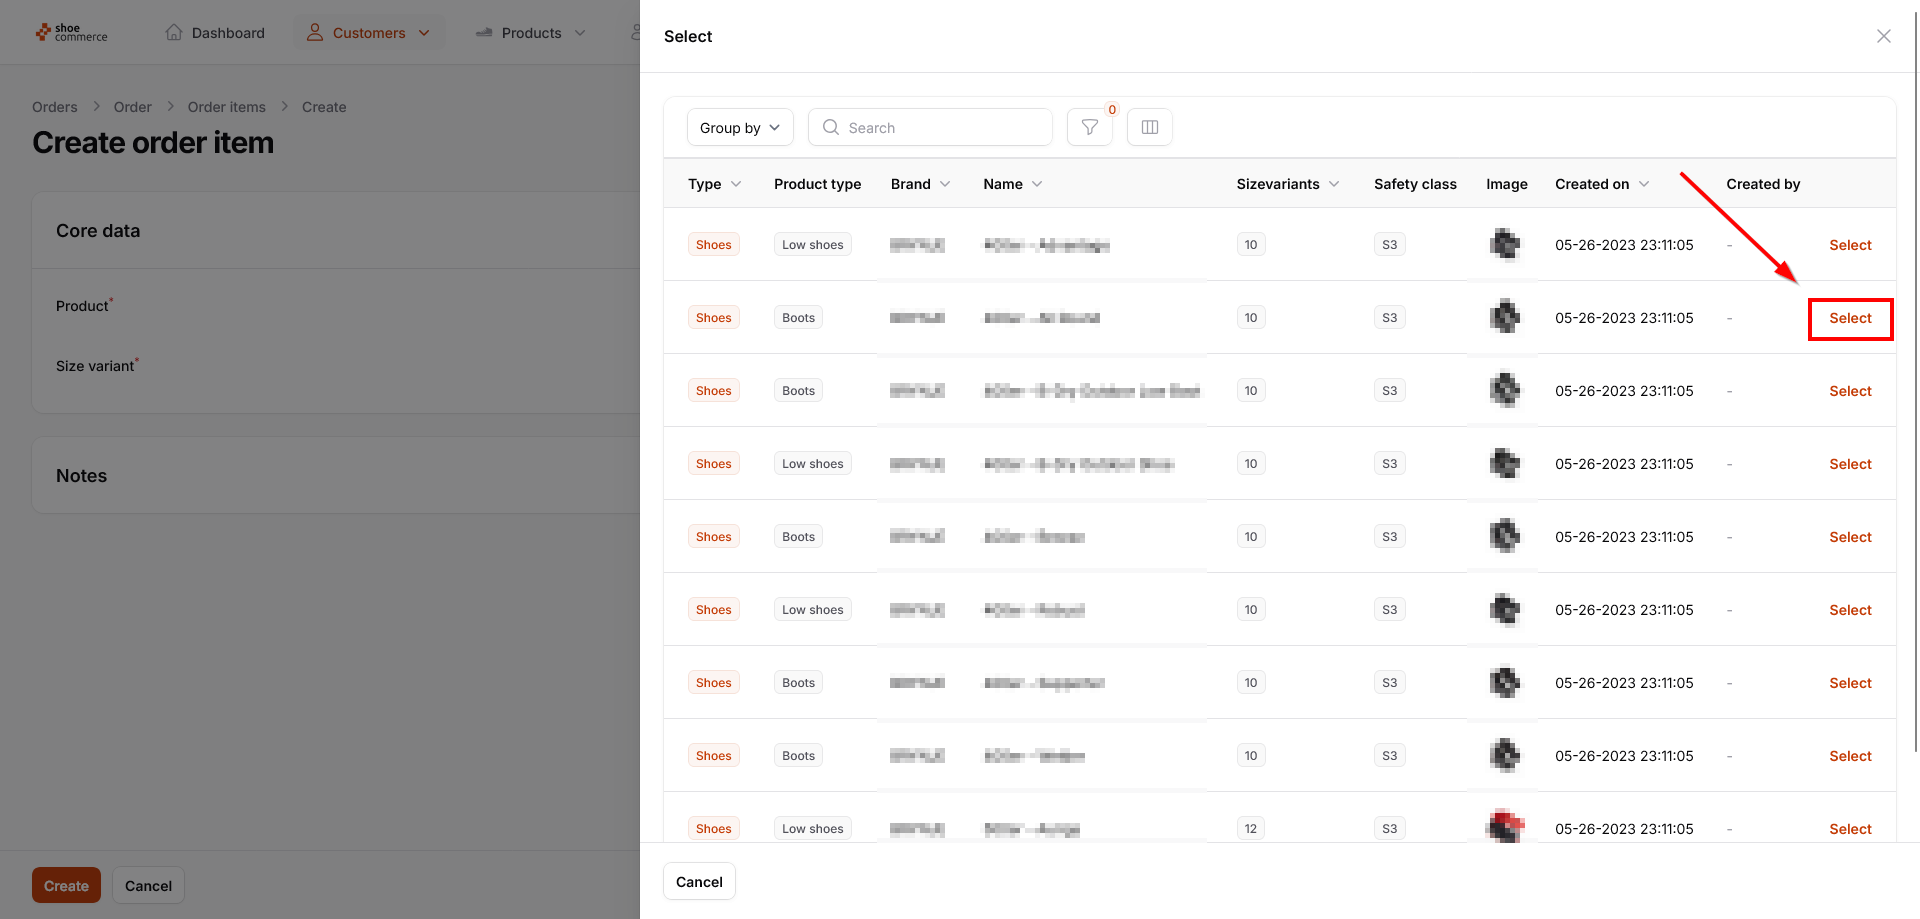
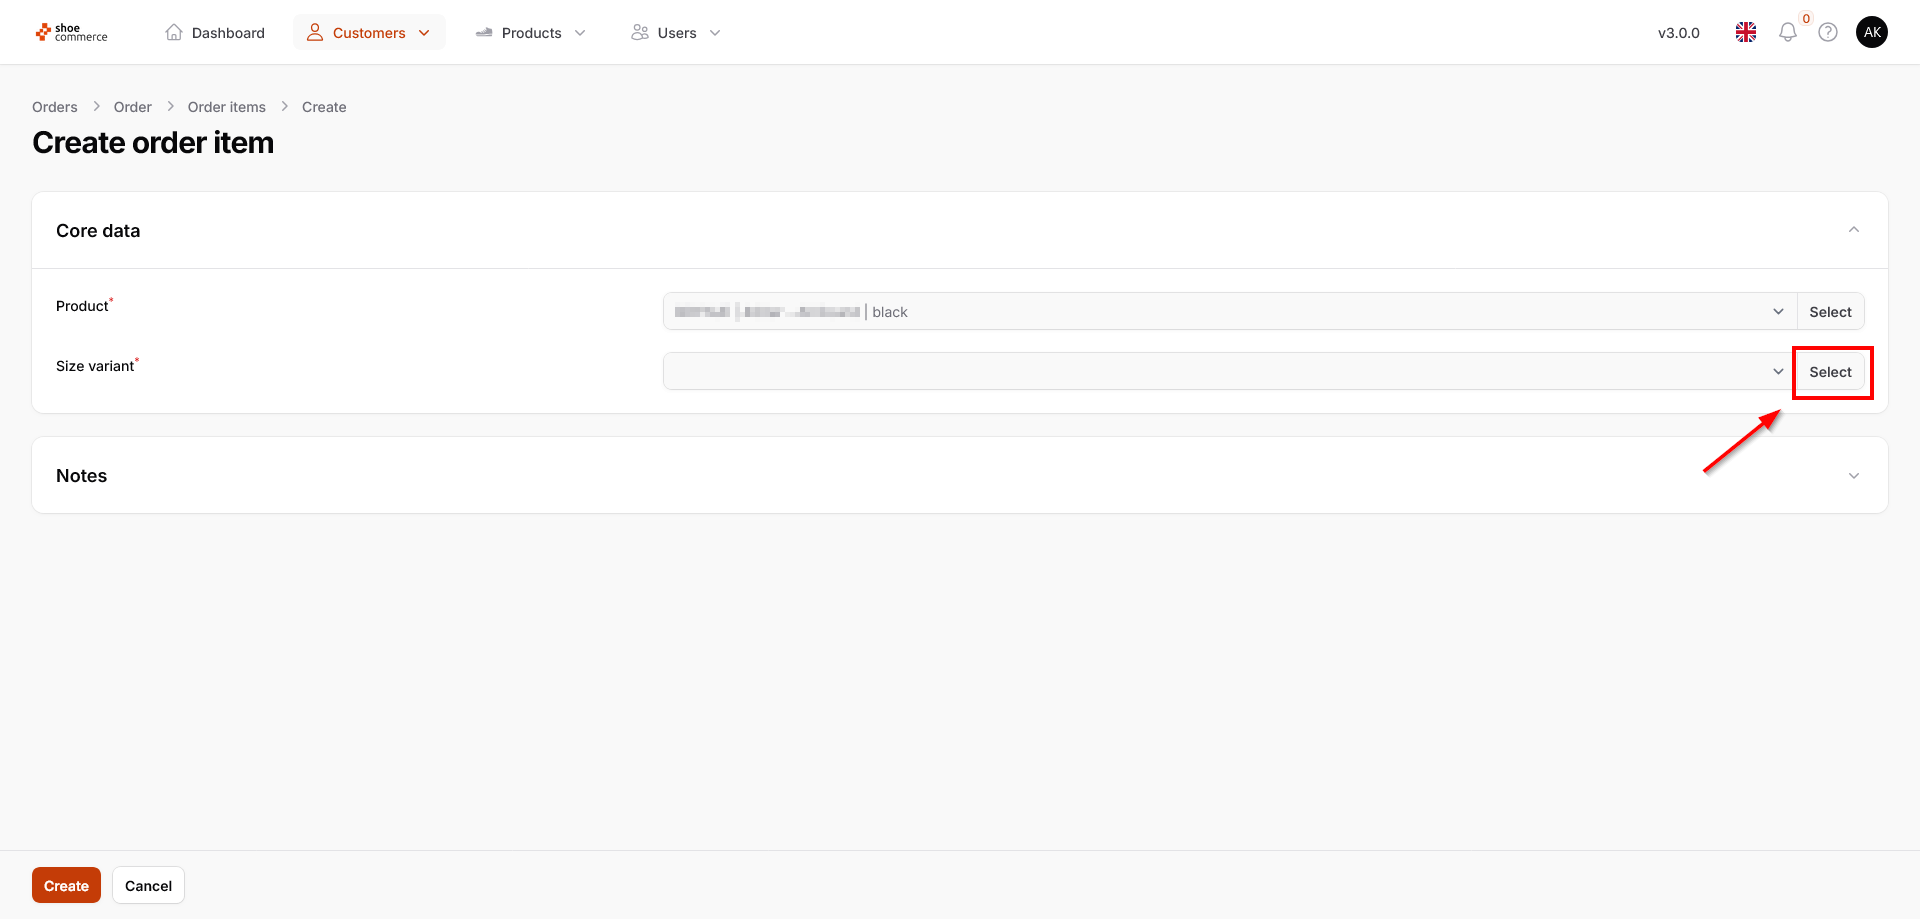
- Click on “Select” to add the desired product to your order. The total number of available sizes is displayed in the “Sizevariants” column.
- Now click on “Select” to specify the size variant.
- You will now be shown all available size variants of the selected shoe model, with the recommendation of the system highlighted in green. In our example, we select this size to add it to the order.
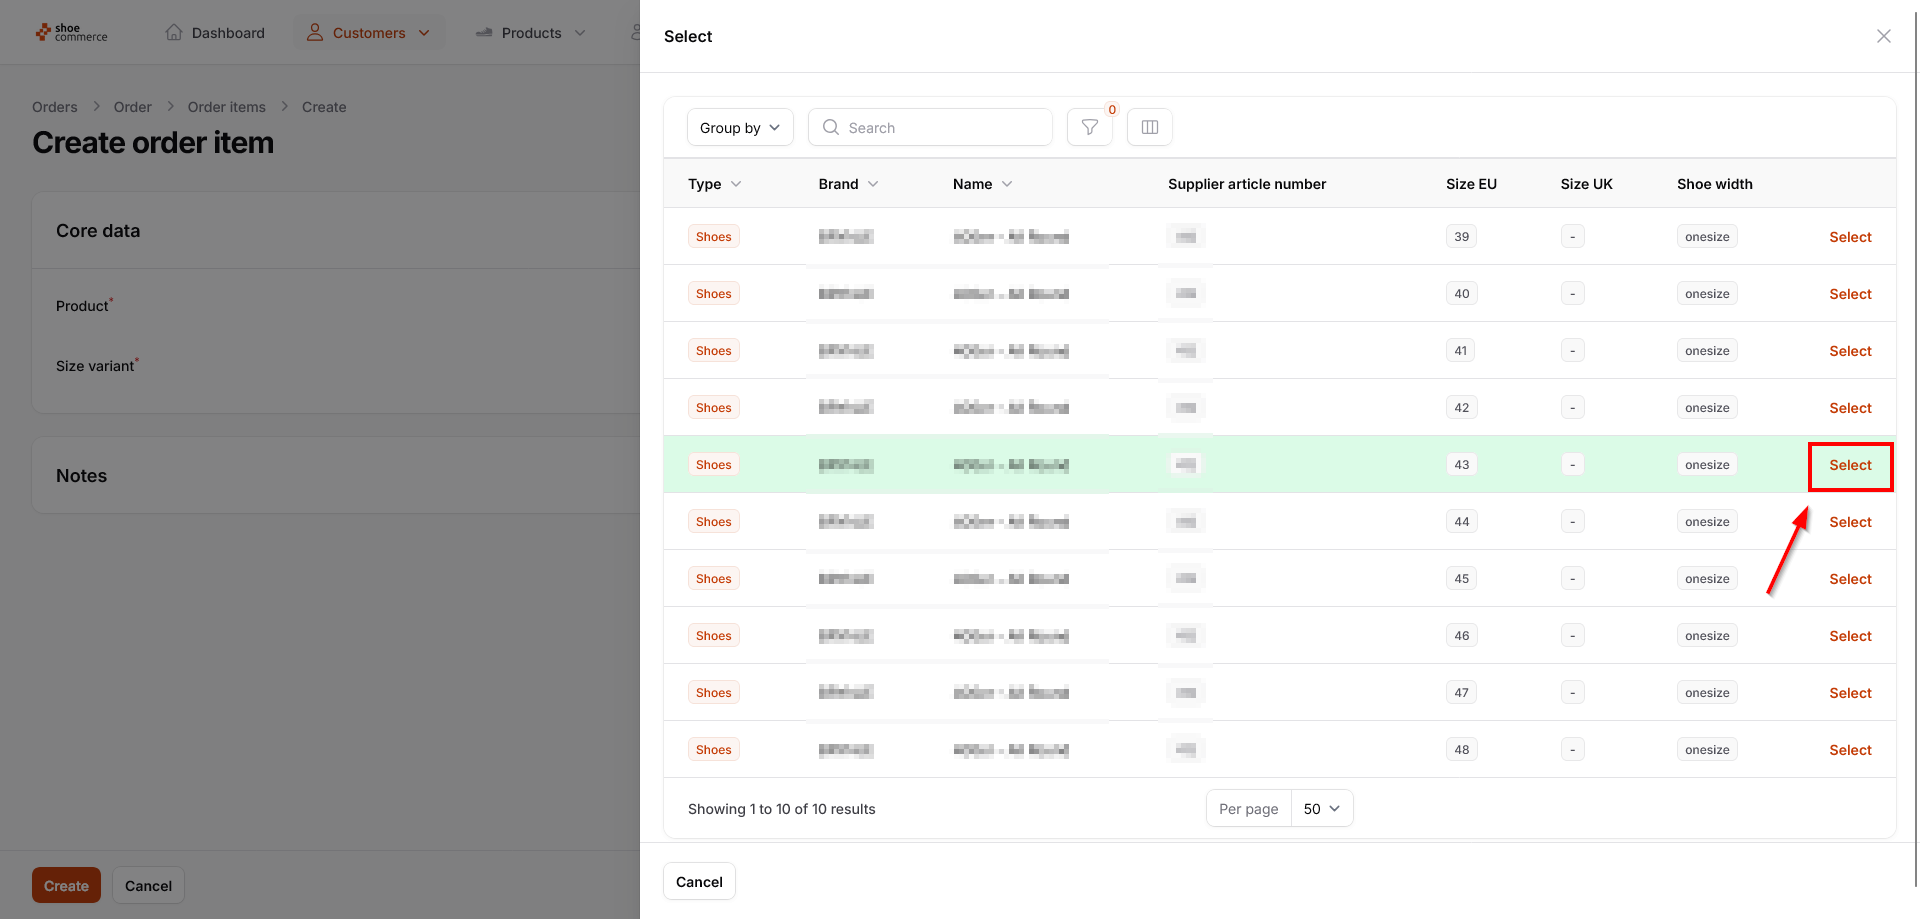
- Finally, click on “Create”.

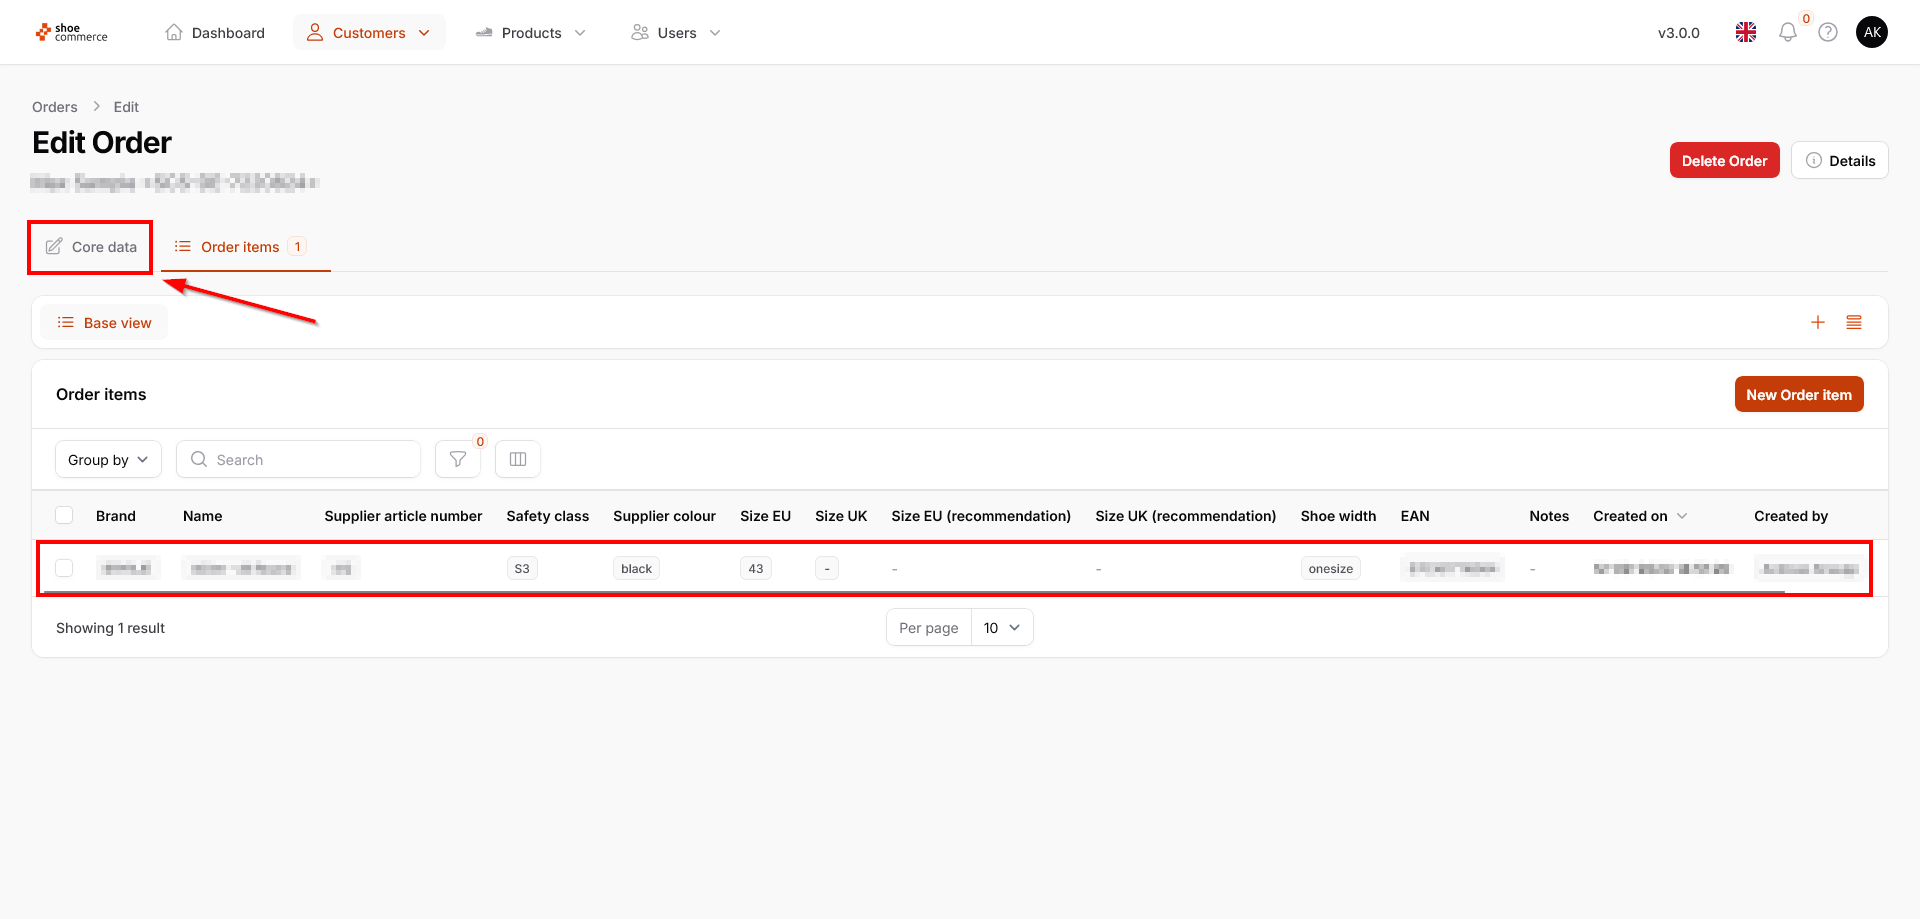
- The shoe model we have just selected in the required size is now displayed in the “Order items” section. To return to the core data of the order, where you can update the order status, click on the corresponding button.
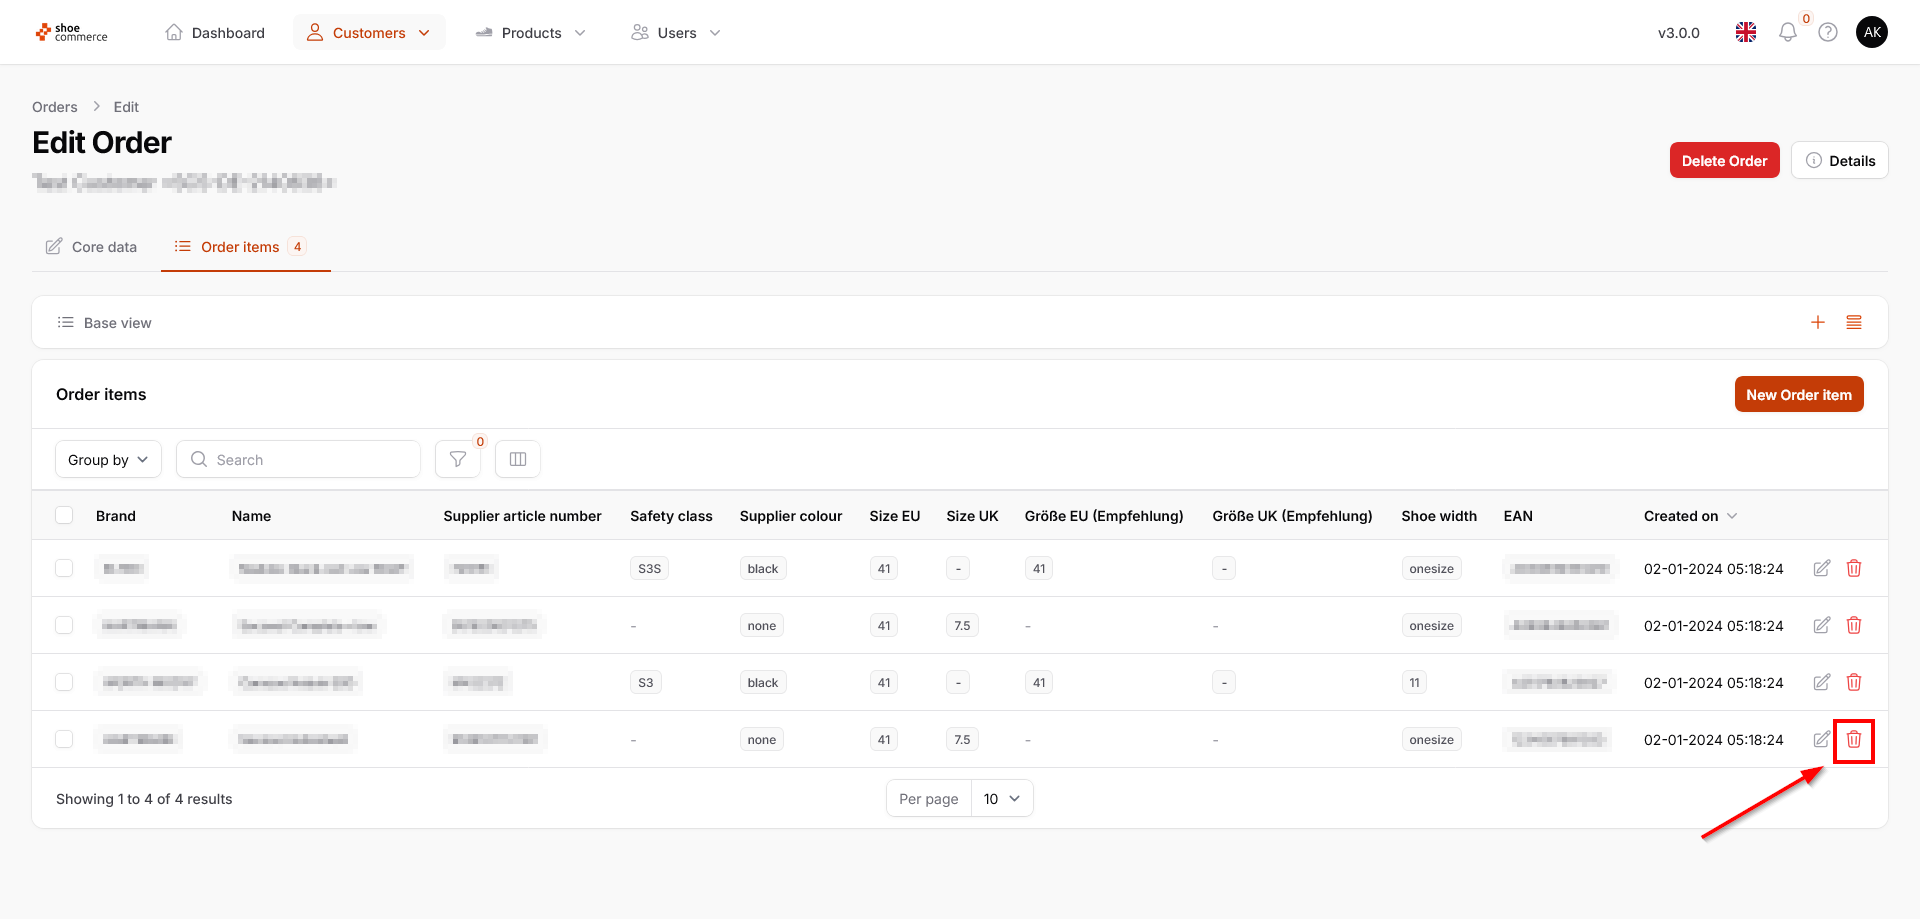
Delete order items
To remove individual or several order items from an order at once, please proceed as follows:
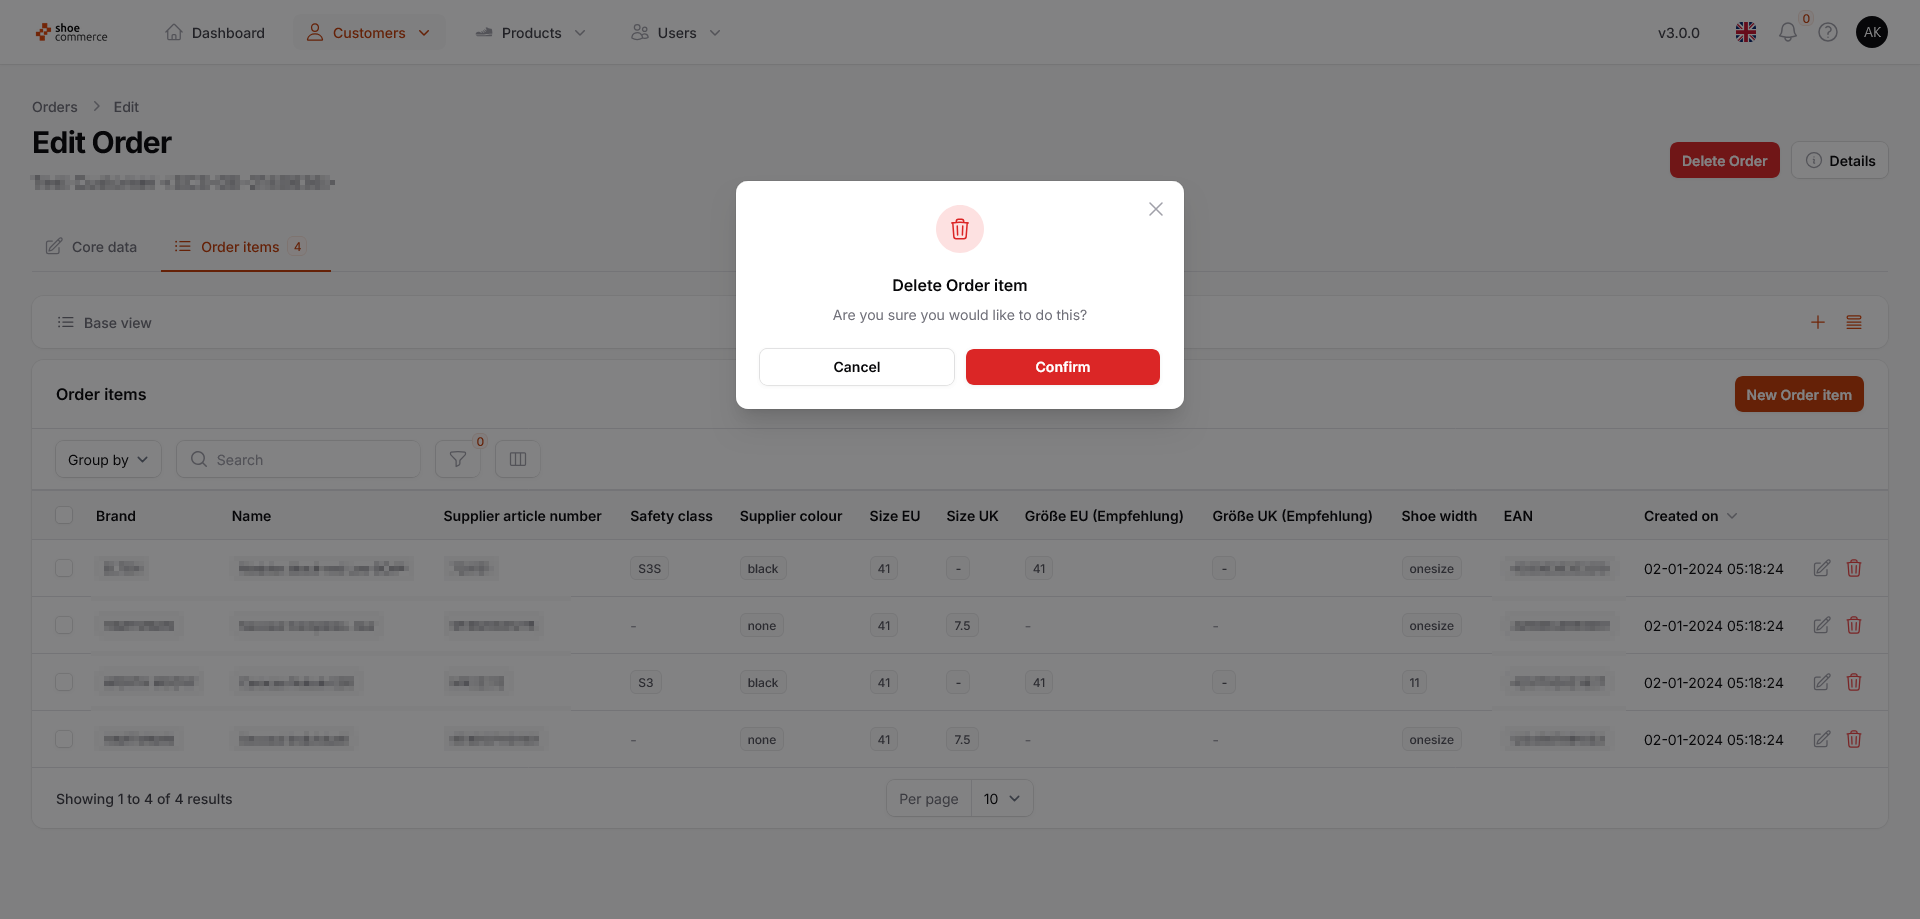
- To remove just a single item from an order, simply click on the corresponding trash can symbol. By confirming the subsequent confirmation prompt, the item is then completely removed from your order.
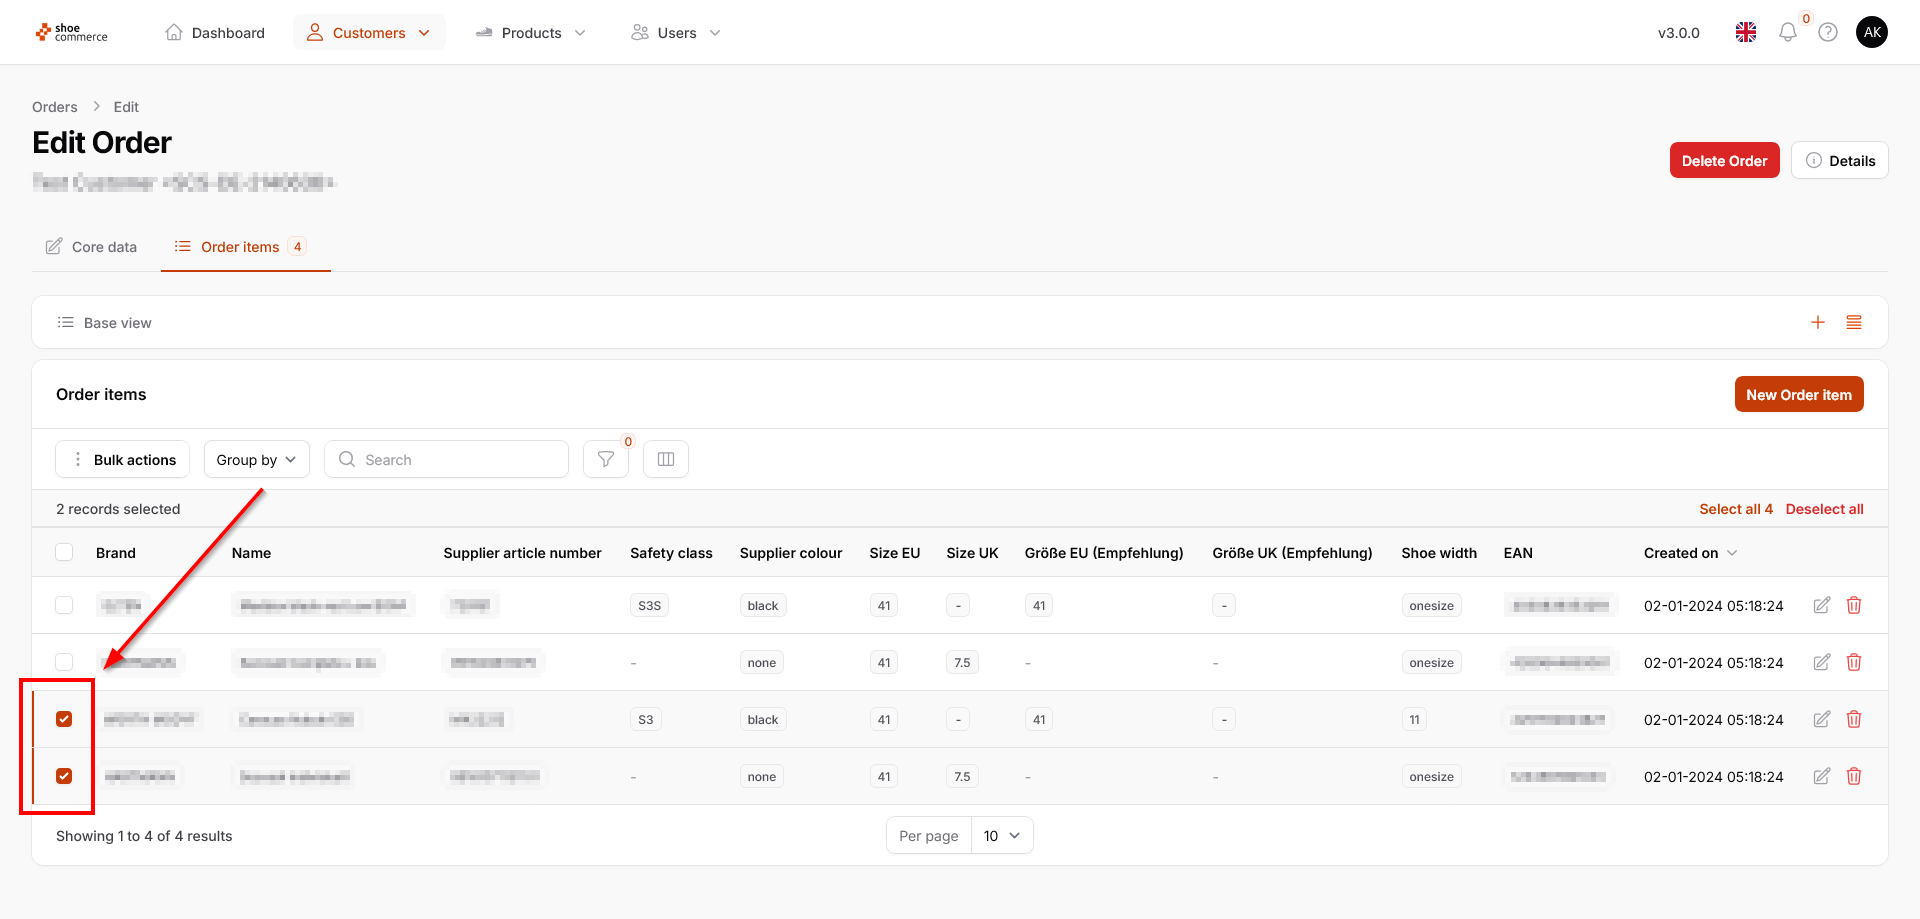
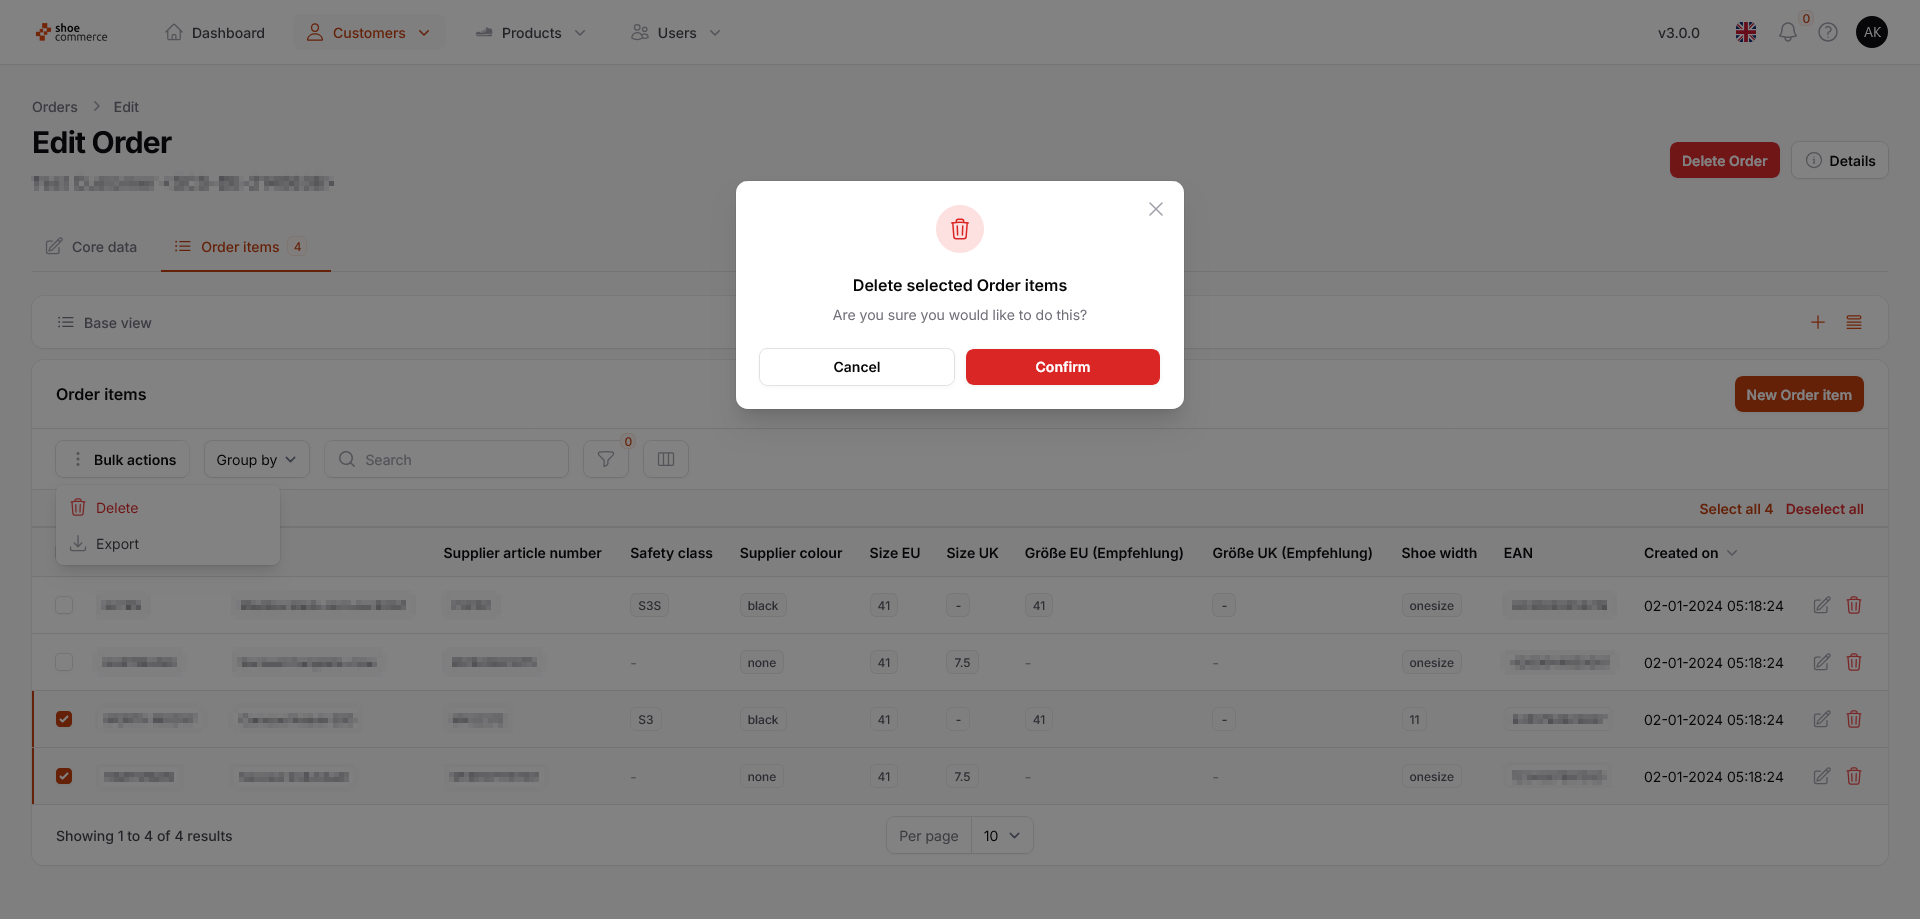
- To remove several order items at once, first activate them by clicking on the corresponding checkboxes.
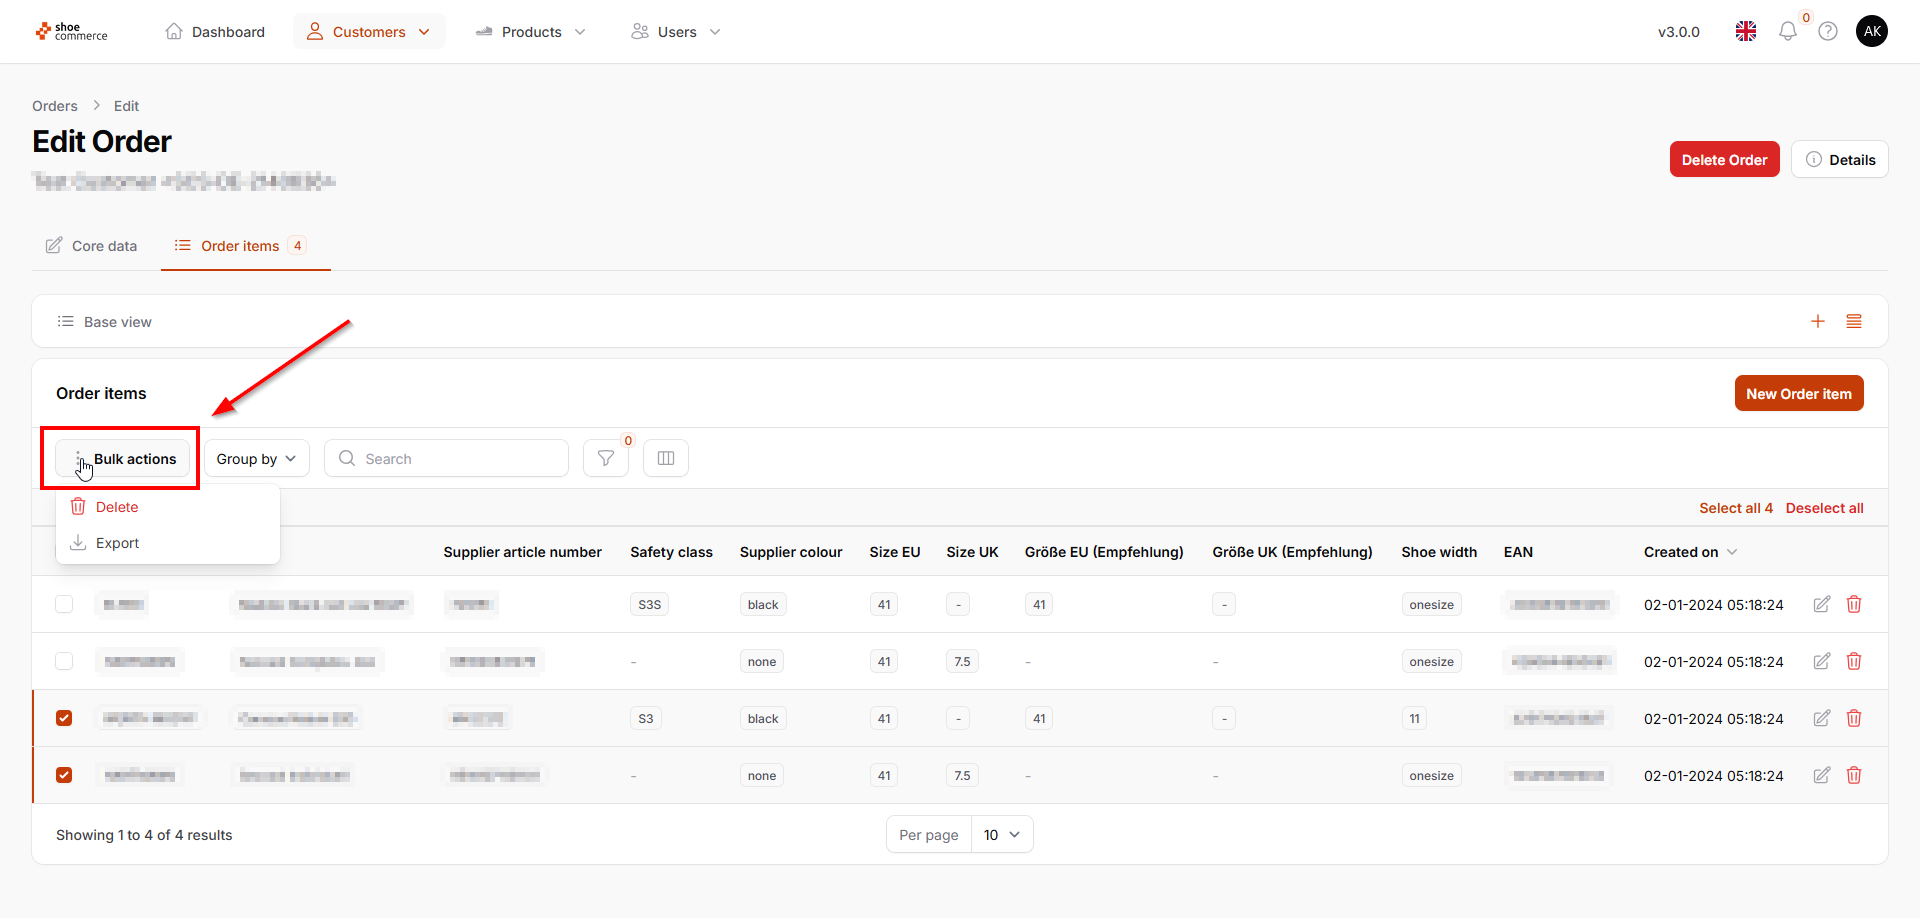
- Click on “Bulk actions” in the upper menu ribbon and select “Delete”. By confirming the subsequent confirmation prompt, the items are then completely removed from your order.
Entering a manual order
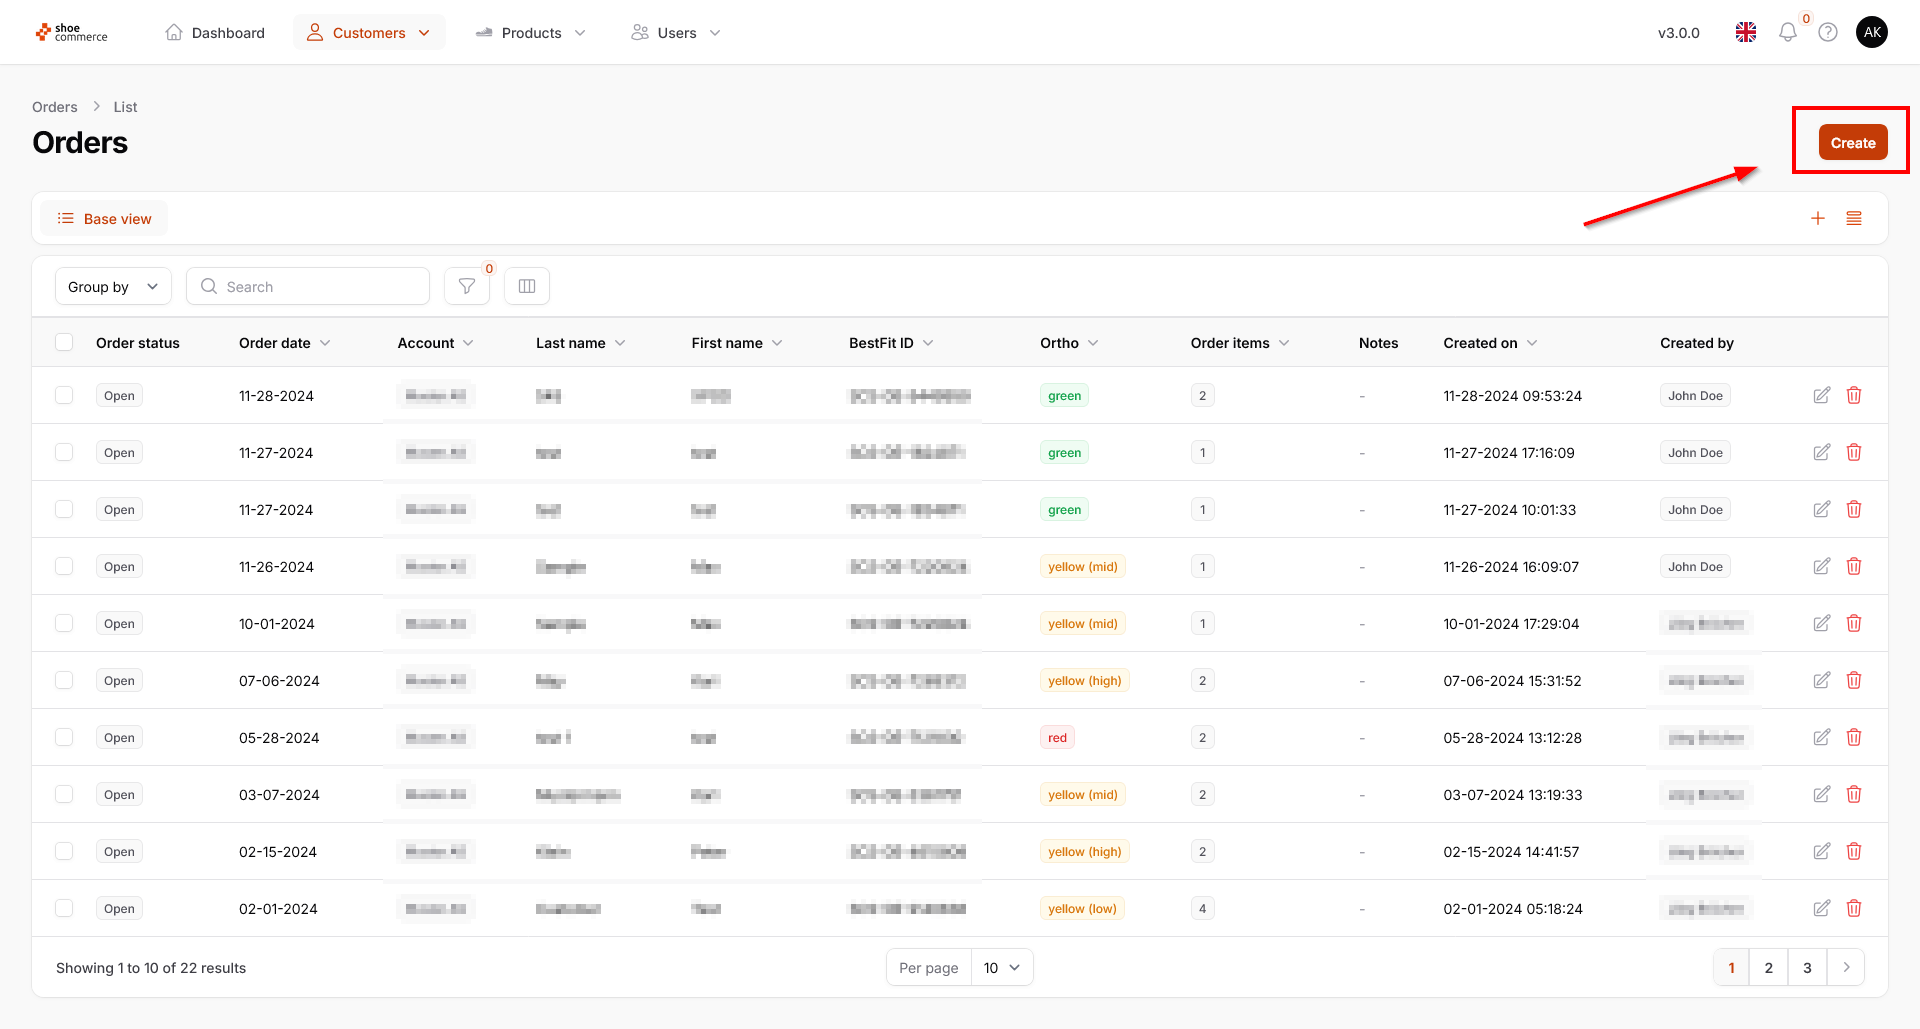
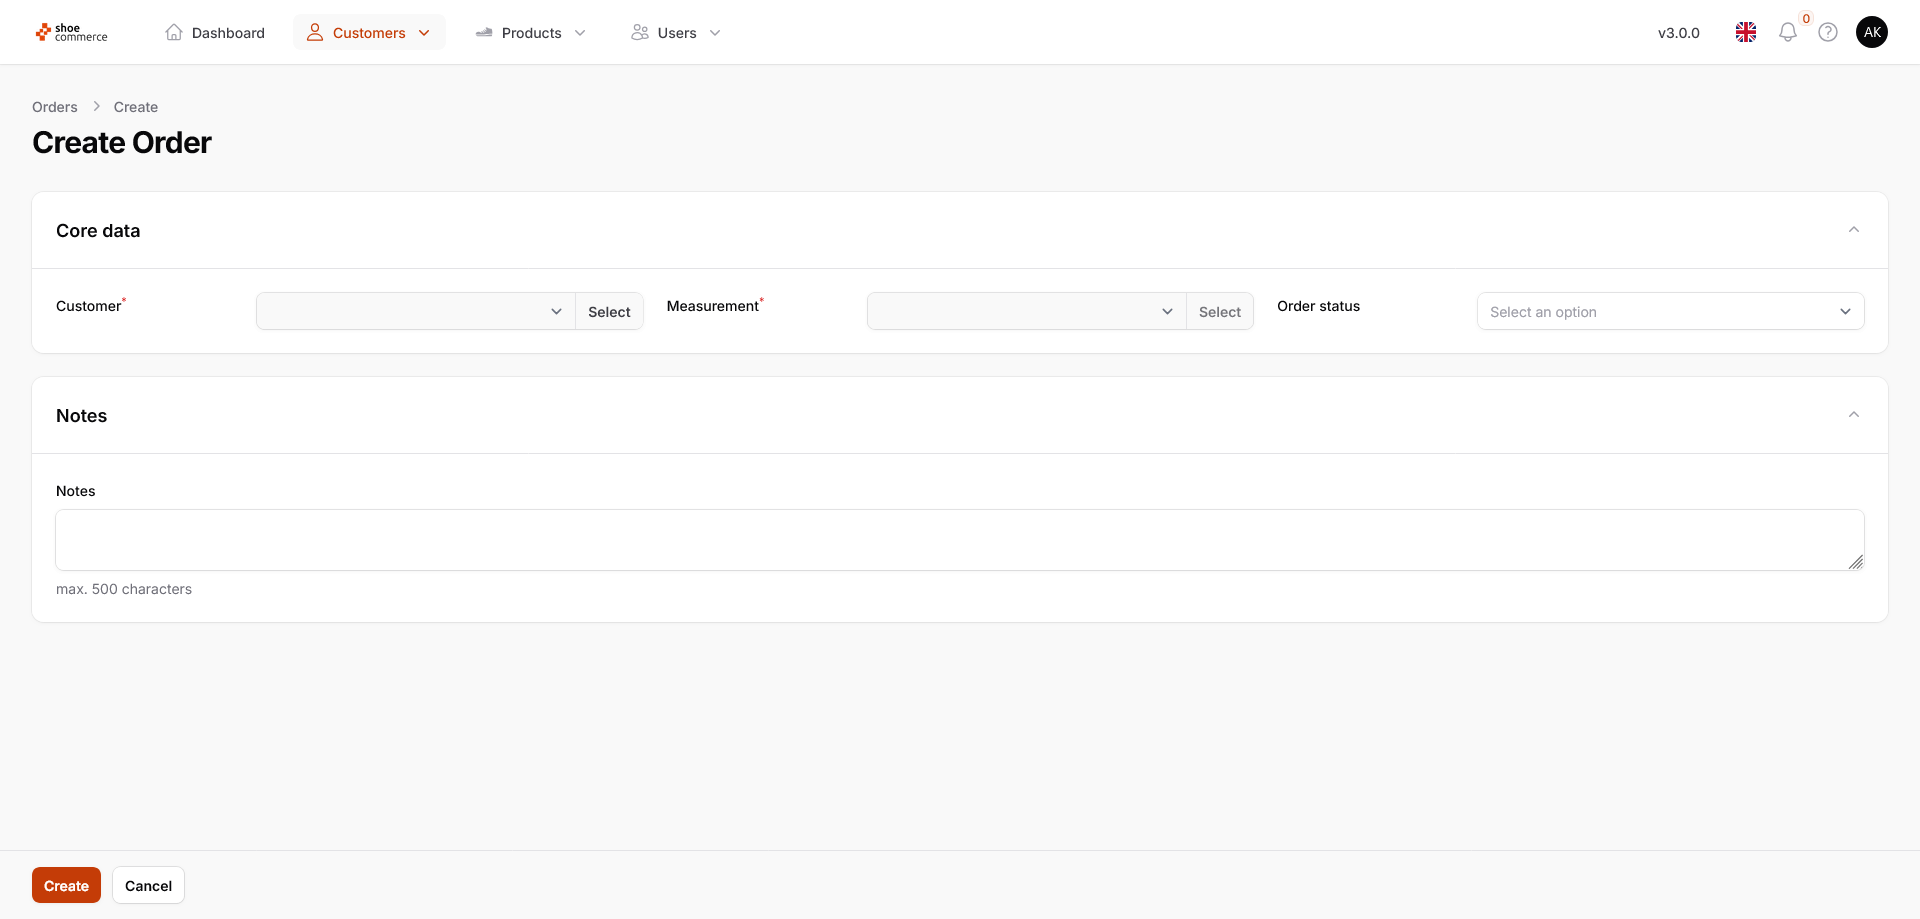
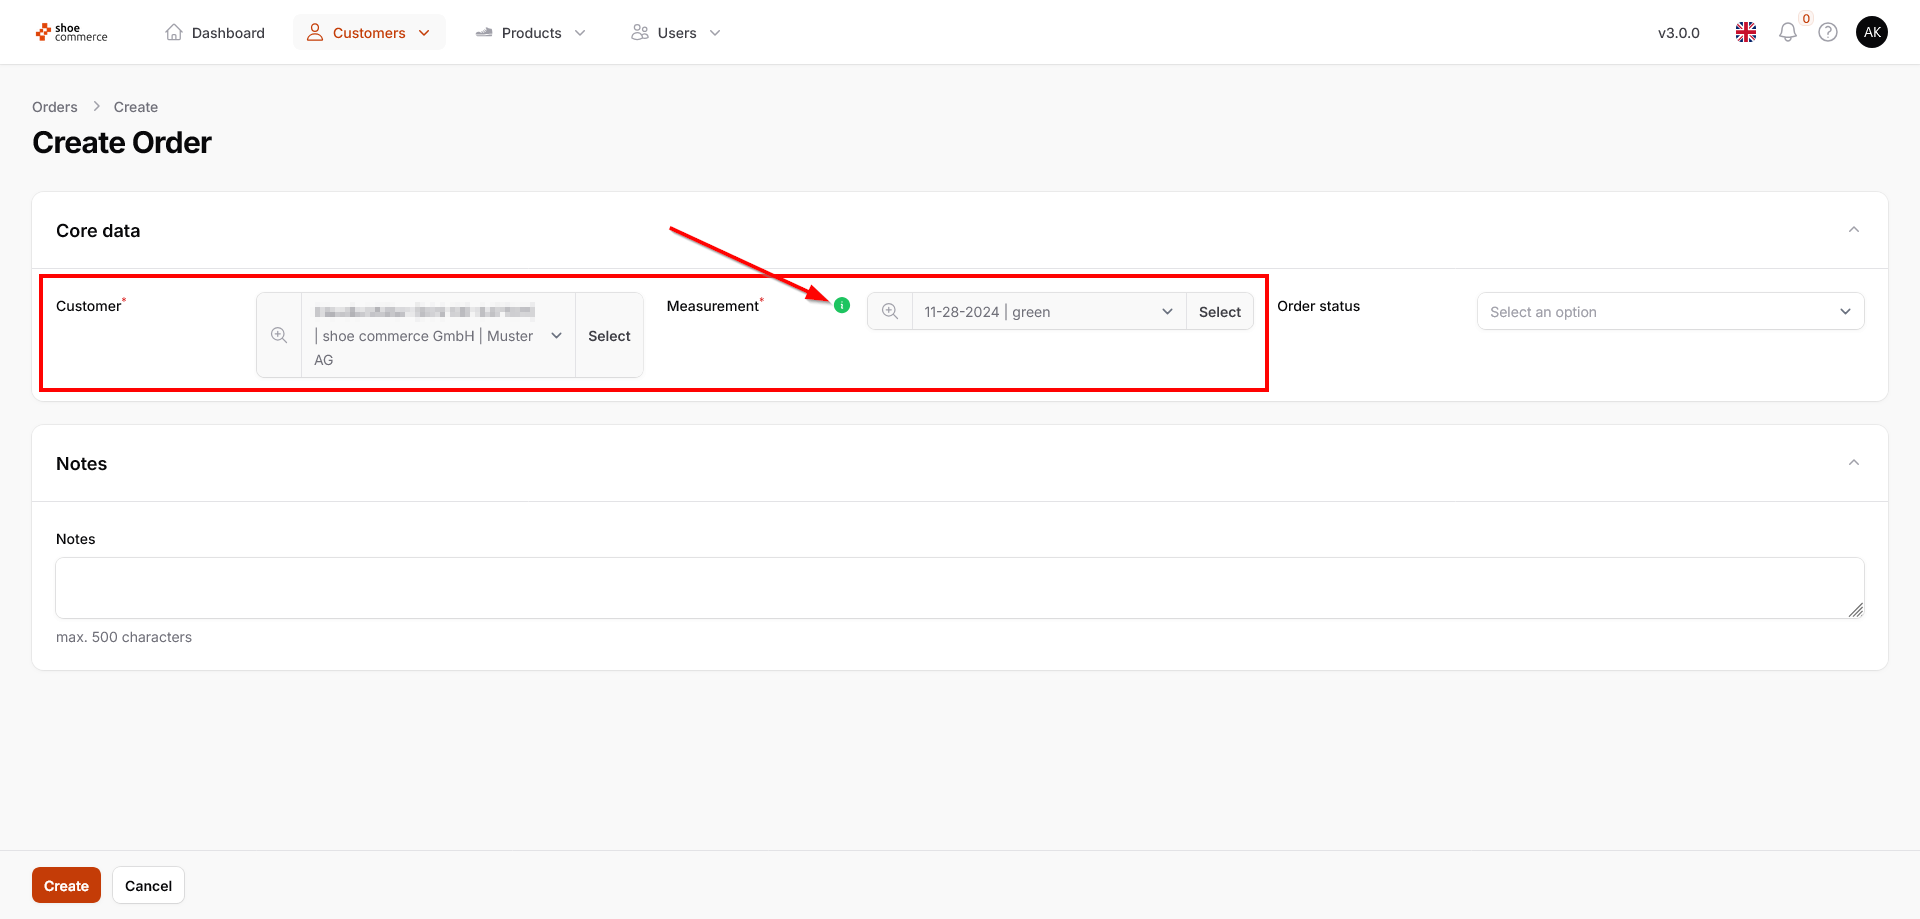
- To enter a new order manually in the backend, click on the orange “Create” button in the top right-hand corner of the main view. This opens the “Create Order” entry screen with the “Core data” field already displayed.
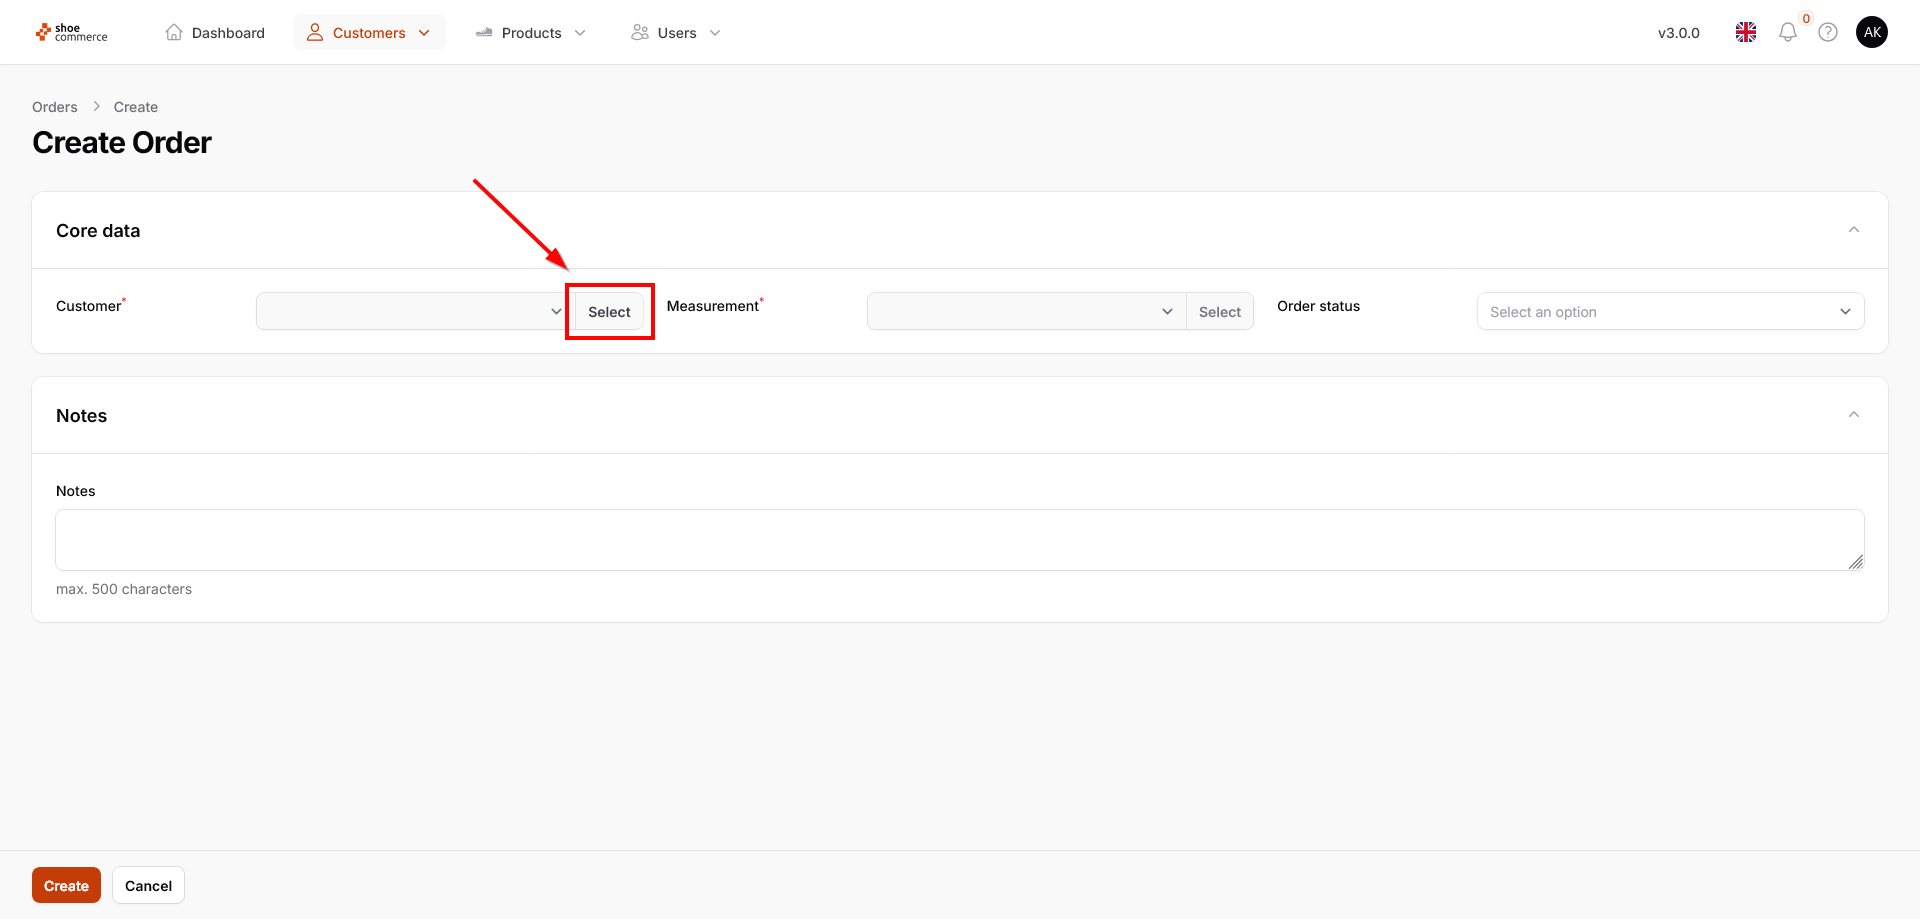
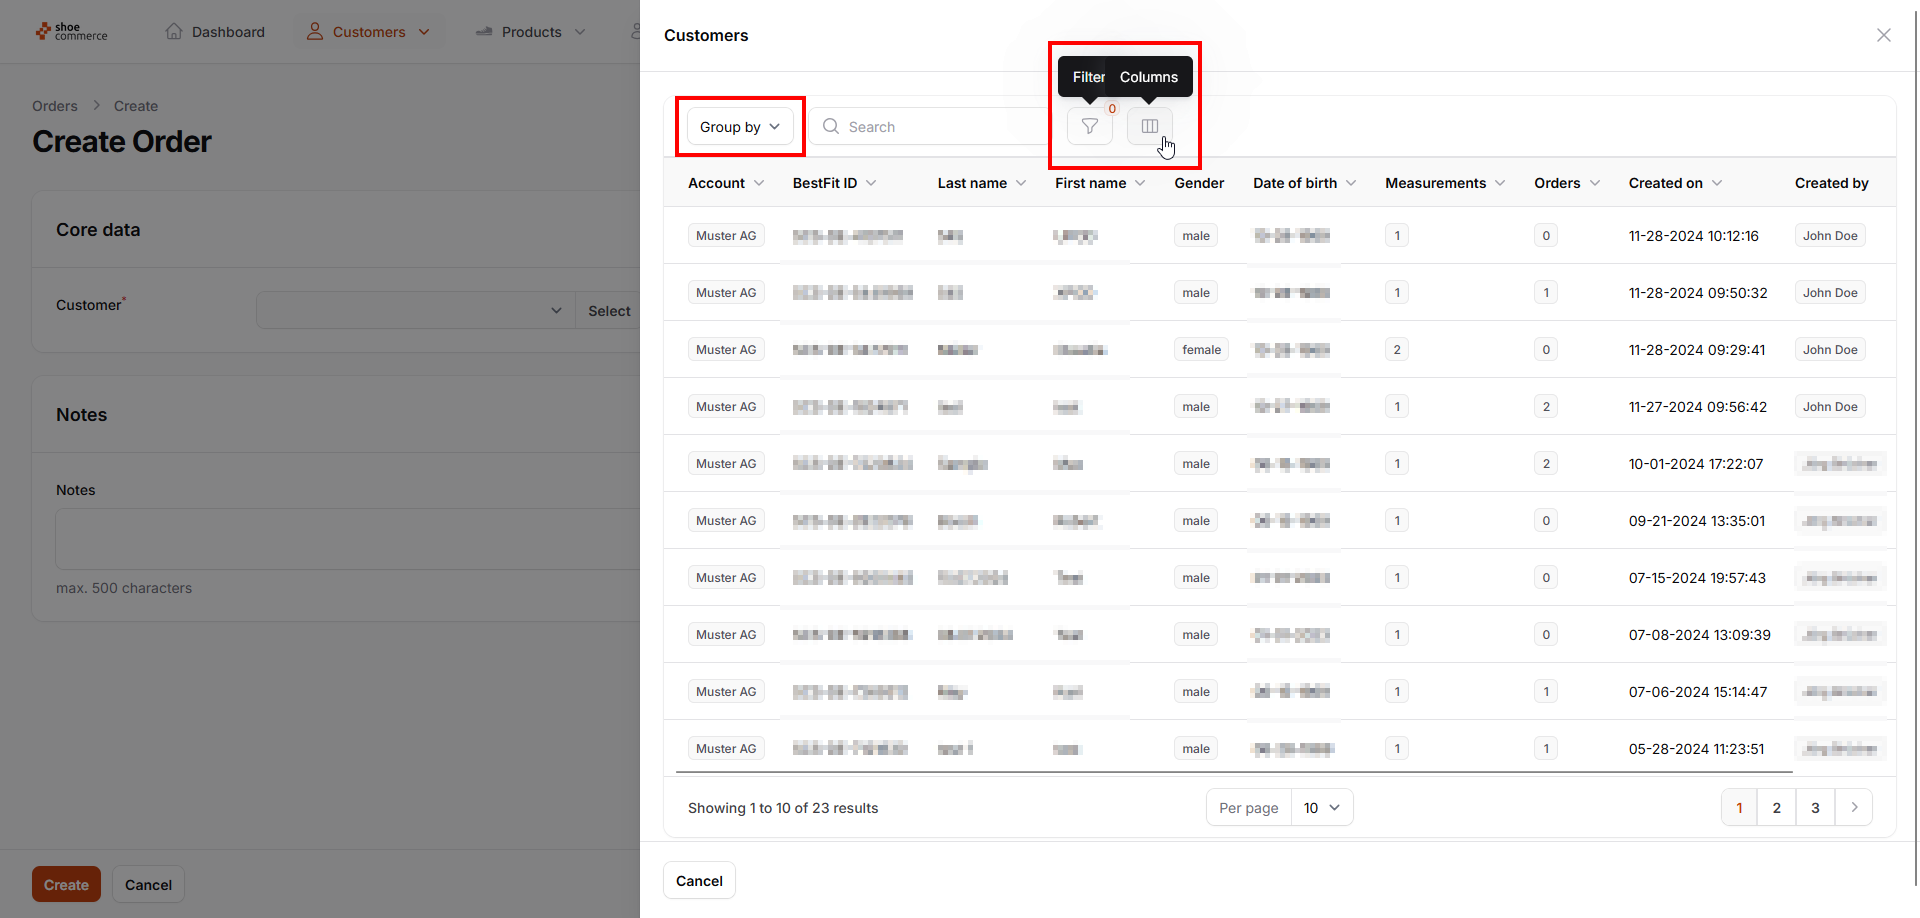
- First select an end customer by clicking on “Select”.
- The usual backend list view then opens, in which all regular functions for showing and hiding columns, grouping and filter functions can also be used.
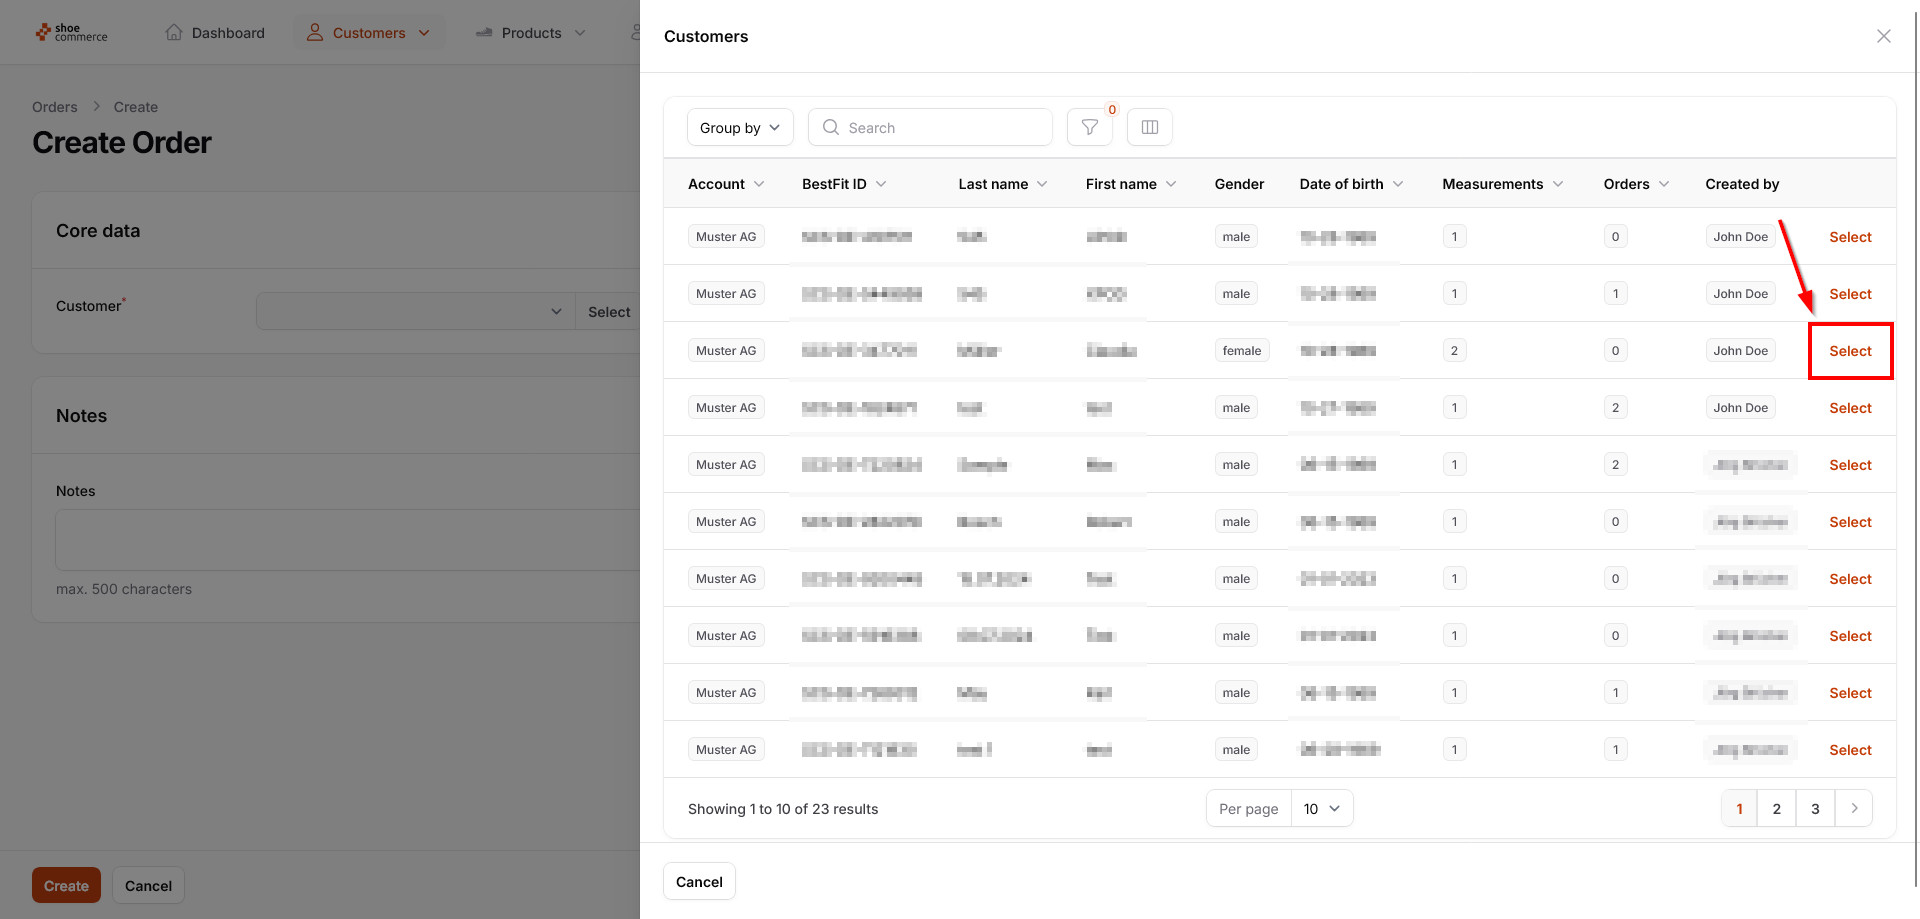
- Now select the required end customer by clicking on “Select”.
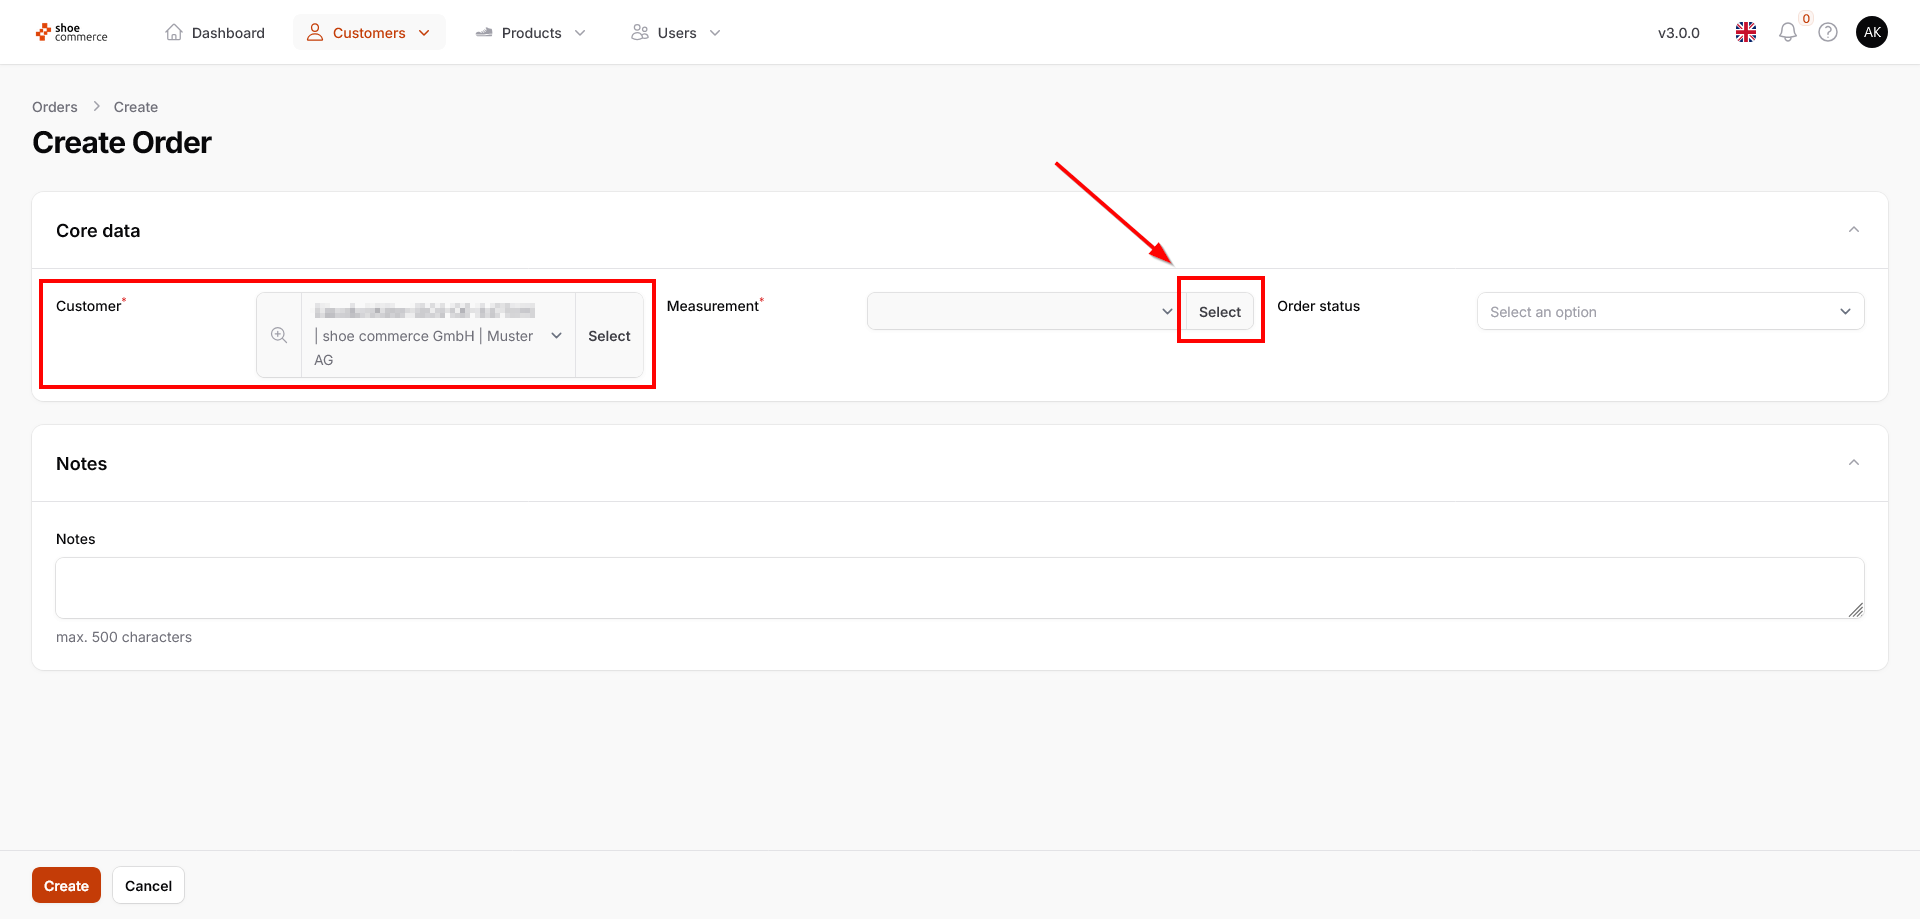
- The end customer you have selected is now displayed accordingly. Then click on “Select” in the “Measurement” section.
- All measurements available in the system for the selected person are now displayed (two in this example). Here, too, all the regular functions for showing and hiding columns, grouping and filtering functions are available to you. Click on “Select” to choose the measurement for the order process.
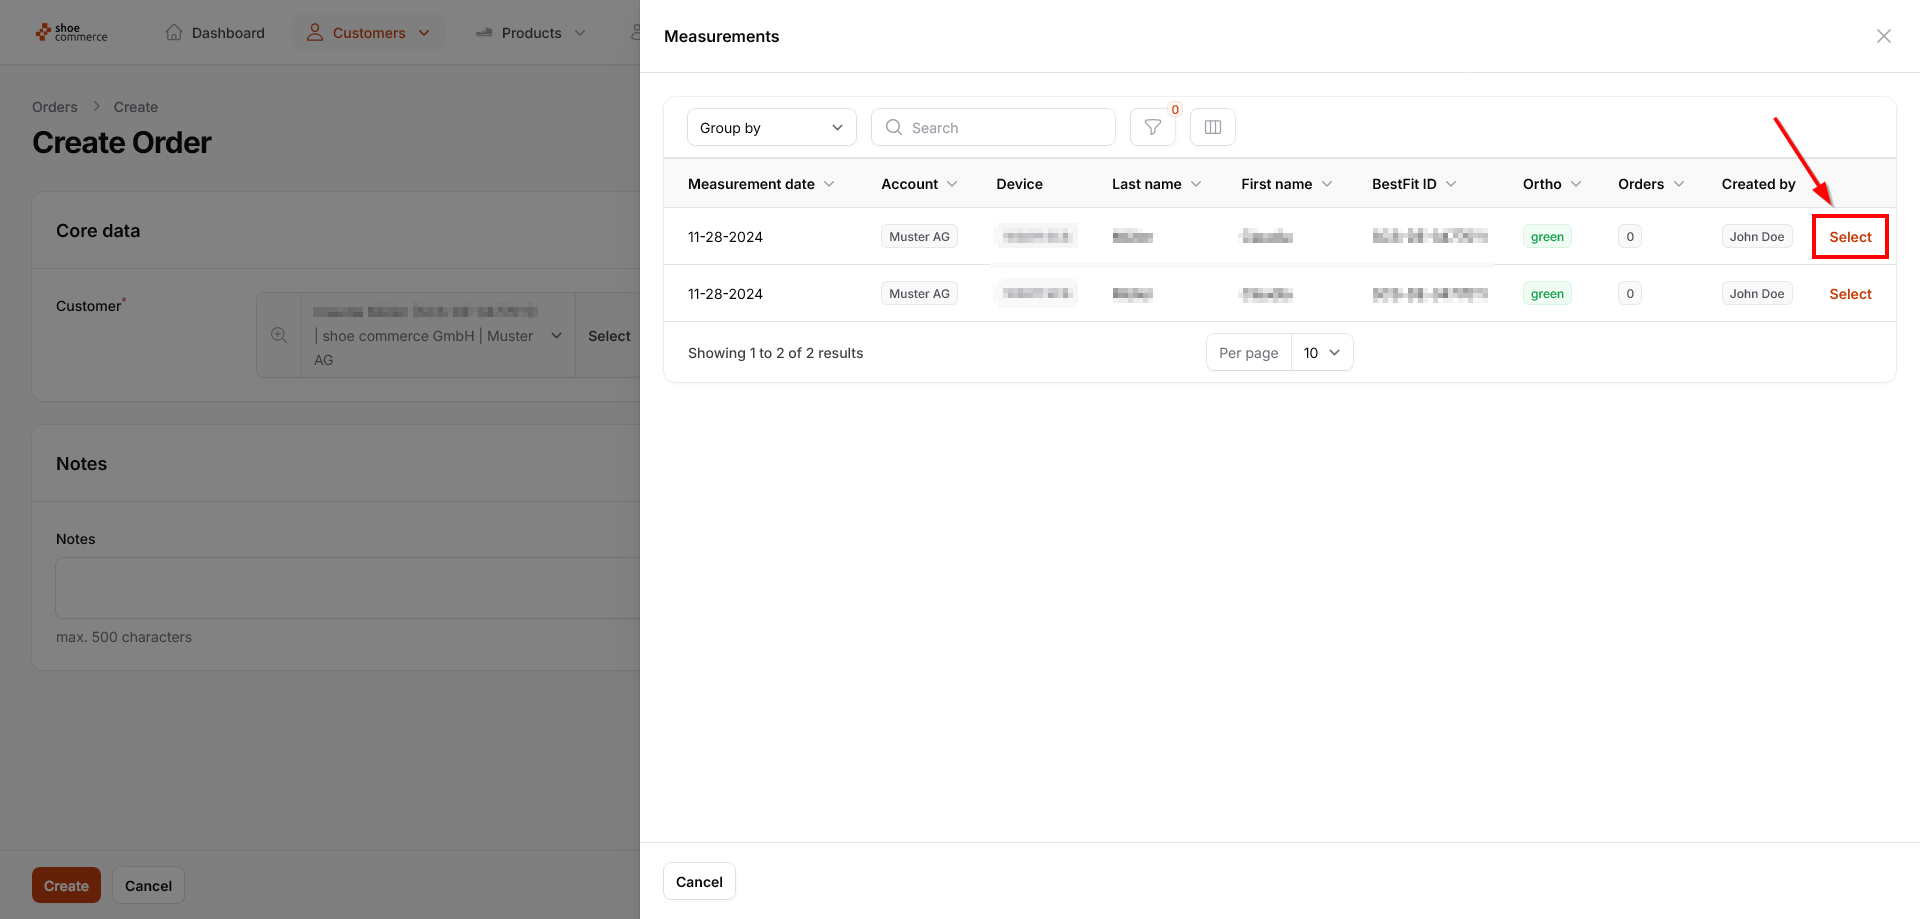
- The data relating to end customer and measurement are now stored. In addition, the result of the Ortho is displayed in the measurement area, in this example “green”.
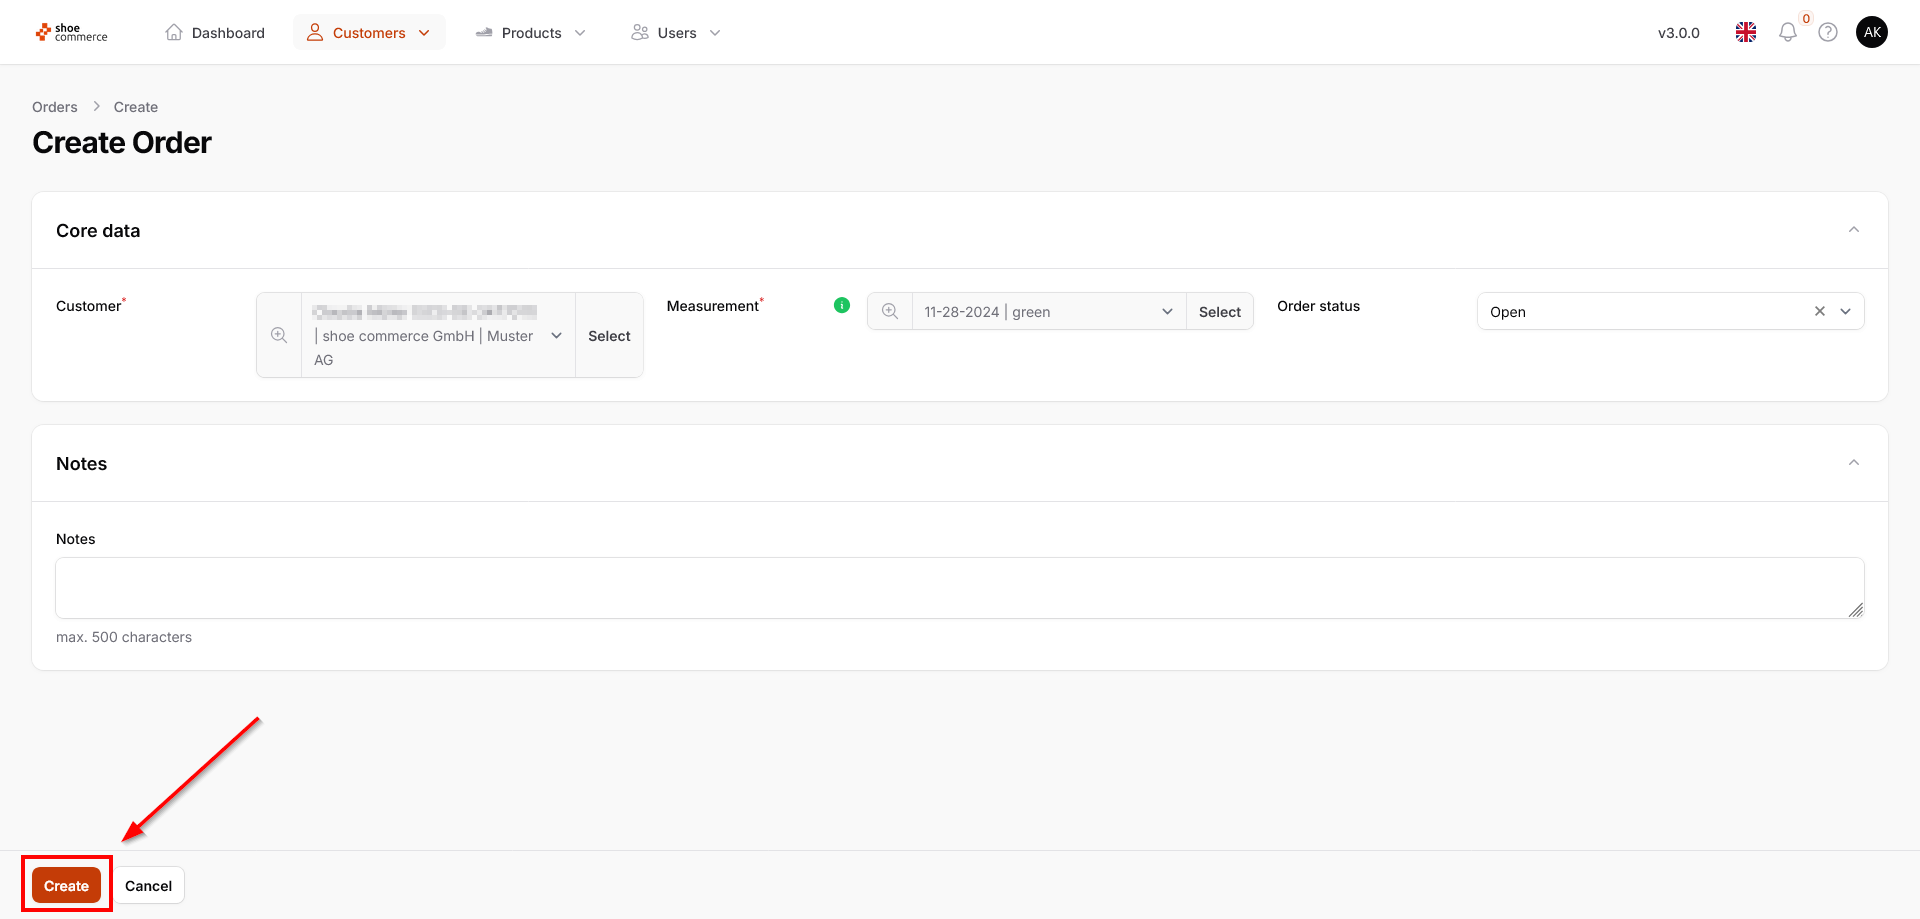
- Finally, select the required order status. A description of the individual options is provided in the “Edit order” section.

- You have the option of adding additional notes to the order. By clicking on “Create”, the order is stored in the system and displayed in the list view with the current date.
View and export details of multiple orders
Details of one or more orders can be viewed in the list view via bulk actions.
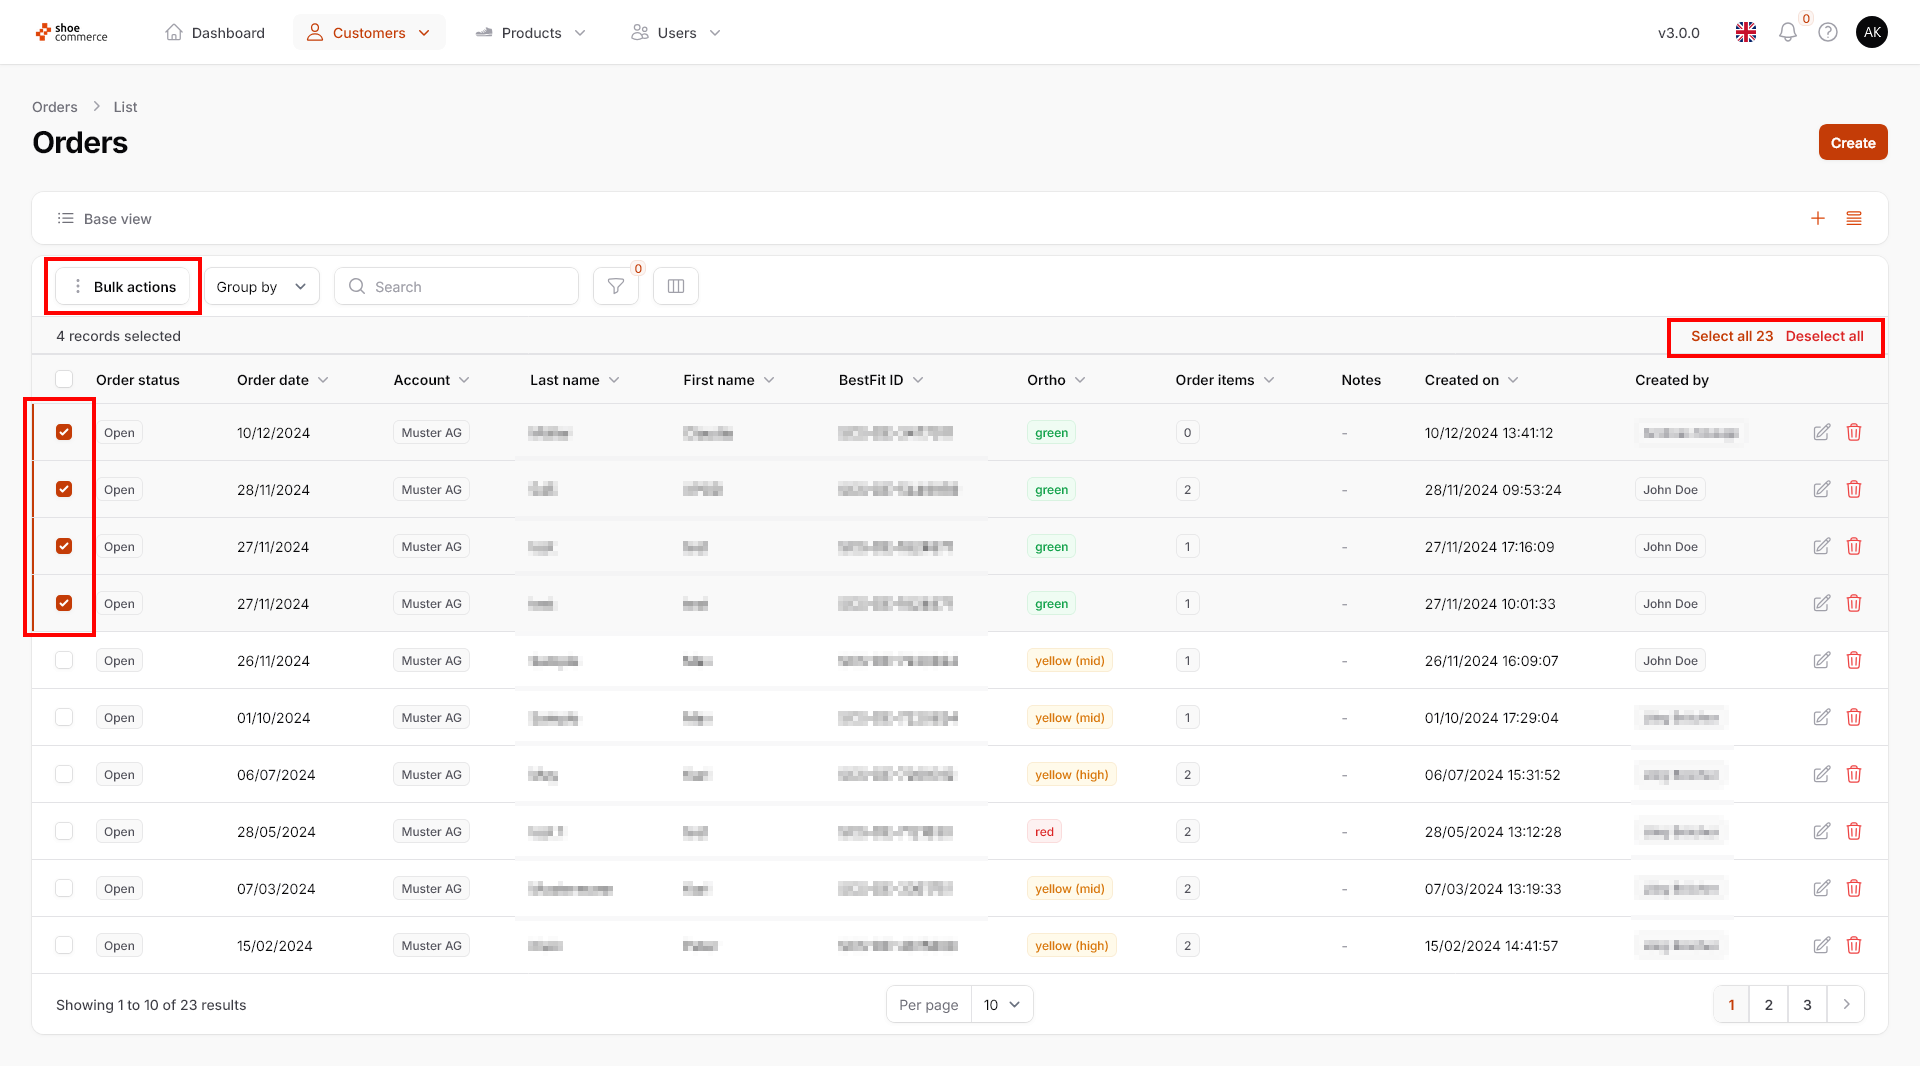
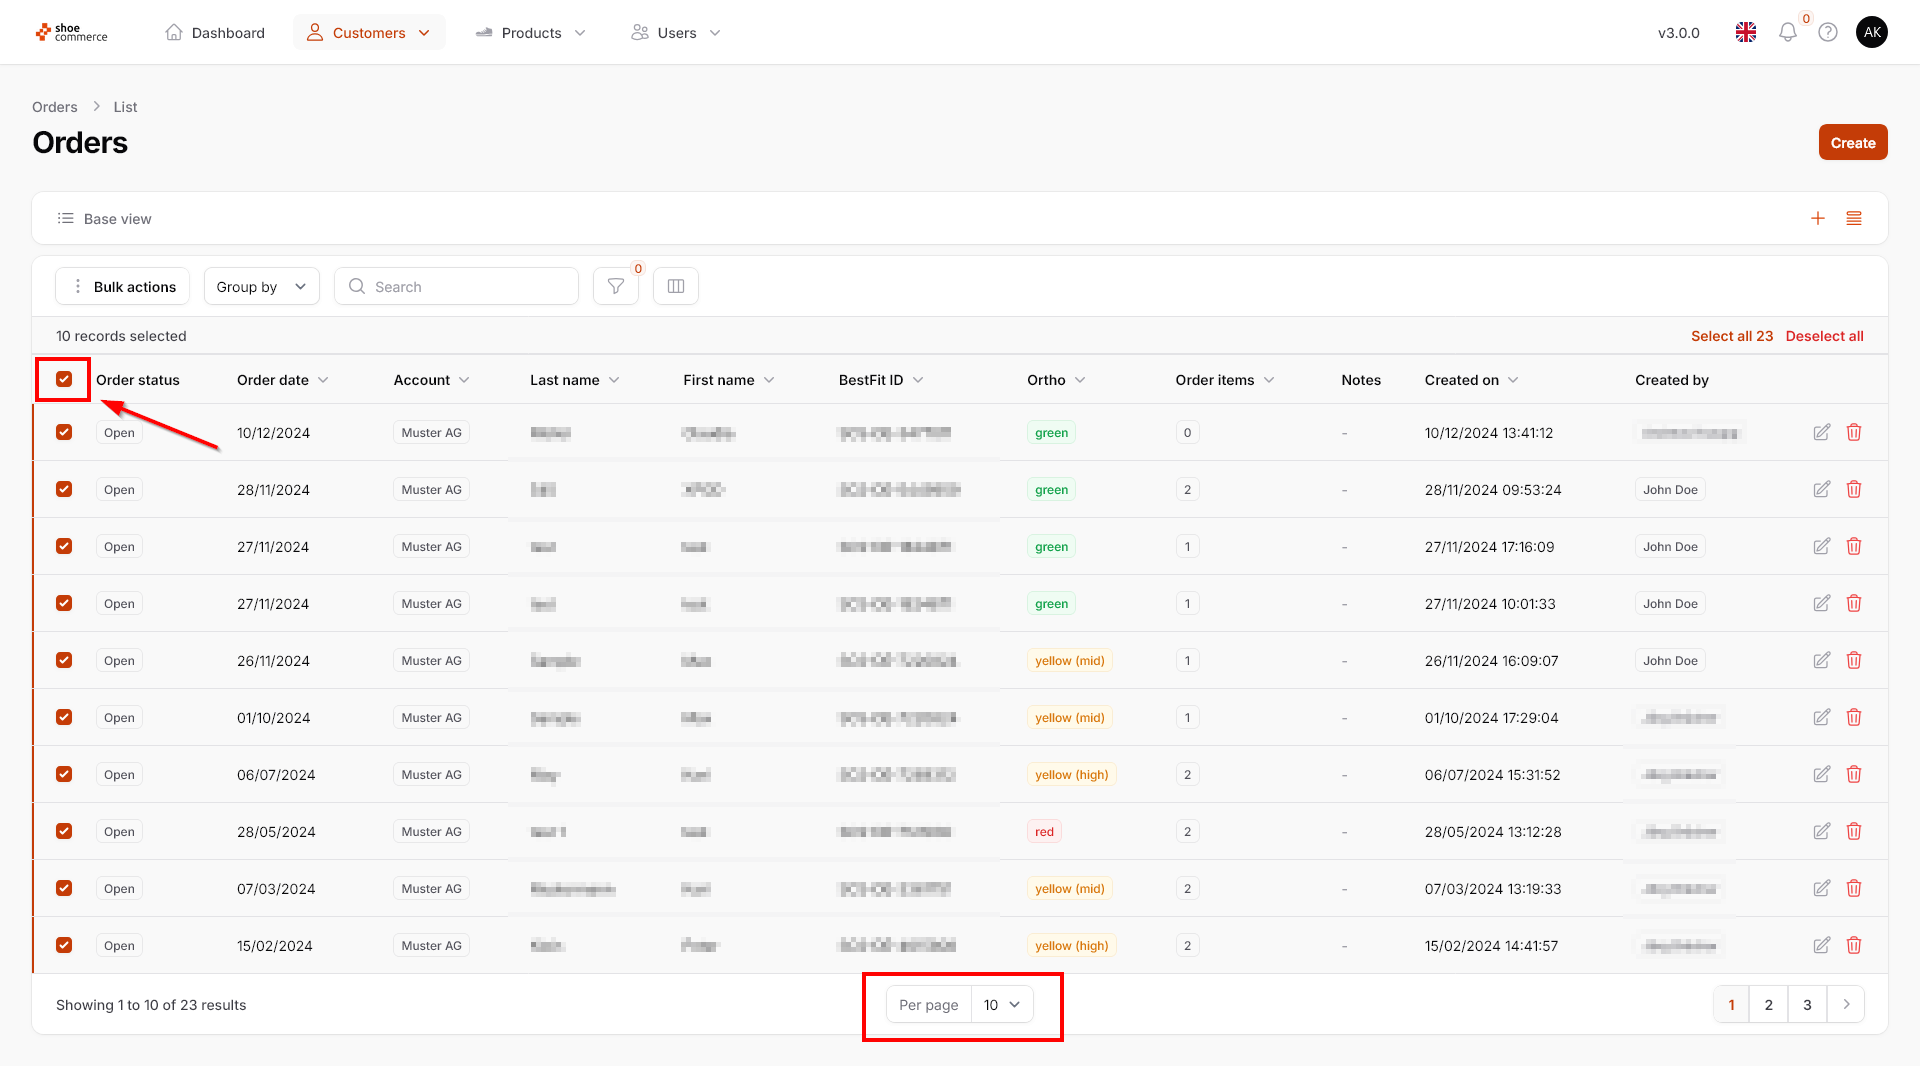
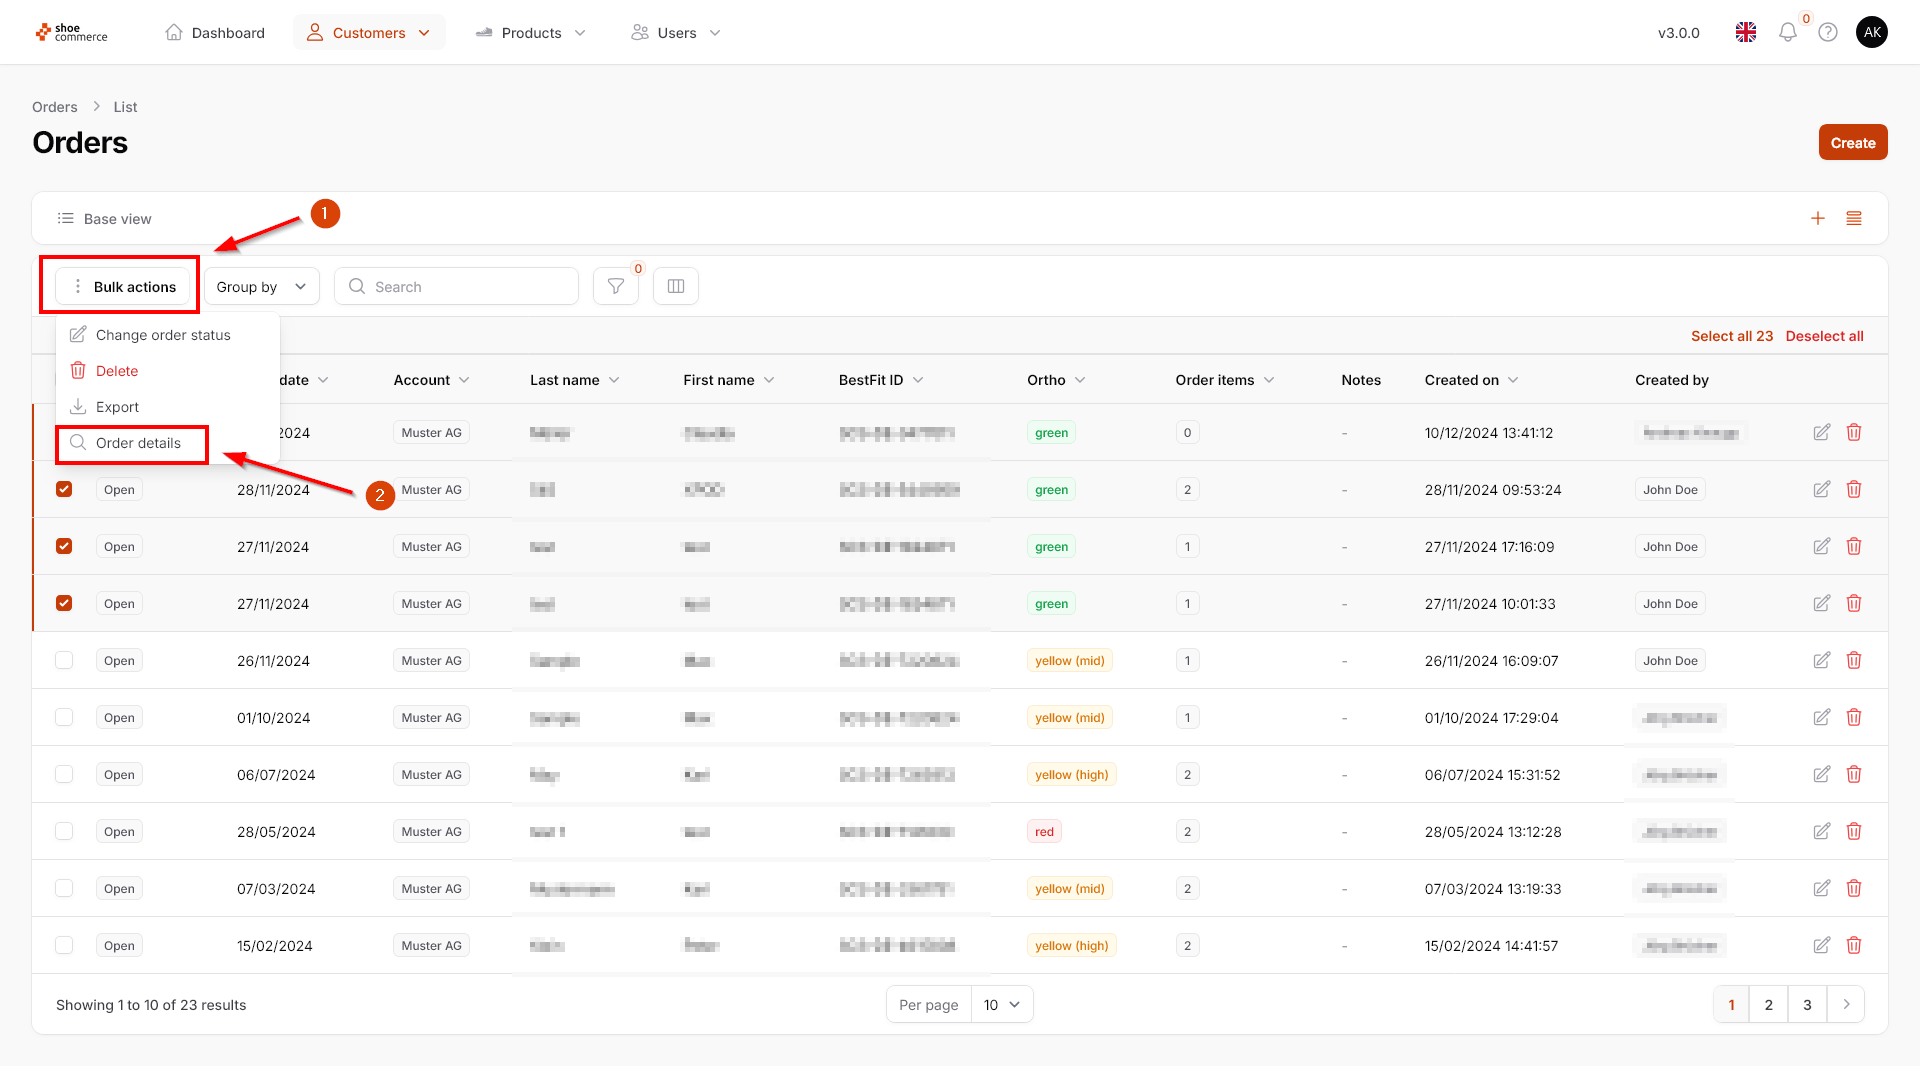
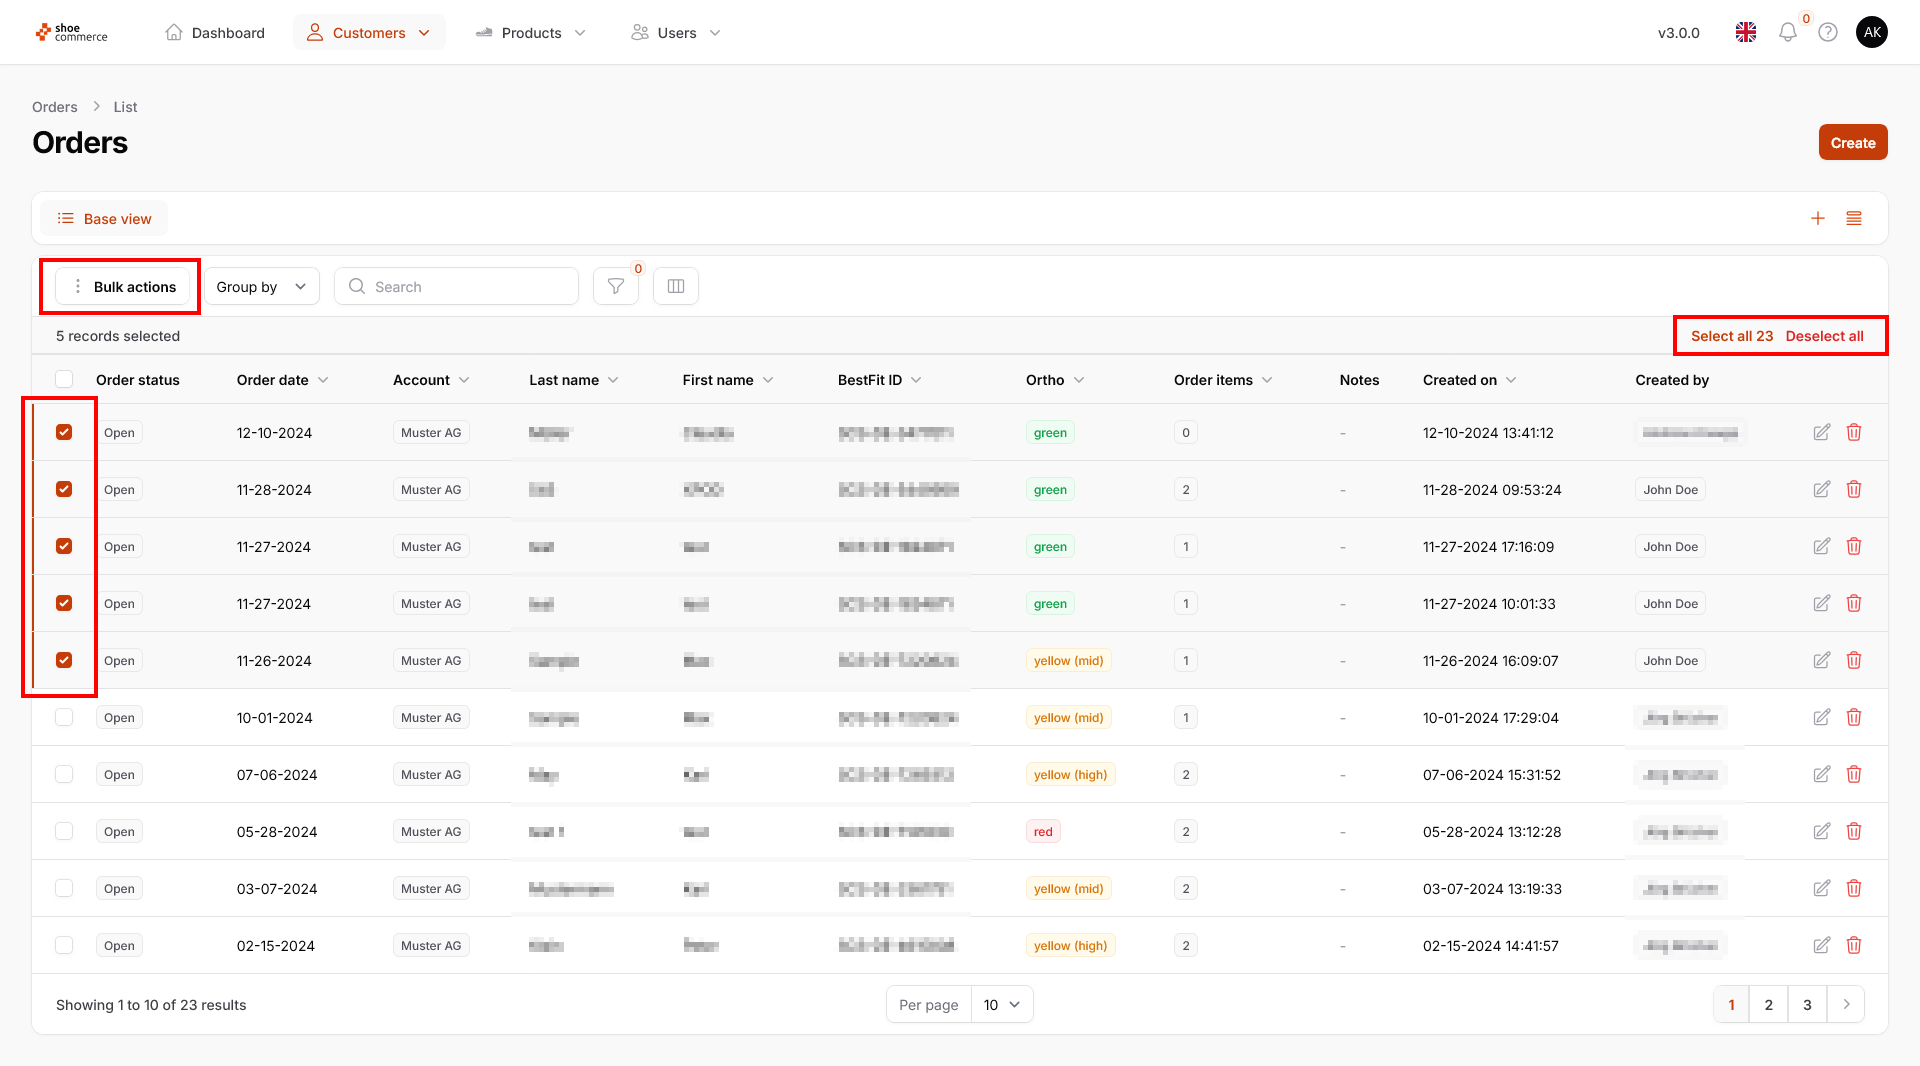
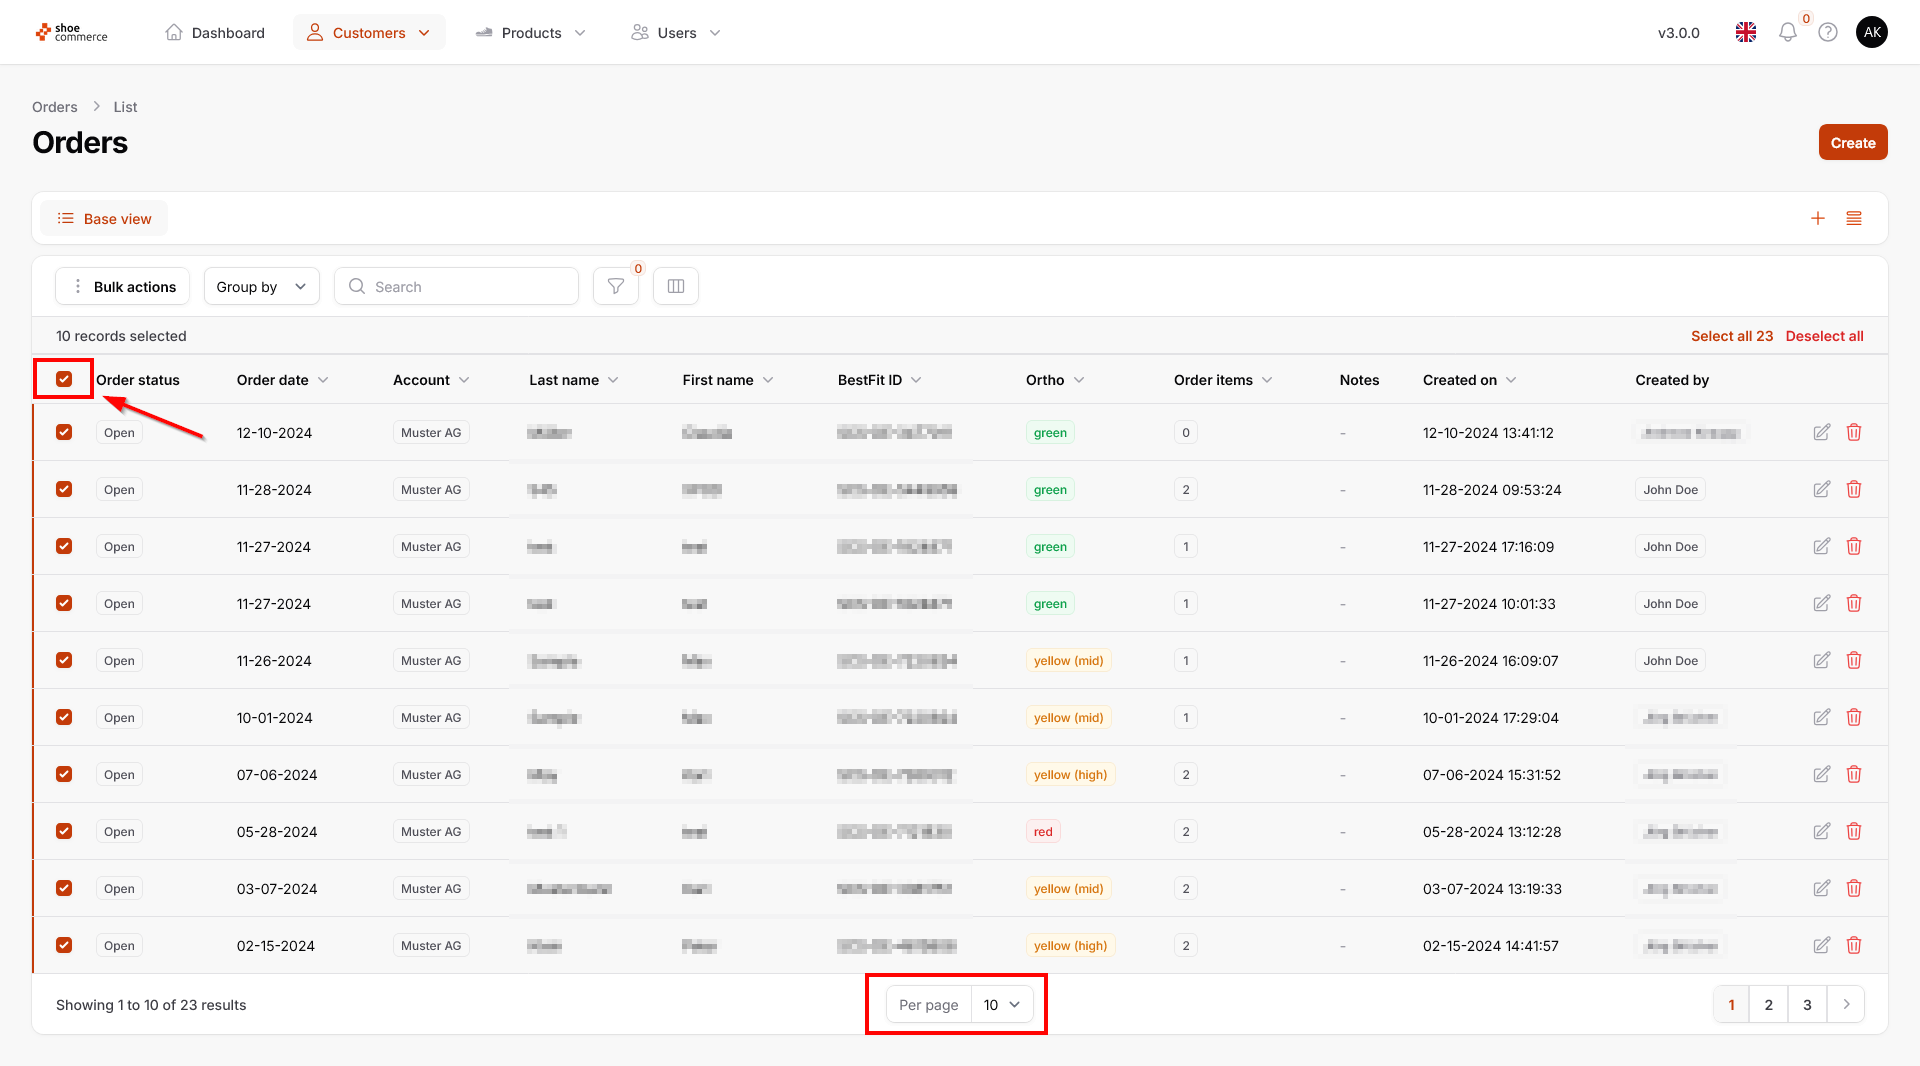
- First select at least one data record by clicking on the left side. This opens the “Bulk actions” menu at the top left along with the function for selecting/deselecting all data records (top right). All visible data records can be activated by clicking on the top left box.
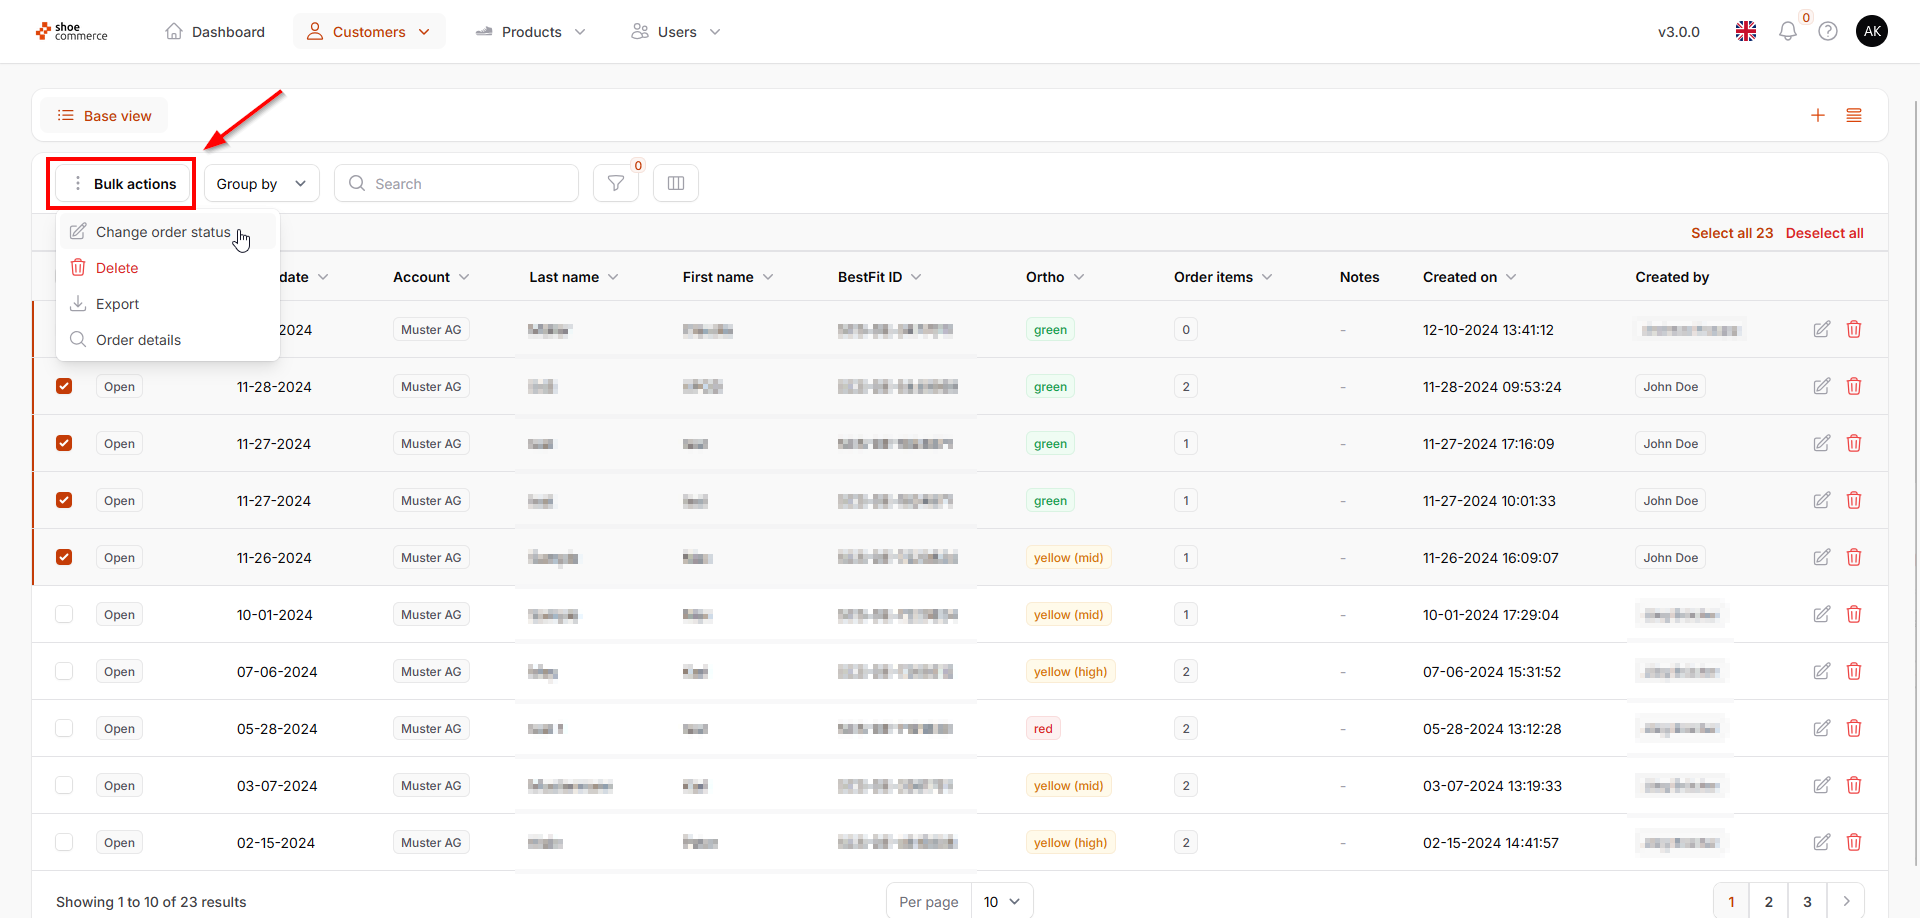
- Now click on the “Bulk actions” button to view all available functions. Select “Order details” in the drop-down menu that opens.
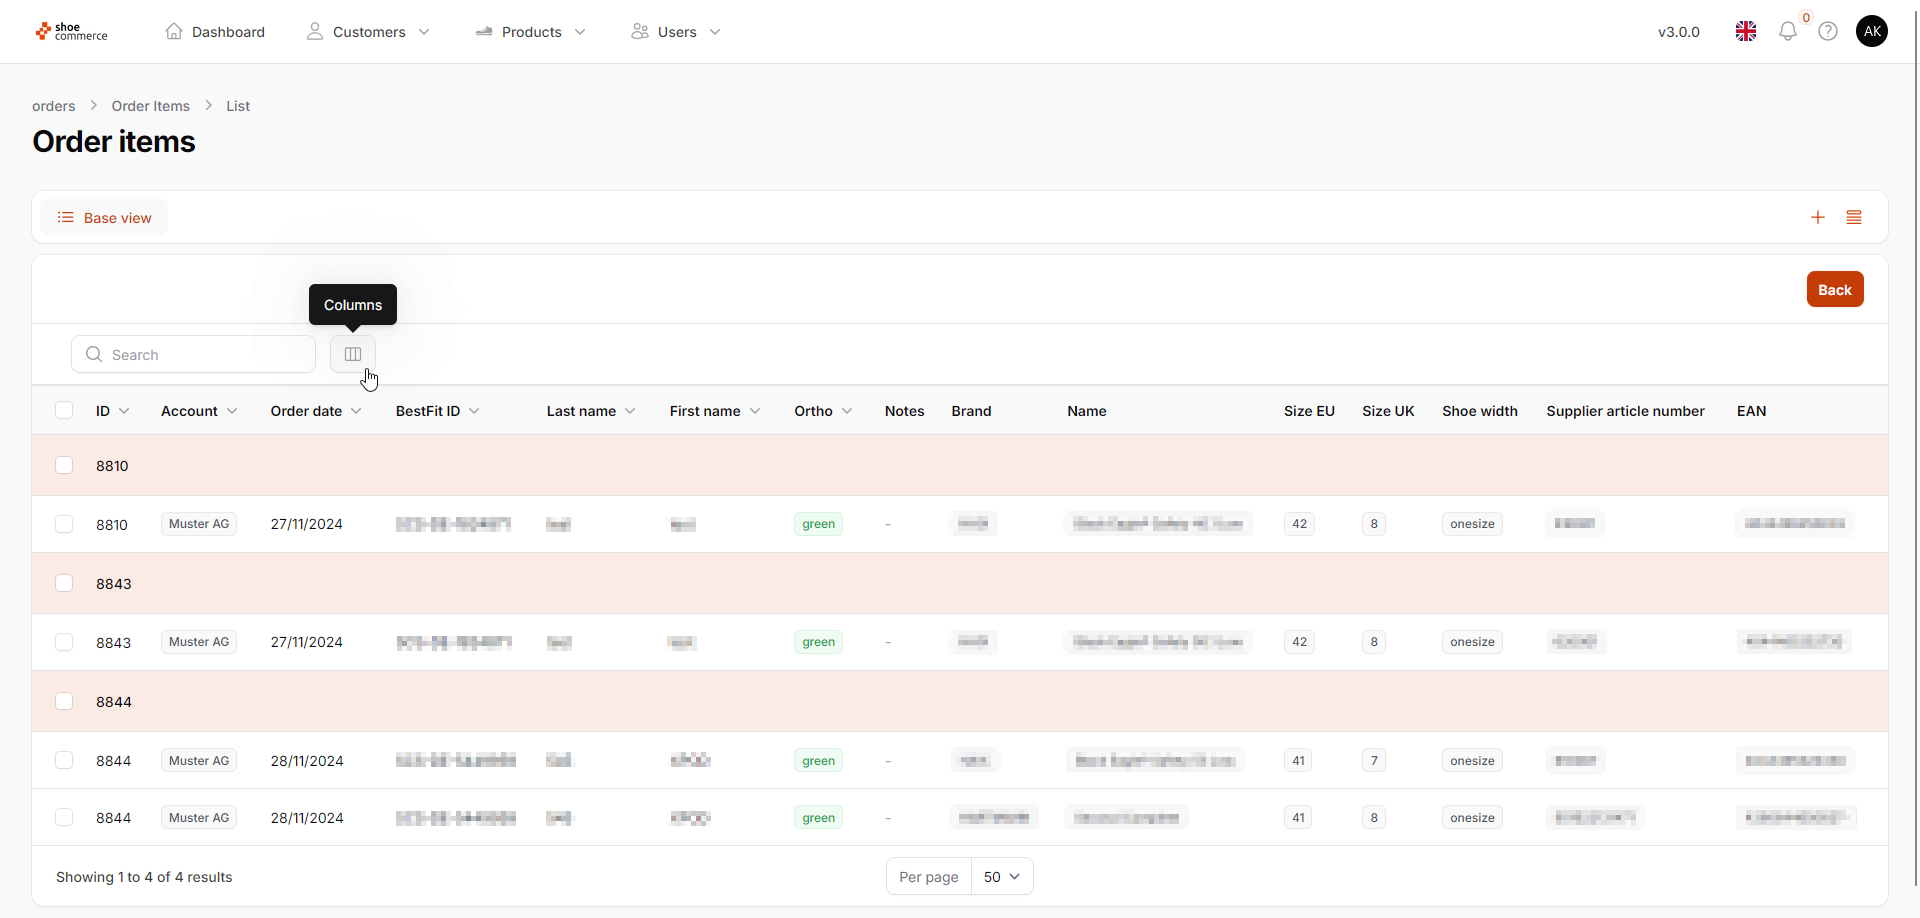
- All order details regarding the data records you have selected in the list view are now displayed in groups. Here too, you have the option of showing or hiding all the required columns.
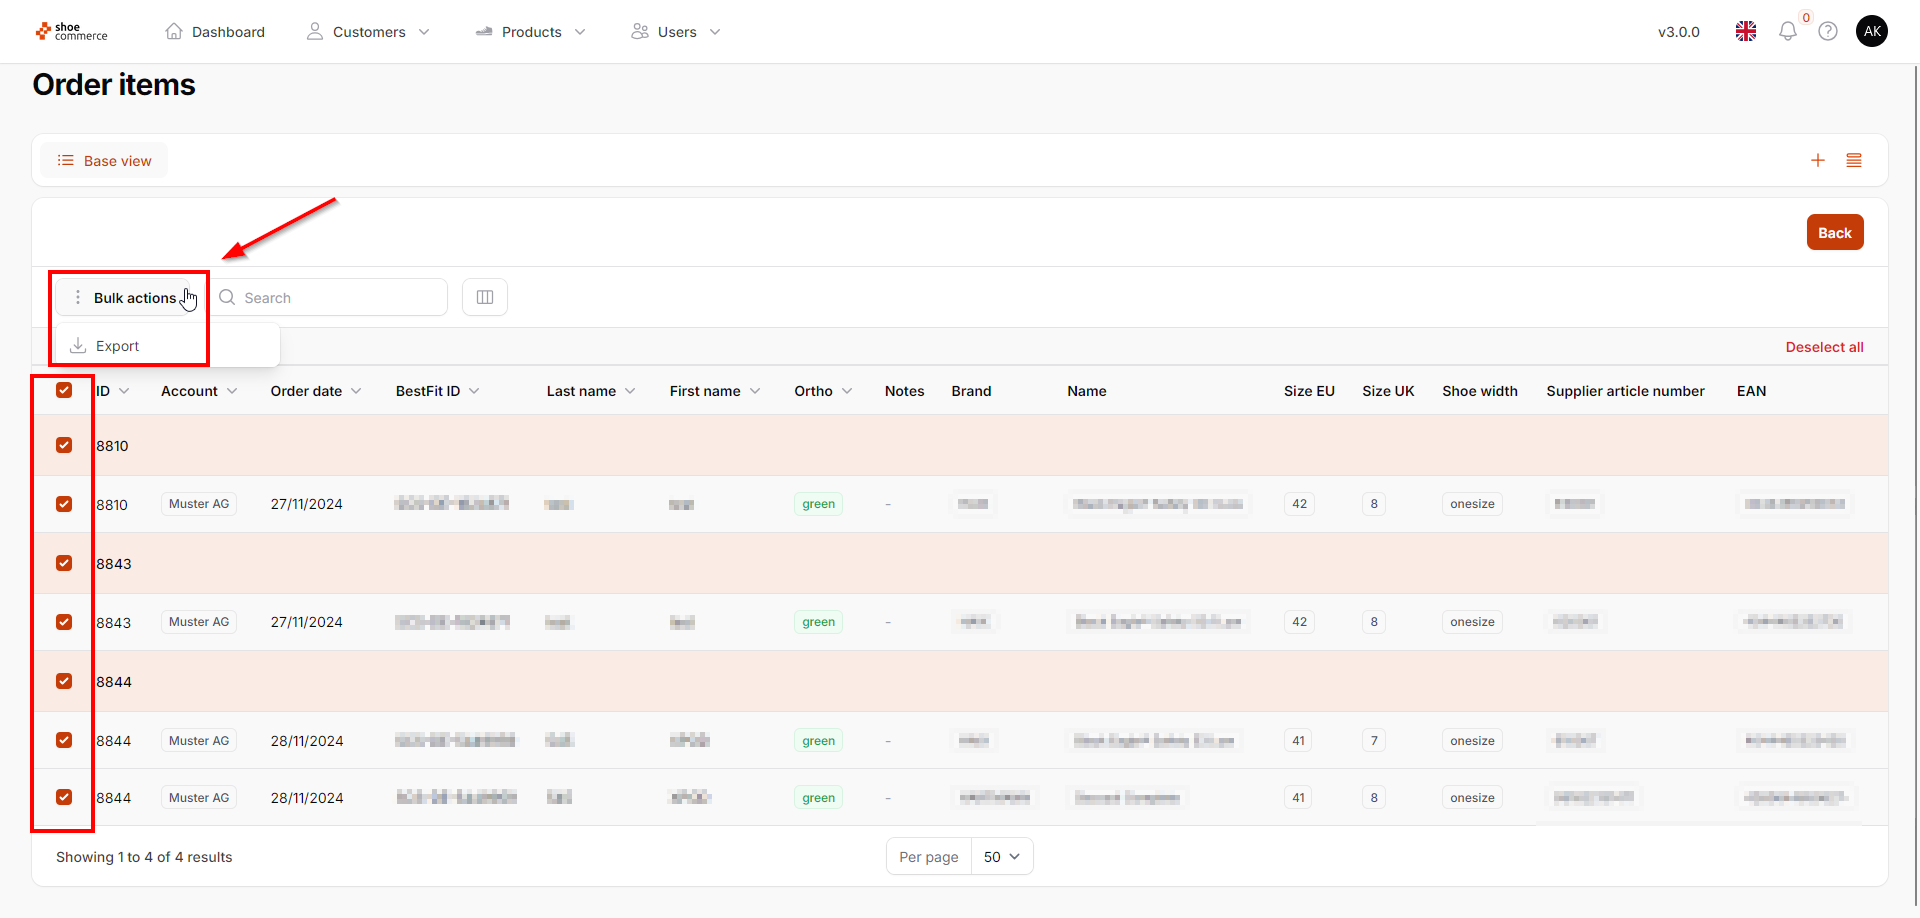
- To start exporting the data to Excel, first select at least one data record again so that the “Bulk actions” function is displayed. After clicking on this, the “Export” function is available, which starts the download. Please note that only all visible columns that you have shown in the backend will be exported.

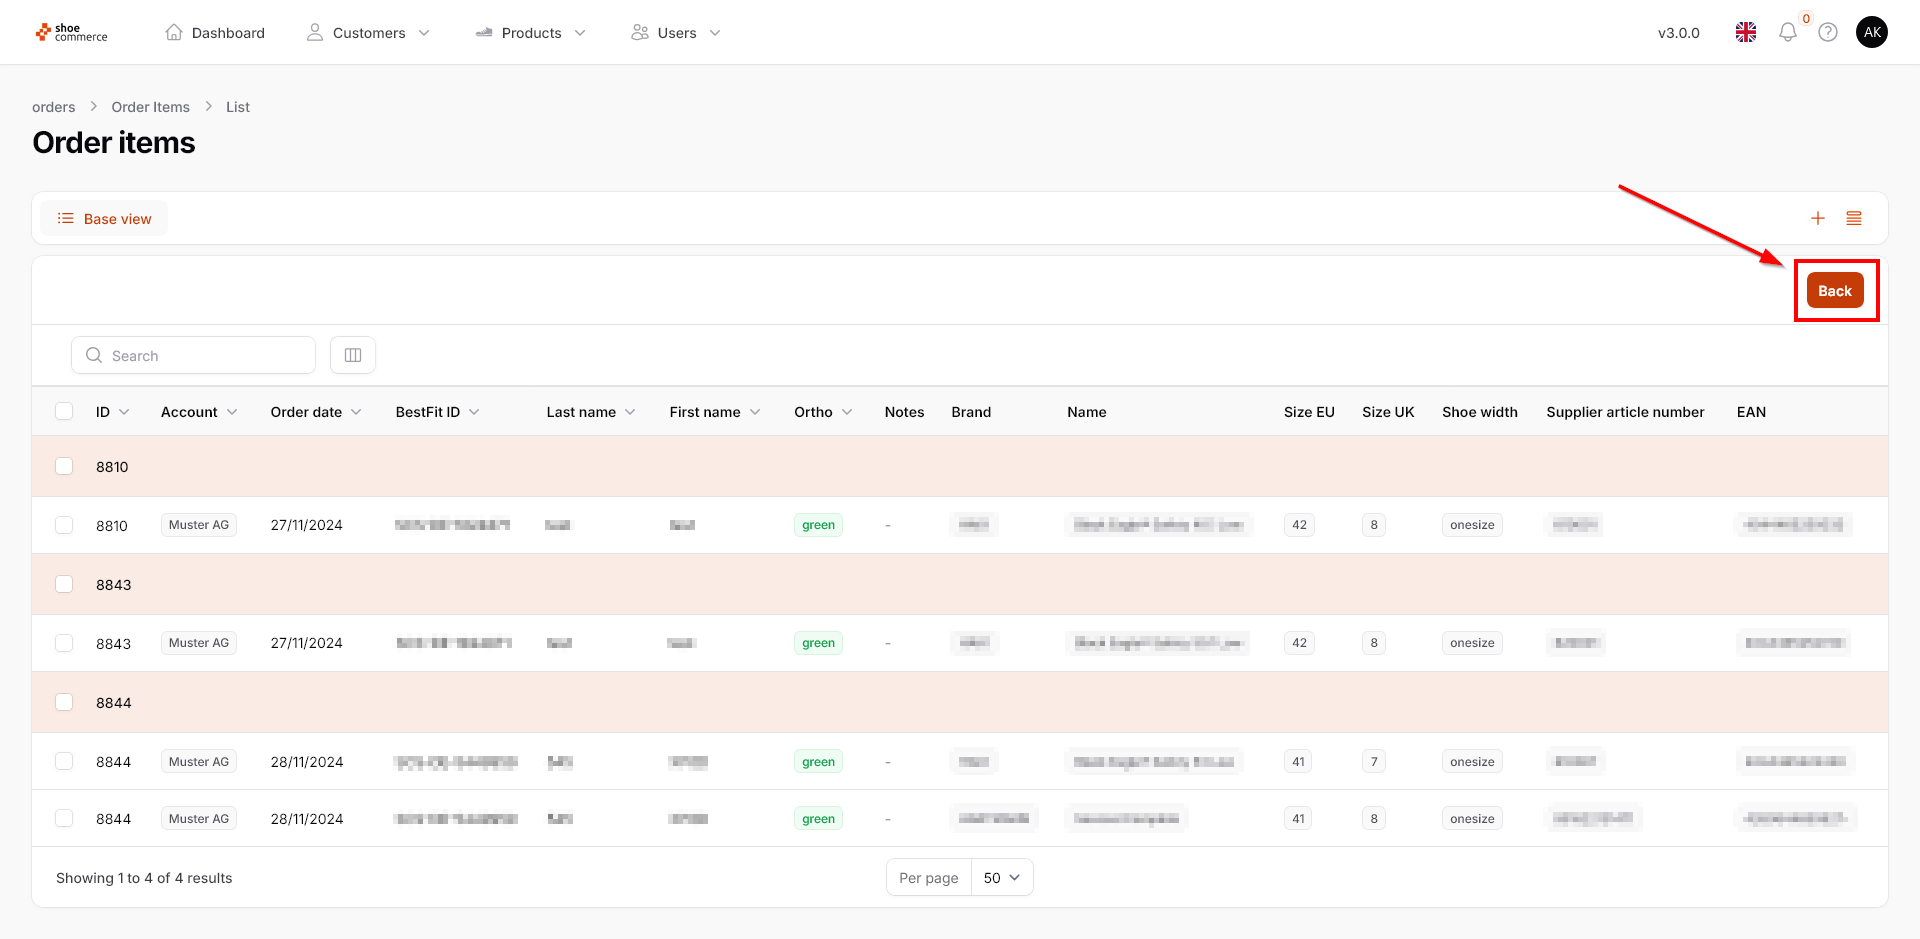
- Click on “Back” in the top right-hand corner to return to the original list view of the backend.
Change order status via bulk actions
To change the order status for a large number of orders at the same time, you can use the bulk actions function.
- First select at least one data record by clicking on the left-hand side. This opens the “Bulk actions” menu at the top left and the function for selecting all data records (top right). All visible data records can be activated by clicking on the top left-hand box.
- Now click on the “Bulk actions” button to access all available functions. Select “Change order status” in the drop-down menu that opens.
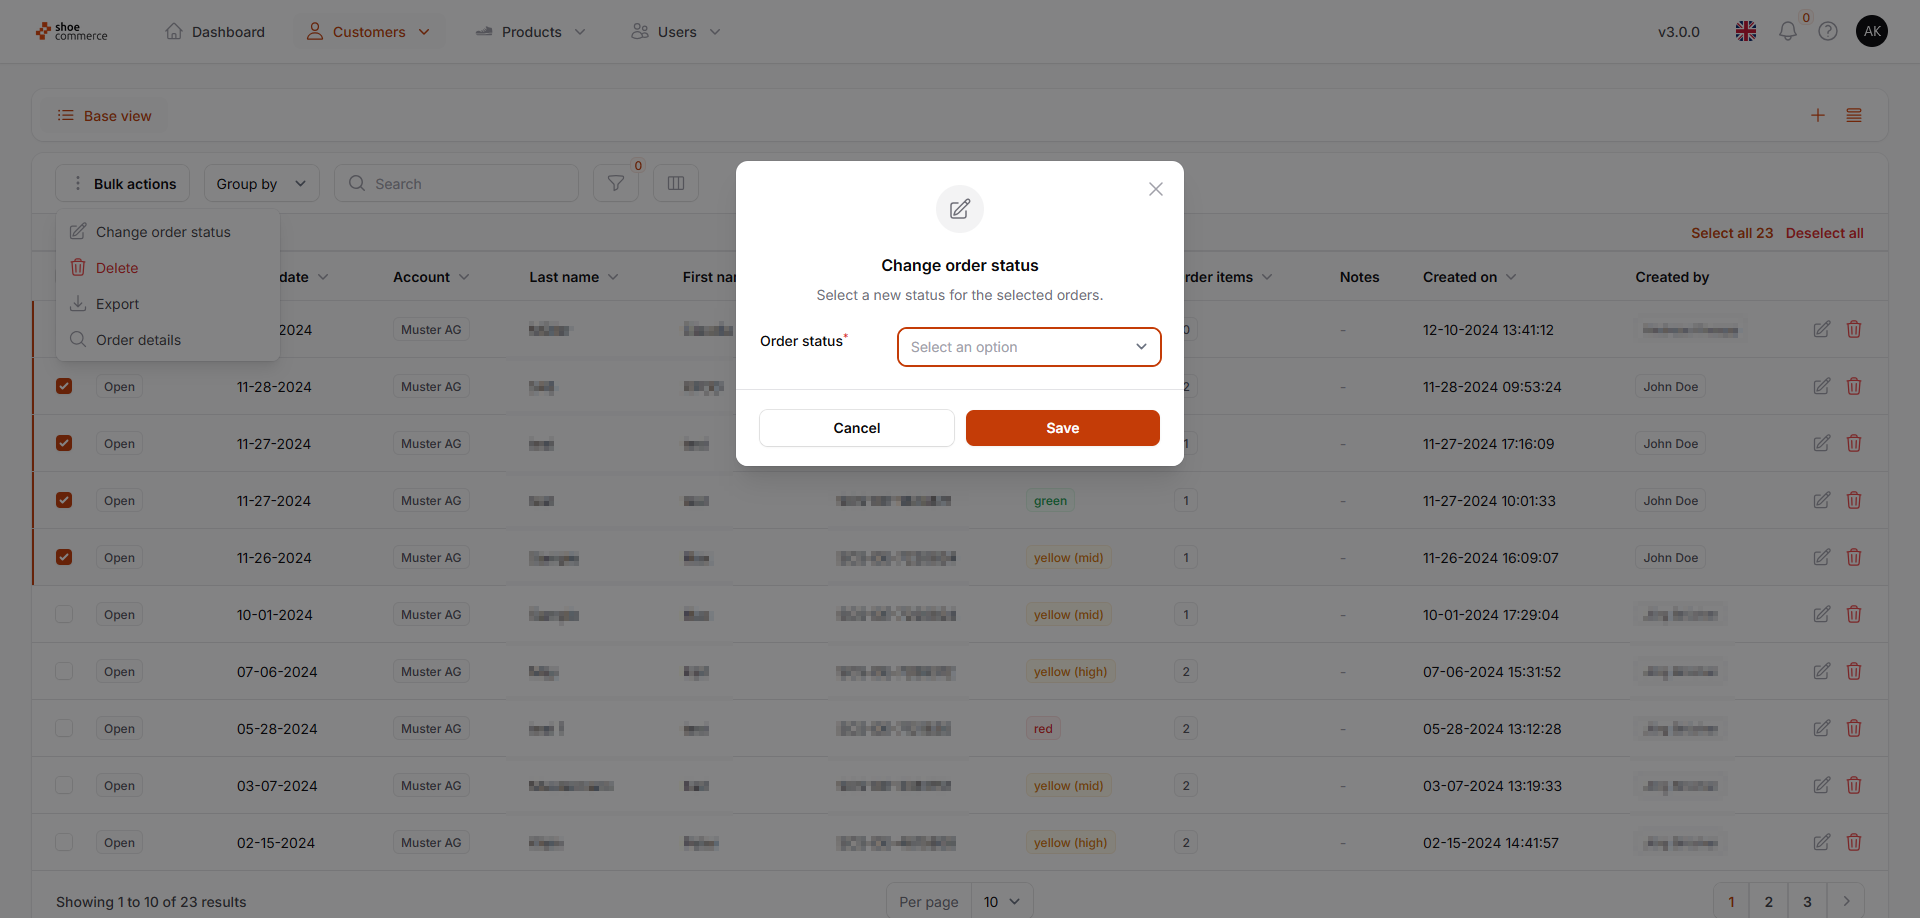
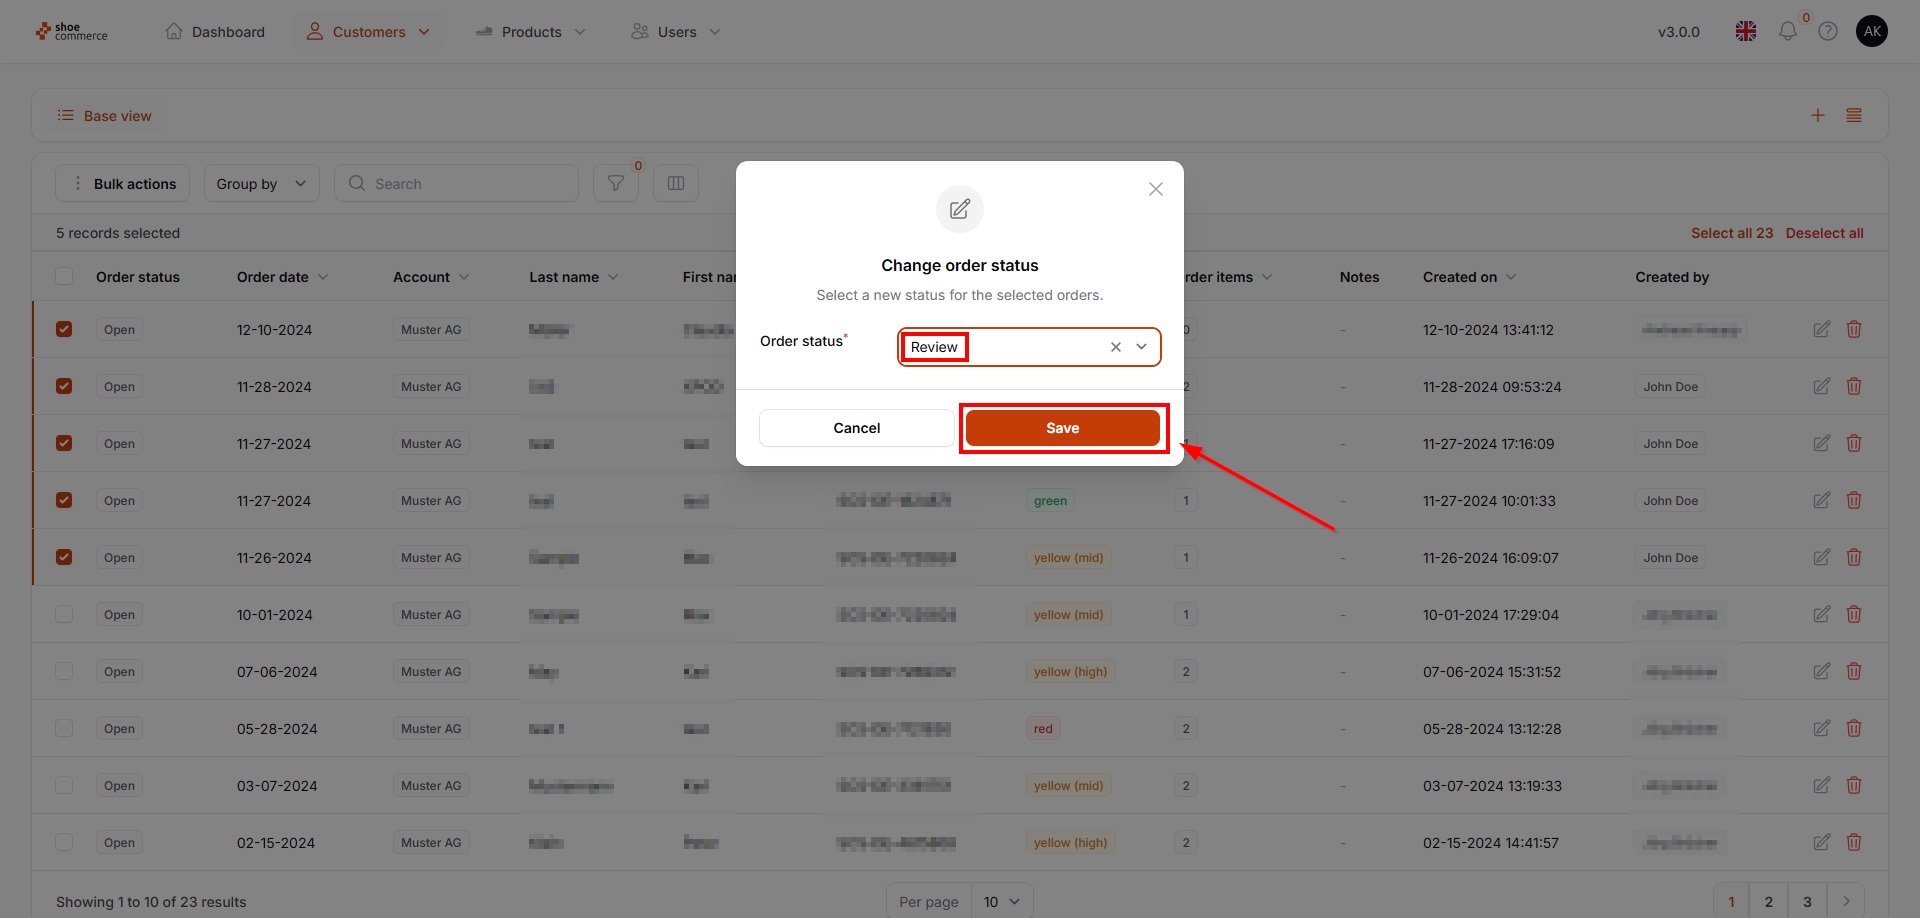
- In the drop-down menu that opens, you now have the option of changing the overall order status for all previously selected data records. For example, we select “Review” and click on “Confirm”.
- In the list view of the backend, the previously selected data records are now displayed with the status "Review".